Replicate's MCP server
Connect tools like Claude Desktop, Claude Code, and Cursor to Replicate's HTTP API
Table of contents
What is MCP?
The Model Context Protocol (MCP) is an open standard developed by Anthropic that defines how applications share context with large language models (LLMs).
MCP extends the capabilities of apps like Claude Desktop, Claude Code, Cursor, or GitHub Copilot by feeding them OpenAPI schemas that describe tools or services, like Replicate’s HTTP API.
MCP lets you give natural language instructions to a language model, and it can discover and run APIs automatically on your behalf.
For model selection guidance and prompting techniques that complement MCP’s API access, see agent skills.
Here are some examples of the kinds of prompts you can use:
Search Replicate for upscaler models and compare them
Show me the latest Replicate models created by @fofr
Generate an image using black-forest-labs/flux-schnell
Upscale that image using the best upscaler model
Replicate’s MCP server
Replicate’s MCP server is published as an npm package that is automatically updated whenever we add new features or operations to Replicate’s HTTP API:
The server supports all of the operations in Replicate’s HTTP API. Once you’ve got it wired up you can use natural language chat to do things like:
- Search for models (using
models.searchunder the hood) - Compare models (using
models.listunder the hood) - Fetch model metadata (using
models.getunder the hood) - Run models (using
predictions.createunder the hood) - Fetch predictions (using
predictions.getunder the hood) - etc…
Remote vs local servers
There are two ways to use Replicate’s MCP server:
- Remote server (recommended): This is the easiest option, and recommended for most users. You just add the hosted server URL to your apps like Claude or Cursor. After installing the server, you’ll be directed to a web-based authentication flow where you can provide a Replicate API key for the server to use on your behalf.
- Local server: You can run the server locally on your machine. This requires you to install the server locally and configure it in your apps.
Using the remote MCP server
The easiest way to use Replicate’s MCP is to use the remote server. This is a hosted server that is automatically updated with the latest features from Replicate’s HTTP API.
To get started, go to mcp.replicate.com, where you’ll find instructions for adding the server to your apps.
Using the local MCP server
The replicate-mcp npm package is a self-contained HTTP server that you can run using the Node.js npx command, which downloads and executes npm packages by name without you having to install them first.
Use this command to start the MCP server:
npx -y replicate-mcp☝️ This command will fire up a local HTTP server, but in practice you won’t usually run it this way. Instead, you’ll add some JSON configuration to your Claude, Cursor, or VS Code settings that will quietly and automatically run these local MCP servers on your machine.
Stop your server by pressing Ctrl+c in the terminal:
^cThen read on to learn how to configure your apps to run the MCP server automatically.
Using the local server with Claude Desktop
Claude Desktop supports local MCP servers out of the box. Note that this only works with the Claude desktop app, not the web app. If you want to use the claude.ai web app, you’ll need to use the remote server.
Here’s how to set it up:
-
Create a Replicate API token and copy it.
-
Open Claude Desktop.
-
Click the Claude menu and select Settings… (not the in-app account settings).
-
In the Settings window, click Developer in the sidebar, then click Edit Config. This will open (or create) a
claude_desktop_config.jsonfile. -
Add the following JSON to the file, substituting your Replicate API token for
your-token-here:{ "mcpServers": { "replicate": { "command": "npx", "args": ["-y", "replicate-mcp"], "env": { "REPLICATE_API_TOKEN": "your-token-here" } } } } -
Restart Claude Desktop. Click the Search and Tools icon in the input box. You should see
replicatelisted as a tool:
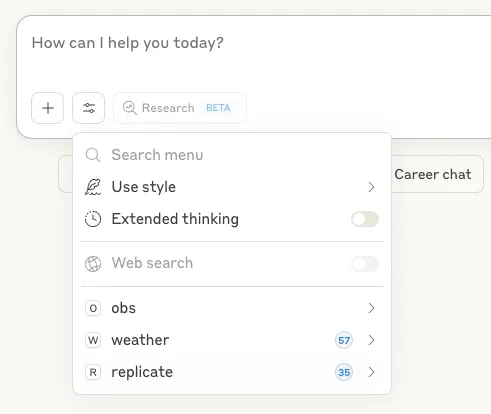
Now that you’ve got the MCP server running, you can use it to search for models, run predictions, and fetch model metadata.
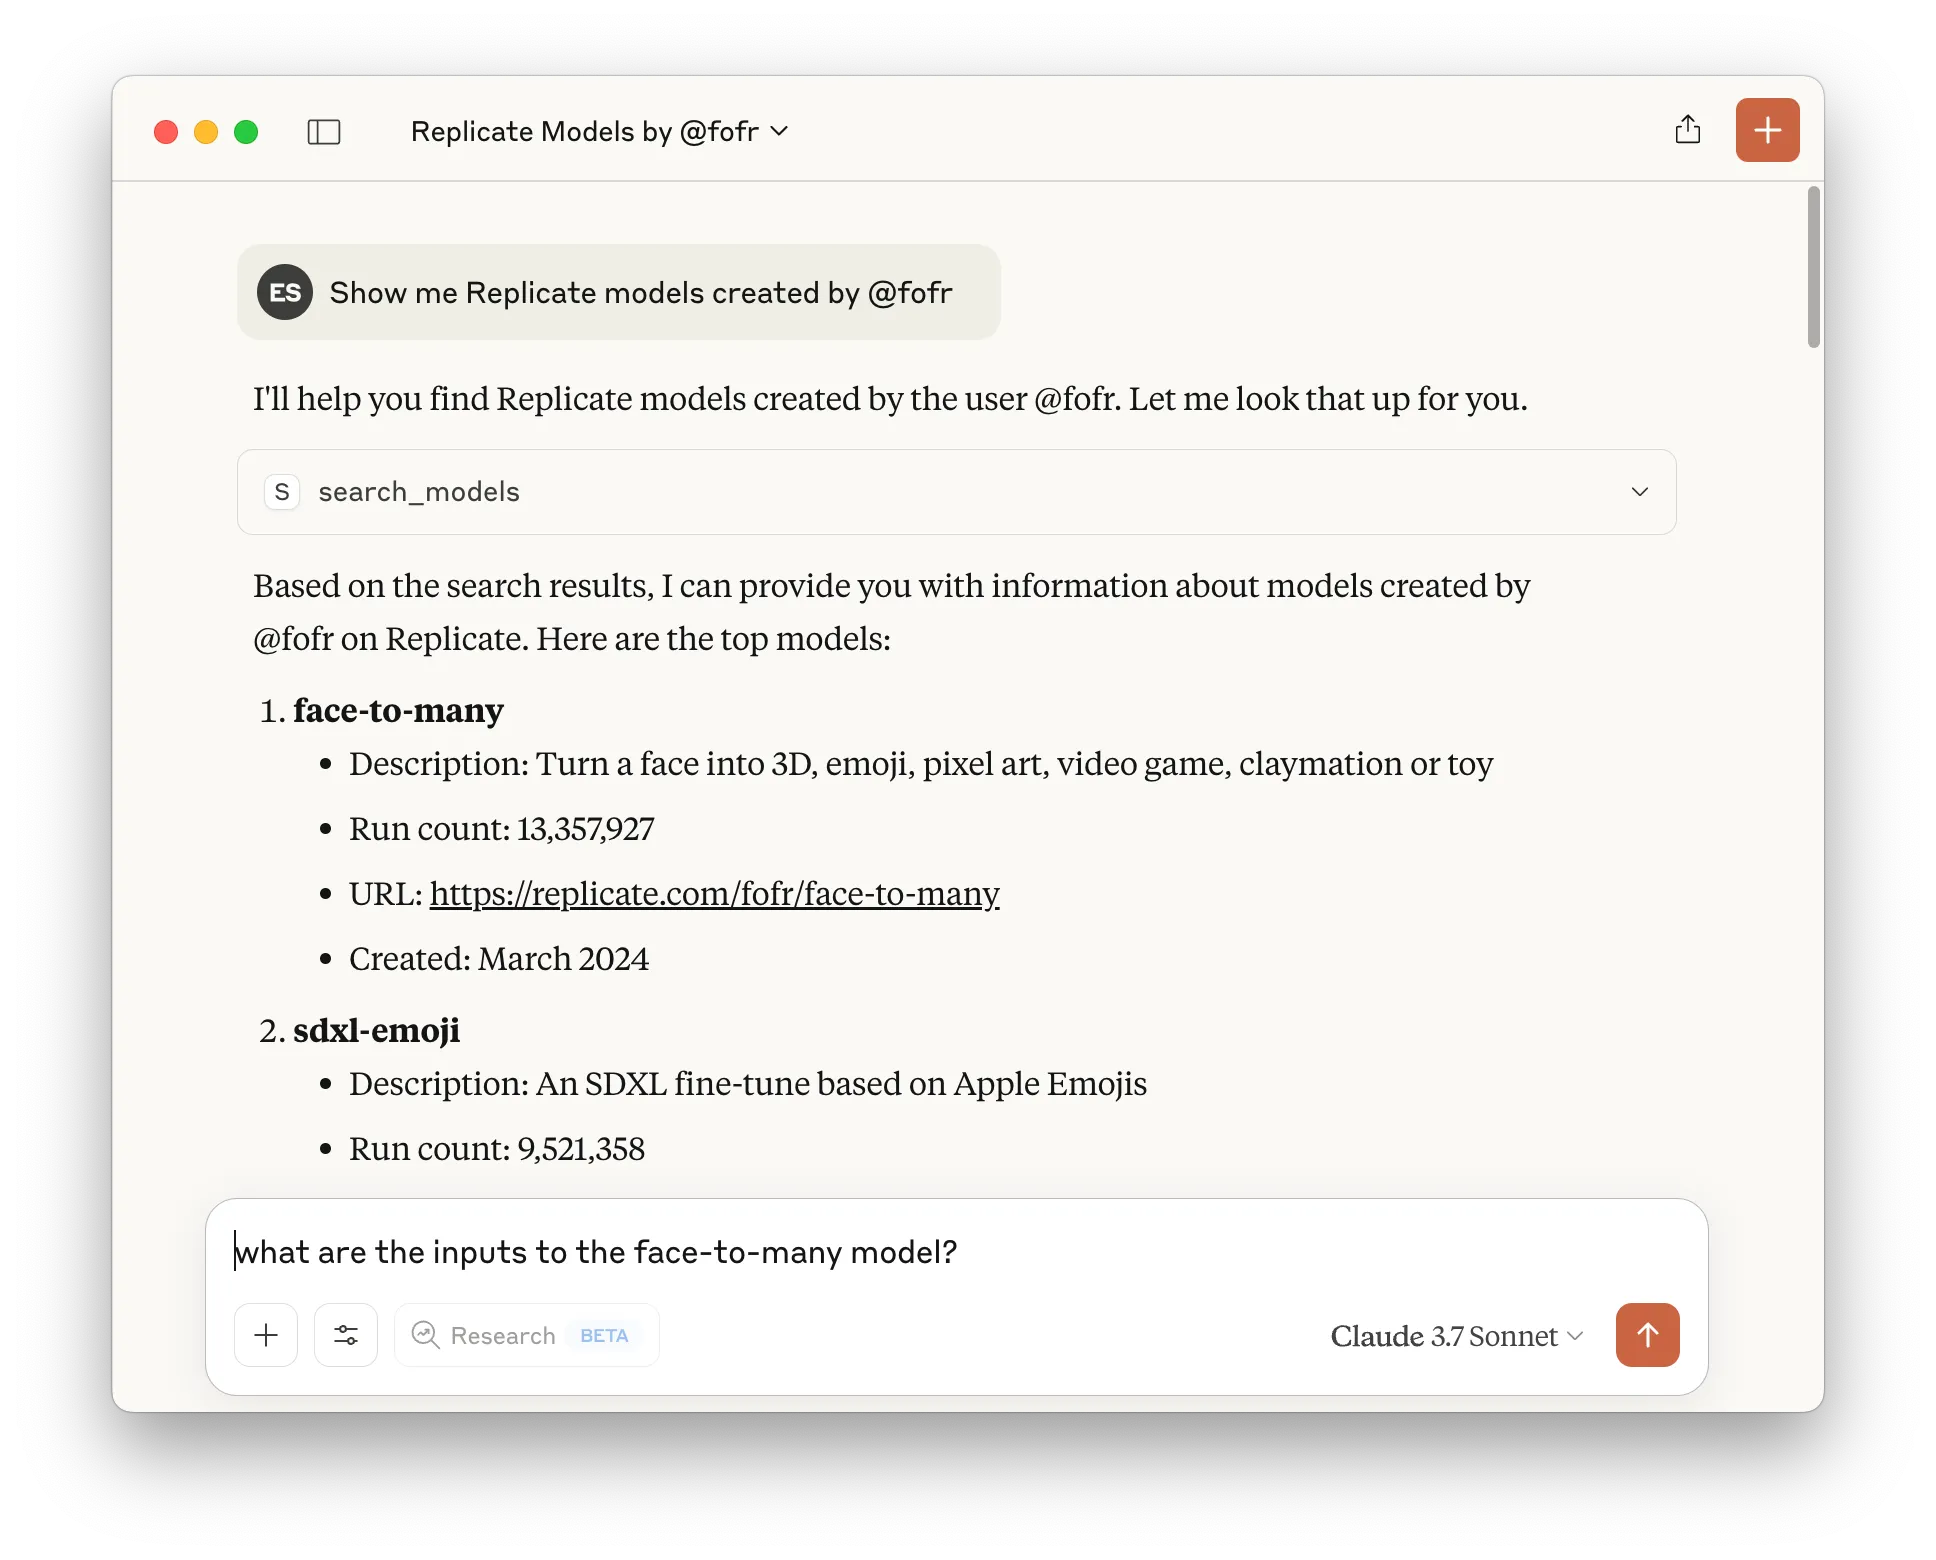
Try these prompts in Claude Desktop:
Search Replicate for upscaler models and compare them
Show me the latest Replicate models created by @fofr
Generate an image using black-forest-labs/flux-schnell
Upscale that image using the best upscaler model
Using the local server with Cursor
Cursor supports the Model Context Protocol (MCP), allowing you to connect external tools and data sources—like Replicate’s HTTP API—directly to your code editor. With Replicate’s MCP server, you can search for models, run predictions, and fetch model metadata from within Cursor using natural language.
Start by creating a Replicate API token and copy it.
Quick setup for Cursor
As of version 1.0, Cursor lets you install MCP servers using a link. Click the button below to install the MCP server in Cursor:

Manual setup for Cursor
If you’d prefer to set up Cursor manually, here’s how:
-
In your project, create a
.cursor/mcp.jsonfile with the following content:{ "mcpServers": { "replicate": { "command": "npx", "args": ["-y", "replicate-mcp"], "env": { "REPLICATE_API_TOKEN": "your-token-here" } } } }Replace
your-token-herewith your Replicate API token. -
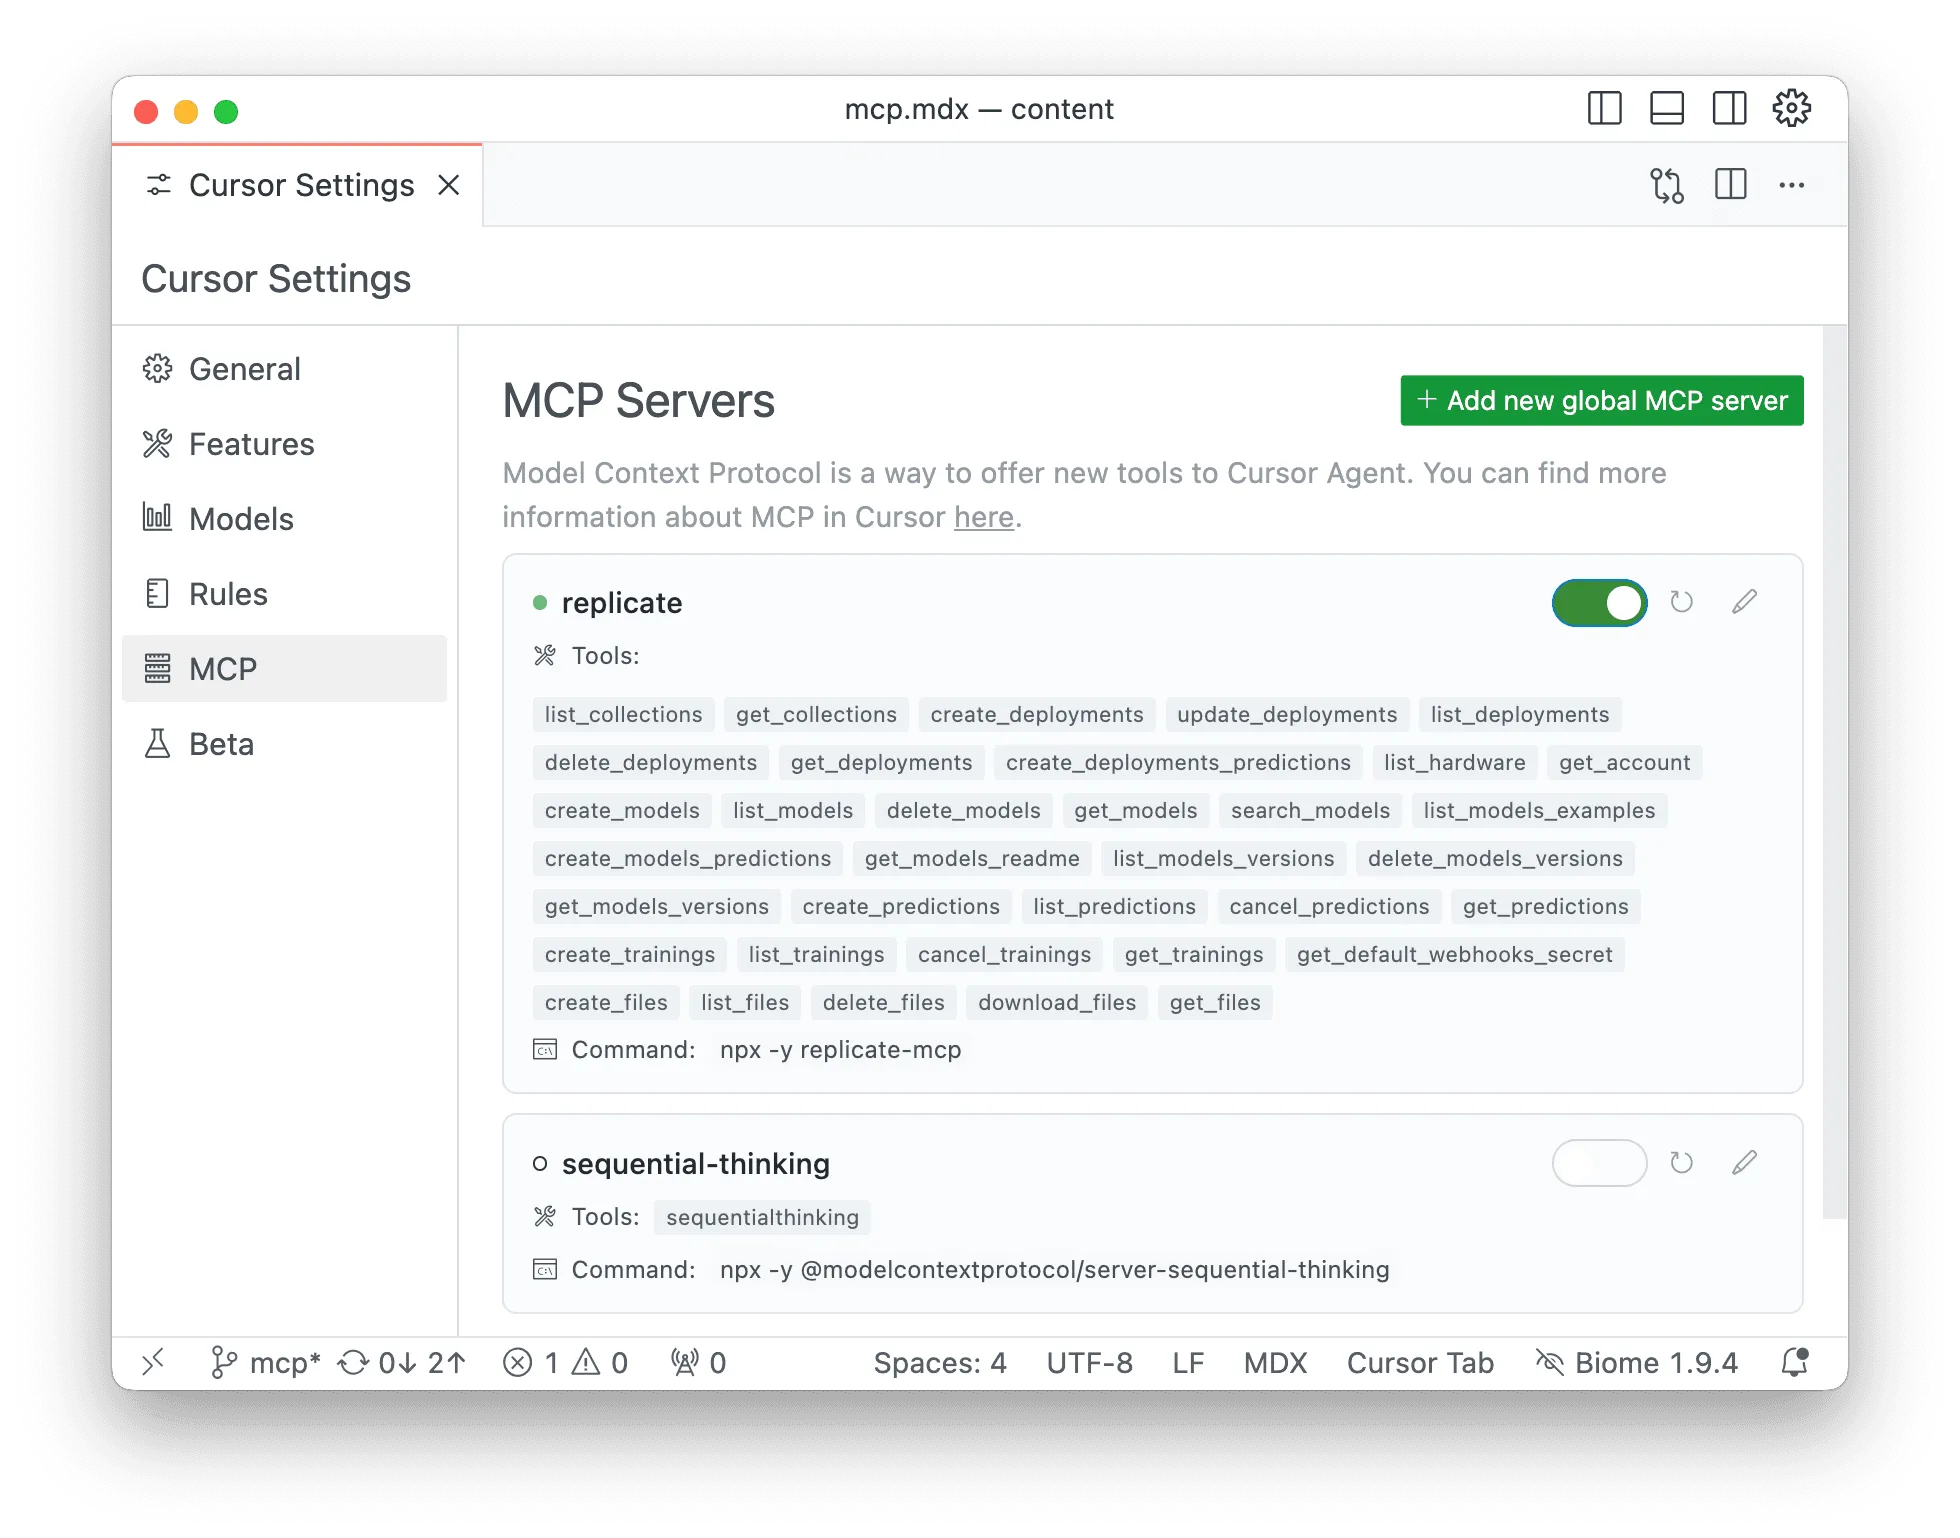
Open Cursor. The MCP server will be started automatically when you use a tool that requires it, or you can start it manually from the MCP settings page.
-
In Cursor, open the MCP settings (search for “MCP” in the command palette or find it in the settings sidebar). You should see
replicatelisted as an available tool.
Now you can use Replicate tools in Cursor’s Composer Agent:
Search Replicate for upscaler models and compare them
Generate an image using black-forest-labs/flux-schnell
Upscale that image using the best upscaler model
You can also configure MCP servers globally by creating a ~/.cursor/mcp.json file, making Replicate’s tools available in all your Cursor workspaces.
For more details, see the Cursor MCP documentation.
Using the local server with GitHub Copilot in VS Code
You can use Replicate’s MCP server with GitHub Copilot Chat in Visual Studio Code to access Replicate’s API tools directly from chat. To set it up:
-
Install Visual Studio Code version 1.99 or later and make sure you have access to Copilot Chat.
-
Create a Replicate API token and copy it.
-
In your project, create a
.vscode/mcp.jsonfile with the following content:{ "servers": { "replicate": { "command": "npx", "args": ["-y", "replicate-mcp"], "env": { "REPLICATE_API_TOKEN": "your-token-here" } } } }Replace
your-token-herewith your Replicate API token. -
Open the
.vscode/mcp.jsonfile in VS Code and click the Start button that appears to launch the MCP server. -
Open Copilot Chat, select Agent from the chat menu, and use Replicate tools in natural language (e.g., “Search Replicate for upscaler models”).
You can also configure the MCP server to run globally in VS Code by adding the configuration to your user settings.json. For instructions, see the GitHub Copilot documentation on using existing MCP configurations.
For more details and advanced configuration, see the official GitHub Copilot documentation.
Code mode (experimental)
Code mode is an experimental feature that allows language models to write and execute TypeScript code directly in a sandboxed environment. Instead of exposing individual API operations as separate tools, Code mode provides two tools: one for searching SDK documentation, and another for executing TypeScript code using the Replicate SDK within a Deno sandbox. The model uses a built-in docs search tool to learn how to write code against the SDK. This approach is more efficient for complex workflows that involve multiple API calls, as it reduces context window usage and allows the model to write custom logic that calls multiple methods and returns only the final results.
Code mode is currently experimental and subject to change. It requires Node.js to run the local MCP server and Deno to execute code in a sandbox. Only local execution is supported at this time; remote cloud sandboxing is under development.
Code mode works with Claude Code, Cursor, OpenAI Codex CLI, Gemini CLI, and other compatible tools. In this example, we’ll use Claude Code.
-
Create a Replicate API token and set it as an environment variable:
export REPLICATE_API_TOKEN=your-token-here -
Install the MCP server with Code mode enabled:
claude mcp add "replicate-code-mode" --scope user --transport stdio -- npx -y replicate-mcp@alpha --tools=code -
Install Deno:
curl -fsSL https://deno.land/install.sh | sh
Once configured, you can use natural language prompts that require complex workflows, and the model will write and execute TypeScript code using the Replicate SDK to accomplish the task.
Here’s an example prompt you can try:
Search Replicate for the best image upscaler model, then use it to upscale this image: https://multimedia-example-files.replicate.dev/mona-lisa.7479x11146.jpg. Show me the code you generated and the result.
For more information, see the replicate-mcp-code-mode repository.