Fine-tune an image model
Train your own fine-tuned FLUX model to generate new images of yourself.
Table of contents
There are loads of image models on Replicate. Have you ever wanted to make your own?
Imagine a version of an image model that consistently generates images in a specific artistic style, or always includes a particular character or subject.
That’s exactly what fine-tuning lets you do.
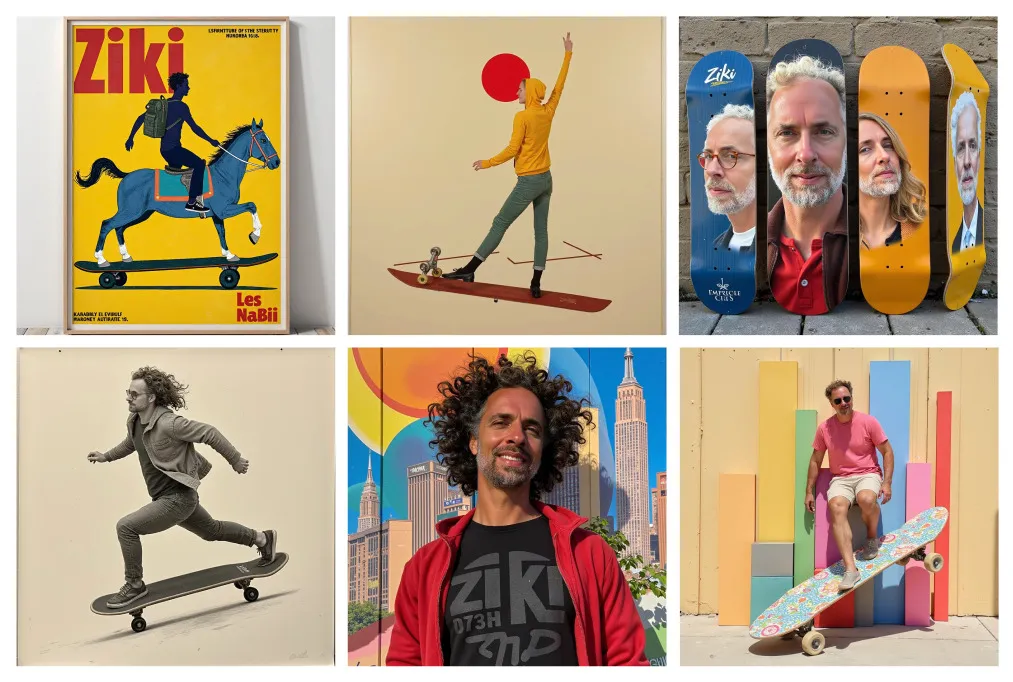
This guide will teach you how to fine-tine a FLUX.1 model to generate images in a specific style, or of a specific subject, or of your pet, or of your own face. In this tutorial, we use Replicate’s beloved @zeke (AKA Ziki) to create a Ziki FLUX fine-tune:
Fine-tuning FLUX on Replicate is easy: you just need a handful of images to get started. No deep technical knowledge is required. You can even create a FLUX fine-tune entirely on the web, without writing a single line of code (we’ll show you how to in this guide!). You’ll be able to generate images of yourself as a superhero, a cartoon character, an adventurer, or just a regular person in a variety of interesting situations.
The community has already published hundreds of public FLUX fine-tunes on Replicate, plus thousands of private fine-tunes too.
Feeling left out now? Let’s get started!
Step 0: Prerequisites
Here’s what you’ll need to get started:
- A Replicate account
- A handful of training images
- Less than two US dollars
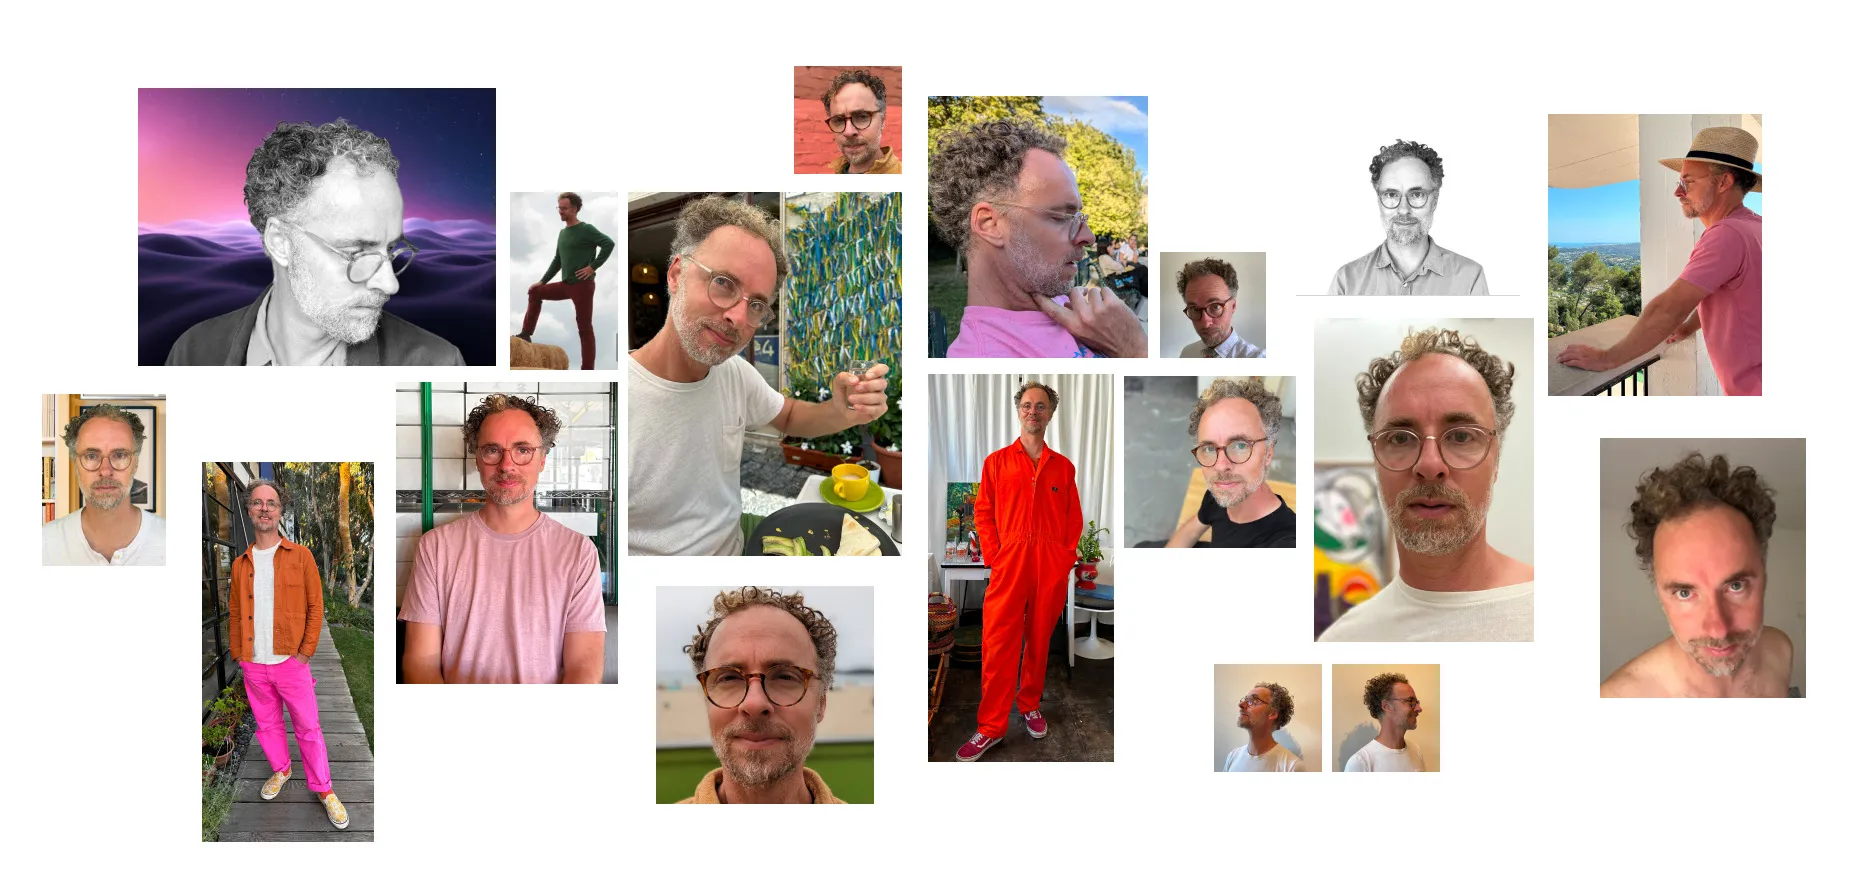
Step 1: Gather your training images
You’ll need a few images of yourself to get started. These should be high-quality images of your face, taken from various angles and in different lighting conditions.
You can fine-tune FLUX with as few as two training images, but for best results you’ll want to use at least 10 images or more. In theory, you’ll get continually better results as you include more images in the training data, but the training process can take longer the more images you add.
Consider the following when gathering your training images:
- WebP, JPG, and PNG formats are all supported.
- Use 1024x1024 or higher resolution if possible.
- Filenames don’t matter. Name your files whatever you like.
- Aspect ratio doesn’t matter. Images can be square, landscape, portrait, etc.
- 10 images is a good minimum.
Once you’ve gathered your images, put them in a zip file. Assuming you put them all in a folder called data, run this command in the same directory to generate a file called data.zip:
zip -r data.zip dataStep 2: Choose a unique trigger word
Whenever you fine-tune an image model, you also choose a unique “trigger word” that you’ll use later in your text prompts when generating images:
photo of YOUR_TRIGGER_WORD_HERE looking super-cool, riding on a segway scooterHere are some things to consider when choosing a trigger word:
- It should be something unique like
MY_UNIQ_TRGGR. Think “vanity license plates”, but without any length limits. - It should not be an existing word in any language, like
dogorcyberpunk. - It should not be
TOK, the commonly-used trigger word for other fine-tunes. This is because it will clash with other fine-tunes if you ever want to combine them. - Case doesn’t matter, but capital letters can help visually distinguish the trigger word from the rest of the text prompt.
For my zeke/ziki-flux fine-tune, I chose ZIKI as a trigger word. Short, unique, and memorable.
Got your trigger word? Hold it in your mind for a second. You’ll use it in the next step.
Step 3: Create and train a model
There are a couple ways to fine-tune FLUX on Replicate. You can use the web-based training form, or the API. The API is great for creating and updating fine-tunes in an automated or programmatic way, but in this guide we’ll just use the web-based form. It’s easier.
Go to https://replicate.com/replicate/fast-flux-trainer/train to start the web-based training process.
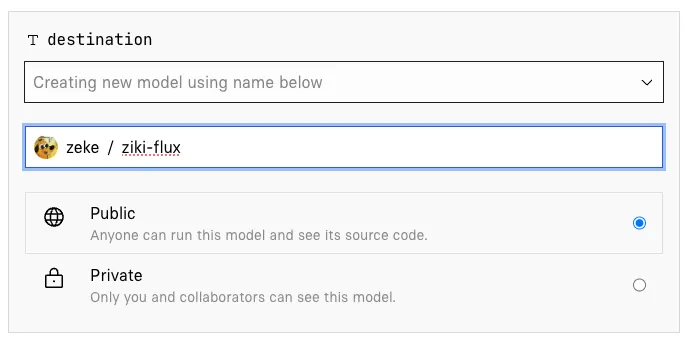
For the destination input, you’ll choose a model to publish to. This can be an existing model you’ve already created, or a new model:
For the input_images input, drag and drop the zip file you created earlier.
For the trigger_word input, enter the string you chose earlier. Make sure it’s unique!
For the lora_type input, select “subject.” (Our subject is Zeke, a human being. Note, if you are fine-tuning an image model of a certain style, choose “style”!)
For training_steps under advanced outputs, leave it at 1000. Any less and your training process will not properly learn the concept in your training images. Any more and you could be incurring extra time and cost without much improvement in the model performance.
You’ll be billed per second for the time the training process takes to run. Trainings for the FLUX model run on x8 Nvidia H100 GPU hardware, which costs $0.012200 per second at the time of this writing. Training takes around 2 minutes (which is typical when using about 20 training images and 1000 steps), so you can expect to pay about $1.46 USD.
Leave the rest of the inputs at their default values and click Create training.
Step 4: Stand up and stretch
The training process is pretty fast — again, less than two minutes. Use this opportunity to get up from your computer, stretch your arms and legs, grab a drink of water, etc.
Then come back, and your model should be ready to go.
Step 5: Generate images on the web
Once the training process is complete, your model will be ready to run. You can either hit Run trained model to run the model on the web or hit Download weights to use elsewhere.
Let’s hit Run trained model!
The only input you’ll need to enter is the prompt. The rest you can leave alone to start. FLUX is great at following long prompts, so the more detailed and descriptive you make the prompt the better. Be sure to include your trigger_word in the prompt to activate your newly trained concept in the resulting images.

Step 6: Generate images using the API
The web playground is a great place to start playing with your new model, but generating images one click at a time can get old pretty fast. Plus, don’t you want to use your new image model in your own app?
Luckily your model is also hosted in the cloud with an API, so you can run it from your own code using the programming language of your choice.
When you run a model, you’ll see tabs for different languages like Node.js and Python. These tabs contain code snippets that show you how to construct an API call to reproduce the exact inputs you just entered in the browser form.
Click the Node.js tab in the web playground to see the API code:
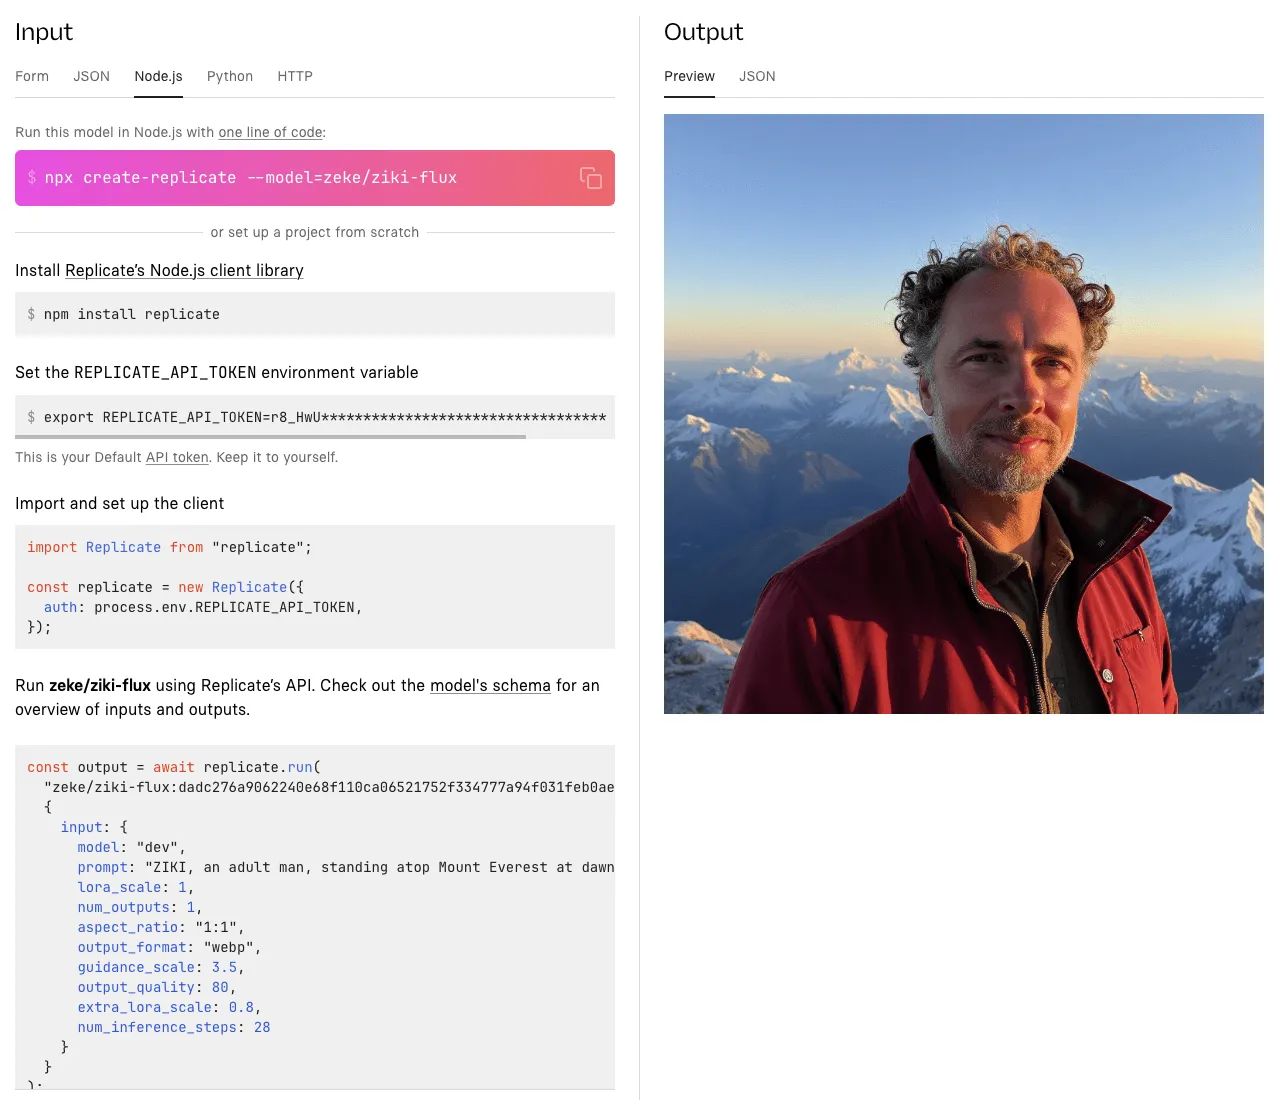
This will show the exact setup steps and code snippet you’ll need to run the model on your own. Here’s an abbreviated version of the Node.js code to get you started:
import Replicate from "replicate"
const replicate = new Replicate()

const model = "zeke/ziki-flux:dadc276a9062240e68f110ca06521752f334777a94f031feb0ae78ae3edca58e"
const prompt = "ZIKI, an adult man, standing atop Mount Everest at dawn..."

const output = await replicate.run(model, { input: { prompt } })

// Save the generated image
import { writeFile } from "node:fs/promises";
await writeFile("./output.png", output);
Step 6.5: Use a language model to write better prompts
Sometimes it’s hard to think of a good prompt from scratch, and using a really simple prompt like “ZIKI wearing a turtleneck holiday sweater” is not going to give you very interesting results.
This is where language models come to the rescue. Here’s an example language model prompt to help crank out some ideas for interesting image-generation prompts:
Write ten prompts for an image generation model. The prompts should describe a fictitious person named ZIKI in various scenarios. Make sure to use the word ZIKI in all caps in every prompt. Make the prompts highly detailed and interesting, and make them varied in subject matter. Make sure the prompts will generate images that include unobscured facial details. ZIKI is a 43 year old adult male. Include some reference to this in prompt to avoid misrepresenting ZIKI’s age or gender. Do not allude to ZIKI’s eye color.
This generates some interesting prompts:
Close-up of ZIKI, a male street artist in his 40s, spray-painting a vibrant mural on a city wall. His face shows intense concentration, with flecks of paint on his cheeks and forehead. He wears a respirator mask around his neck and a beanie on his head. The partially completed mural is visible behind him.
ZIKI, a dapper gentleman spy in his 40s, engaged in a high-stakes poker game in a luxurious Monte Carlo casino. His face betrays no emotion as he studies his cards, one eyebrow slightly raised. He wears a tailored tuxedo and a bow tie, with a martini glass on the table in front of him.
ZIKI, a distinguished-looking gentleman in his 40s, conducting a symphony orchestra. His expressive face shows intense concentration as he gestures dramatically with a baton. He wears a crisp tuxedo, and his salt-and-pepper hair is slightly disheveled from his passionate movements.
To get started writing your own prompts, check out Meta Llama 3.1 405b, a fast and powerful language model that you can in the web or with an API on Replicate, just like your own model:
import Replicate from "replicate"
const replicate = new Replicate()
const model = "meta/meta-llama-3.1-405b-instruct"
const prompt = "Write ten prompts for an image generation model..."
const output = await replicate.run(model, { input: { prompt } })
console.log(output)
Step 7: Have fun and iterate
Now that you’ve got a fine-tuned image generation model and a language model to help generate prompts, it’s time to start playing around and generating fun images.
If you need inspiration, check the collection of FLUX fine-tunes on Replicate to see what other people have created.
Have fun and share your results with the community on X or Discord.