Push a Transformers model
Learn how to push a Hugging Face Transformers language model to Replicate.
Table of contents
Transformers is an open-source Python library that provides a consistent interface for using language models. The library contains multiple open-source generative language models like FLAN, GPT-J, GPT Neo, LLaMA, BLOOM, and others, which have been pre-trained on large text corpora and can be fine-tuned for specific tasks with relatively small amounts of training data.
Transformers also contains models like Longformer, BERT, and RoBERTa, which are generally used for more traditional natural language processing tasks like classification, named entity recognition, and so on. The process we’re walking through here will work for both kinds of models; in fact, it should work for every model on Transformers.
In this guide we’ll walk you through the process of taking an existing Transformers model and pushing it to Replicate as your own public or private model with a stable API.
Prerequisites
To follow this guide, you’ll need:
- An account on Replicate.
- Docker. You’ll be using the Cog command-line tool to build and push your model. Cog uses Docker to create a container for your model. You’ll need to install and start Docker before you can run Cog. You can confirm Docker is running by typing
docker infoin your terminal.
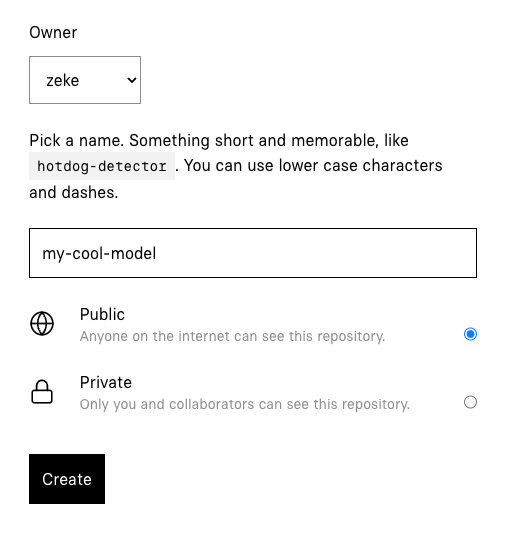
Step 1: Create a model
First, create a model on Replicate at replicate.com/create. If you haven’t used Replicate before, you’ll need to sign in with your GitHub account. You can configure the model to be private so that only you can use it, or public so anyone can use it.
Step 2: Install Cog
Cog is an open source tool that makes it easy to put a machine learning model in a Docker container. Run the following commands to install it and set the correct permissions:
curl https://replicate.github.io/codespaces/scripts/install-cog.sh | bashConfirm that Cog is installed by running cog --version:
cog --version
# cog version 0.9.25 (built 2024-10-07T15:11:47Z)
Step 3: Initialize your project
Create a new directory and initialize a new Cog project:
mkdir my-cool-model
cd my-cool-model
cog init
This will create two files, cog.yaml and predict.py, which you’ll use to configure your dependencies and define the inputs and outputs of your model.
Step 4: Configure dependencies
The cog.yaml file defines the CUDA and Python versions, and dependencies for the model. This file tells Cog how to package the model.
Replace the contents of the cog.yaml file with the following:
build:
  gpu: true
  python_version: "3.10"
  python_packages:
    - "torch==1.12.1"
    - "transformers==4.30.0"
    - "sentencepiece==0.1.97"
    - "accelerate==0.16.0"

predict: "predict.py:Predictor"
Step 5: Customize your predictor
The predict.py file defines the inputs and outputs of the model, and the code to run the model. The language model itself is imported through the Python transformers library.
Replace the contents of the predict.py file with the following:
from typing import List, Optional
from cog import BasePredictor, Input
from transformers import T5ForConditionalGeneration, AutoTokenizer
import torch

CACHE_DIR = 'weights'

# Shorthand identifier for a transformers model.
# See https://huggingface.co/models?library=transformers for a list of models.
MODEL_NAME = 'google/flan-t5-xl'

class Predictor(BasePredictor):
    def setup(self):
        self.device = 'cuda' if torch.cuda.is_available() else 'cpu'
        self.model = T5ForConditionalGeneration.from_pretrained(MODEL_NAME, cache_dir=CACHE_DIR, local_files_only=True)
        self.model.to(self.device)
        self.tokenizer = AutoTokenizer.from_pretrained(MODEL_NAME, cache_dir=CACHE_DIR, local_files_only=True)

    def predict(
        self,
        prompt: str = Input(description=f"Text prompt to send to the model."),
        n: int = Input(description="Number of output sequences to generate", default=1, ge=1, le=5),
        max_length: int = Input(
            description="Maximum number of tokens to generate. A word is generally 2-3 tokens",
            ge=1,
            default=50
        ),
        temperature: float = Input(
            description="Adjusts randomness of outputs, greater than 1 is random and 0 is deterministic, 0.75 is a good starting value.",
            ge=0.01,
            le=5,
            default=0.75,
        ),
        top_p: float = Input(
            description="When decoding text, samples from the top p percentage of most likely tokens; lower to ignore less likely tokens",
            ge=0.01,
            le=1.0,
            default=1.0
        ),
        repetition_penalty: float = Input(
            description="Penalty for repeated words in generated text; 1 is no penalty, values greater than 1 discourage repetition, less than 1 encourage it.",
            ge=0.01,
            le=5,
            default=1
        )
        ) -> List[str]:
        input = self.tokenizer(prompt, return_tensors="pt").input_ids.to(self.device)

        outputs = self.model.generate(
            input,
            num_return_sequences=n,
            max_length=max_length,
            do_sample=True,
            temperature=temperature,
            top_p=top_p,
            repetition_penalty=repetition_penalty
        )
        out = self.tokenizer.batch_decode(outputs, skip_special_tokens=True)
        return out
The AutoTokenizer used above should work for all Transformers models.
If you want to use a Transformers model other than Flan-T5, you’ll need to specify the model class to use. For example, if you’re using a GPT-J model, you’ll want to use AutoModelForCausalLM instead of T5ForConditionalGeneration. See the Transformers docs for more details.
Step 6: Download weights
Next you’ll create a script that uses the transformers library to download pretrained weights.
Create a file for the script:
mkdir script
touch script/download_weights
chmod +x script/download_weights # makes the file executable
Paste the following code into the script/download_weights file:
#!/usr/bin/env python

import os
import shutil
from transformers import T5ForConditionalGeneration, T5Tokenizer

CACHE_DIR = 'weights'

if os.path.exists(CACHE_DIR):
    shutil.rmtree(CACHE_DIR)

os.makedirs(CACHE_DIR)

model = T5ForConditionalGeneration.from_pretrained("google/flan-t5-xl", cache_dir=CACHE_DIR)
tokenizer = T5Tokenizer.from_pretrained("google/flan-t5-xl", cache_dir=CACHE_DIR)`
Run the script to download the weights:
cog run script/download_weightsThis process will take a while to run but you’ll only need to run it once, as it will cache the downloaded dependencies on disk. Get up and stretch, grab yourself a snack, or use this opportunity to add metadata to the model page you created on Replicate in Step 1 by adding a title, README, GitHub repository URL, etc.
Step 7: Run your model
Now that you’ve downloaded the weights, you can run the model locally with Cog:
cog predict -i prompt="Q: Answer the following yes/no question by reasoning step-by-step. Can a dog drive a car?"This will run the model locally and return output text.
Step 8: Push your model
Now that you’ve created your model, it’s time to push it to Replicate.
First you’ll need to authenticate:
cog loginThen push your model using the name you specified in Step 1:
cog push r8.im/<your-username>/<your-model-name>Step 9: Use your model
Your model is now live! 🚀
You can run the model from the website by clicking the “Demo” tab on the model page, or you can use the HTTP API to run the model from your own code.
Click the “API” tab on your model page to see example code for running the model:

Next steps
Now that you have your own model, see what else you can do with it!
To see what models you can use, check out the Transformers docs on Hugging Face.
If you need inspiration or guidance, jump into our Discord.