Start by running the ComfyUI examples
Table of contents
The easiest way to get to grips with how ComfyUI works is to start from the shared examples.
Start with the default workflow
The default workflow is a simple text-to-image flow using Stable Diffusion 1.5. It’s one that shows how to use the basic features of ComfyUI. If it’s not already loaded, you can load it by clicking the "Load default" button. You can always reset back to this.
You’ll need one checkpoint for this to work, the default uses v1-5-pruned-emaonly.ckpt. But any Stable Diffusion checkpoint will work – SD1.5, SDXL, SD2.1 or any fine-tune. Remember you can download these models via "Install models" in ComfyUI manager.
To run the workflow, click the "Queue prompt" button. Outputs are saved in the ComfyUI/outputs folder by default.
Try changing this example
Given this default example, try exploring by:
- changing your prompt (CLIP Text Encode node)
- editing the negative prompt (this is the CLIP Text Encode node that connects to the negative input of the KSampler node)
- loading a different checkpoint
- using different image dimensions (Empty Latent Image node)
- changing steps and sampler settings (KSampler node)
Load another workflow
You can load workflows into ComfyUI by:
- dragging a PNG image of the workflow onto the ComfyUI window (if the PNG has been encoded with the necessary JSON)
- copying the JSON workflow and simply pasting it into the ComfyUI window
- clicking the "Load" button and selecting a JSON or PNG file
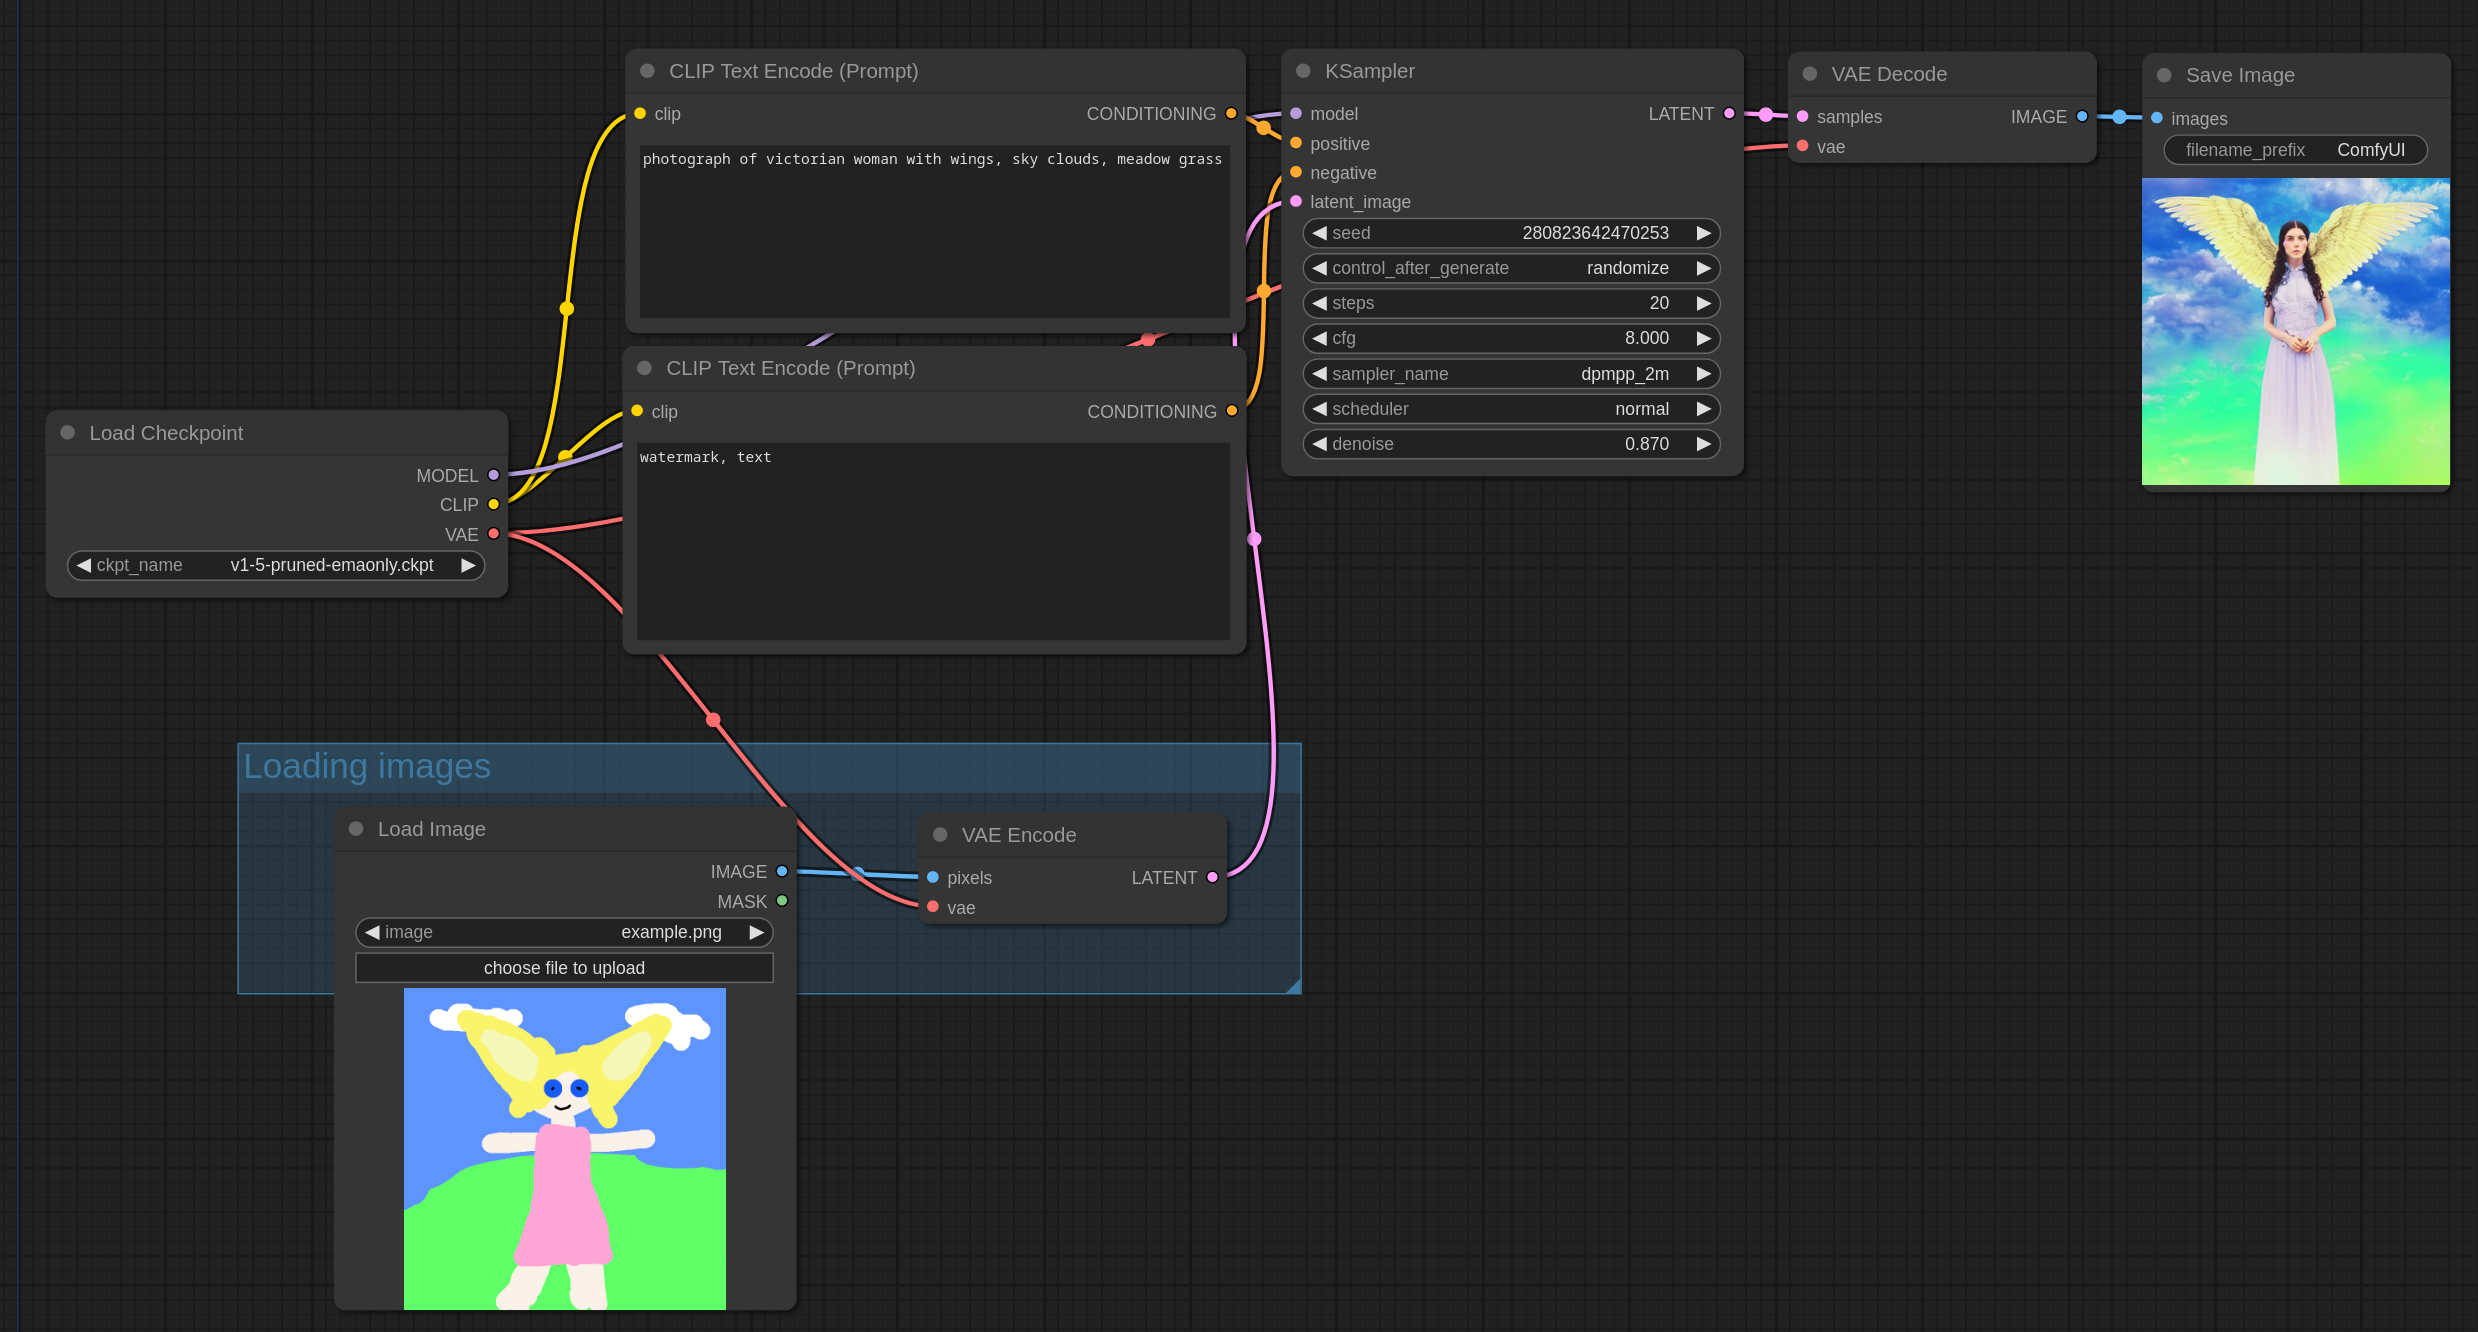
Try dragging this img2img example onto your ComfyUI window:

It works like this: