Outpainting with Stable Diffusion
Table of contents
Outpainting is the process of using an image generation model like Stable Diffusion to extend beyond the canvas of an existing image. Outpainting is very similar to inpainting, but instead of generating a region within an existing image, the model generates a region outside of it.
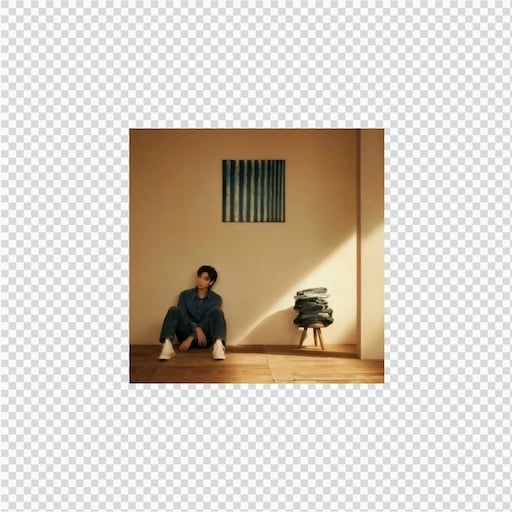
Here's an example of an outpainted image:
| Input | Output |
|---|---|
 |  |
In this guide, we'll walk you through the process of creating your own outpainted images from scratch using Stable Diffusion SDXL.
The outpainting process
At a high level, outpainting works like this:
- Choose an existing image you'd like to outpaint.
- Create a source image that places your original image within a larger canvas.
- Create a black and white mask image.
- Use your source image, your mask image, and a text prompt as inputs to Stable Diffusion to generate a new image.
🍿 Watch our inpainting and outpainting guide on YouTube
Step 1: Find an existing image
The first step is to find an image you'd like to outpaint. This can be any image you want, like a photograph, a painting, or an image generated by an AI model like Stable Diffusion.
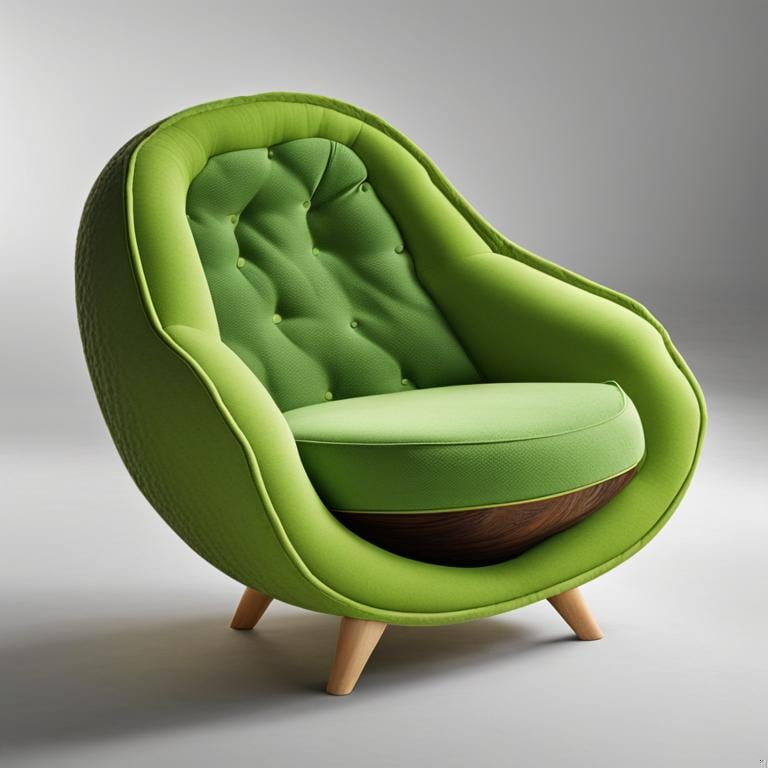
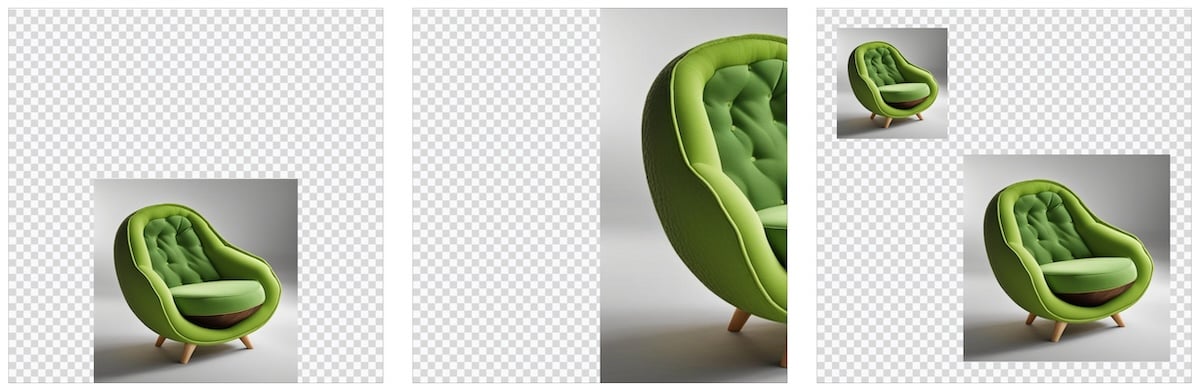
Here's an example of an image to outpaint, an AI-generated armchair in the shape of an avocado:
The image here has square dimensions, but your image can have any aspect ratio.
Step 2: Create a source image
Once you've found an image you want to outpaint, you need to place it within a larger canvas so the image model will have space to paint around it. You can do this with traditional raster image editing software like Photoshop or GIMP, but since you won't actually be doing any manual bitmap-based editing of the image, you can also use web-based vector drawing tools like Figma or Canva to achieve the same result.
Create a new square image, and place your original image within it. 1024x1024 is ideal if you're using the SDXL version of Stable Diffusion, as you will in this guide. For more info about image sizing and dimensions, see the docs on width and height.
In the example image below, there's a checkboard pattern to indicate the "transparent" parts of the canvas that will be outpainted, but the checkboard is not actually neccessary. You can choose any color you like for the surrounding canvas, but it's a good idea to choose a color that's similar to the color of the image you're outpainting. This will help the model generate a more seamless transition between the original image and the outpainted region.
It should look something like this:
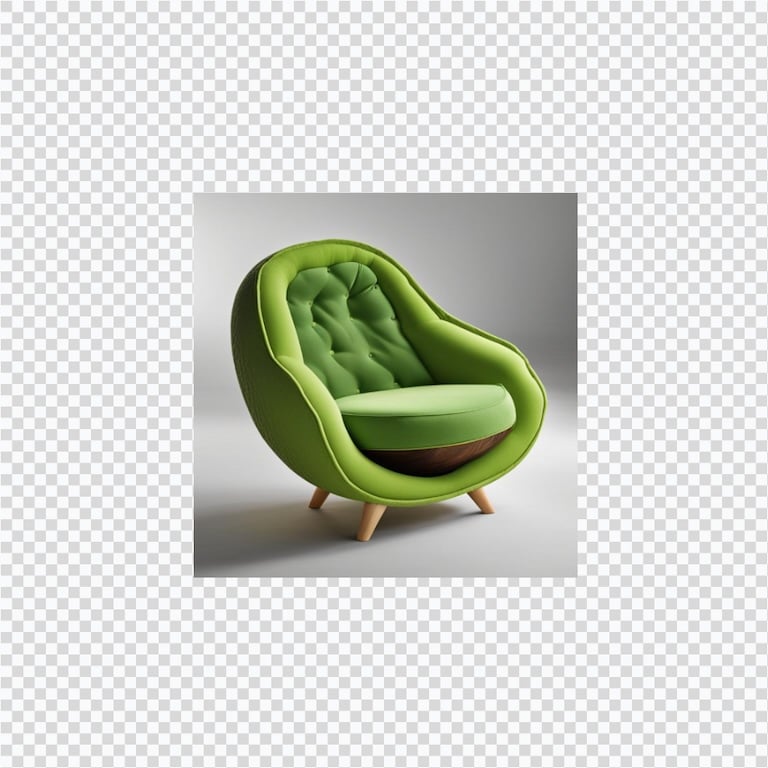
☝️ Here the original image is centered in the middle of the canvas, but you can place it anywhere you like depending on which part of the canvas you'd like to outpaint. These are also perfectly valid arrangements:
Save this image as a JPG or PNG file. Give it a name like outpainting-source.jpg or outpainting-source.png so you can easily identify it later.
Step 3: Create a mask image
Next, you'll generate a mask image. This is a black and white image that tells the model which parts of the image to preserve, and which parts to generate new content for. Again you can use any image editing tool you like do to do this, as long as it can save JPG or PNG files.
Use the same dimensions for your mask image as you did for your source image: 1024x1024 square. The mask image should be black and white, with the black areas representing the parts of the image you want preserve, and the white areas representing the parts of the image you want to generate new content for.
If you can't easily remember which parts should be black and which should be white, try asking ChatGPT to create a mnemonic for you. Here's one:
Keep the Night, Replace the Light
For our centered avocado armchair, the mask image should look something like this:

☝️ Important! Be sure to draw your mask slightly smaller than the source image. This will help the model generate a more seamless visual transition between the original image and the outpainted region. It will also prevent an unwanted visible line from being drawn between the original image and the outpainted region.
Save this image as a JPG or PNG file. Give it a name like outpainting-mask.jpg or outpainting-mask.png so you can easily identify it later.
Step 4: Generate the outpainted image
Now that you've generated your source image and mask image, you're ready to generate the outpainted image. There are many models that support outpainting, but in this guide you'll use the SDXL version of Stable Diffusion to generate your outpainted image.
The inputs you'll provide to stable diffusion are:
prompt: A short string of text describing the image you'd like to generate. To see what your avocado armchair would look like if it were in a larger room, use a prompt like "an armchair in a room full of plants".image: The source image you created in step 2.mask: The mask image you created in step 3.
Use Replicate's web interface
To generate your outpainted image using Replicate's web interface, follow this link, replacing the image, mask, and prompt inputs with your own values. The web UI makes it easy to drag and drop your image and mask files right into the browser window.
Use Replicate's API
To generate your outpainted image using Replicate's API, you can use whatever programming language you prefer, but in this guide we'll use Python.
Start by setting up the Python client, then run this code:
import replicate
output = replicate.run(
"stability-ai/sdxl:39ed52f2a78e934b3ba6e2a89f5b1c712de7dfea535525255b1aa35c5565e08b",
input={
"prompt": "an armchair in a room full of plants",
"image": open("path/to/outpainting-source.jpg", "rb"),
"mask": open("path/to/outpainting-mask.jpg", "rb")
}
)
# Save the outpainted image
with open('outpainted.png', 'wb') as f:
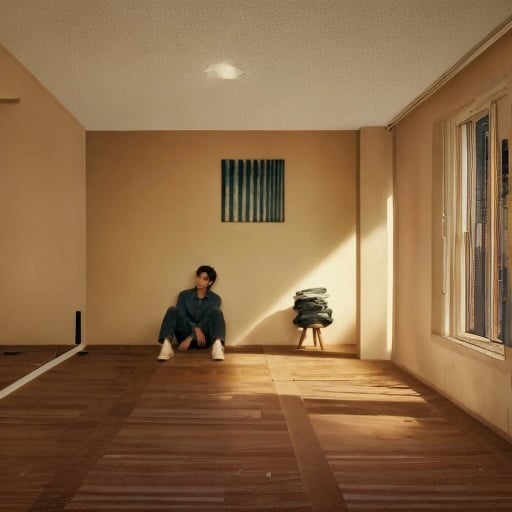
f.write(output[0].read())The resulting image should look something like this:
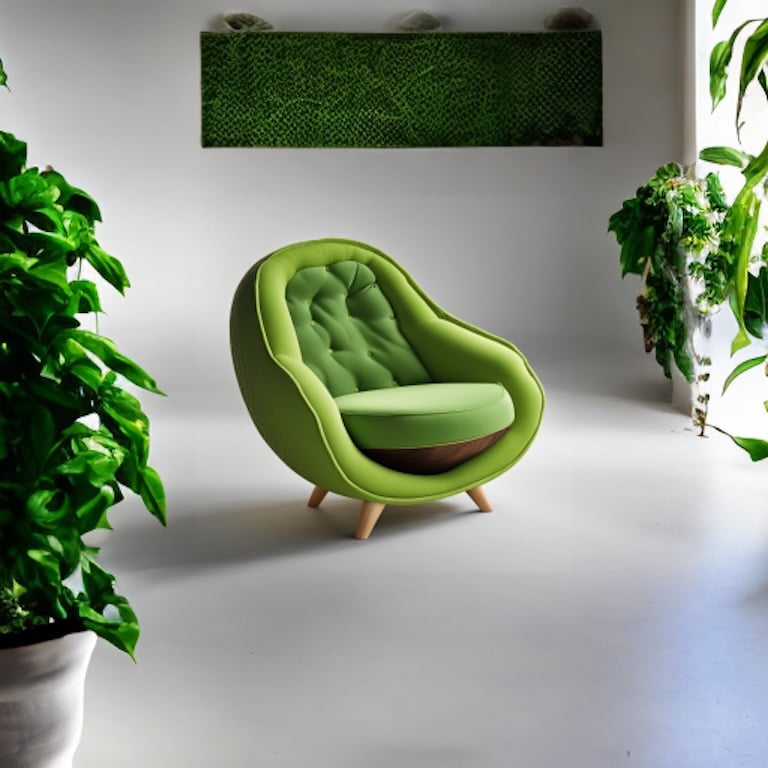
Now that you've generated your first outpainted image, it's time to iterate. Refine the prompt, adjust the mask, and try again. This is where the API really shines, because you can easily write code to run the model multiple times with different inputs to see what works best.
Happy outpainting! 🥑