Using ControlNet with Stable Diffusion
Table of contents
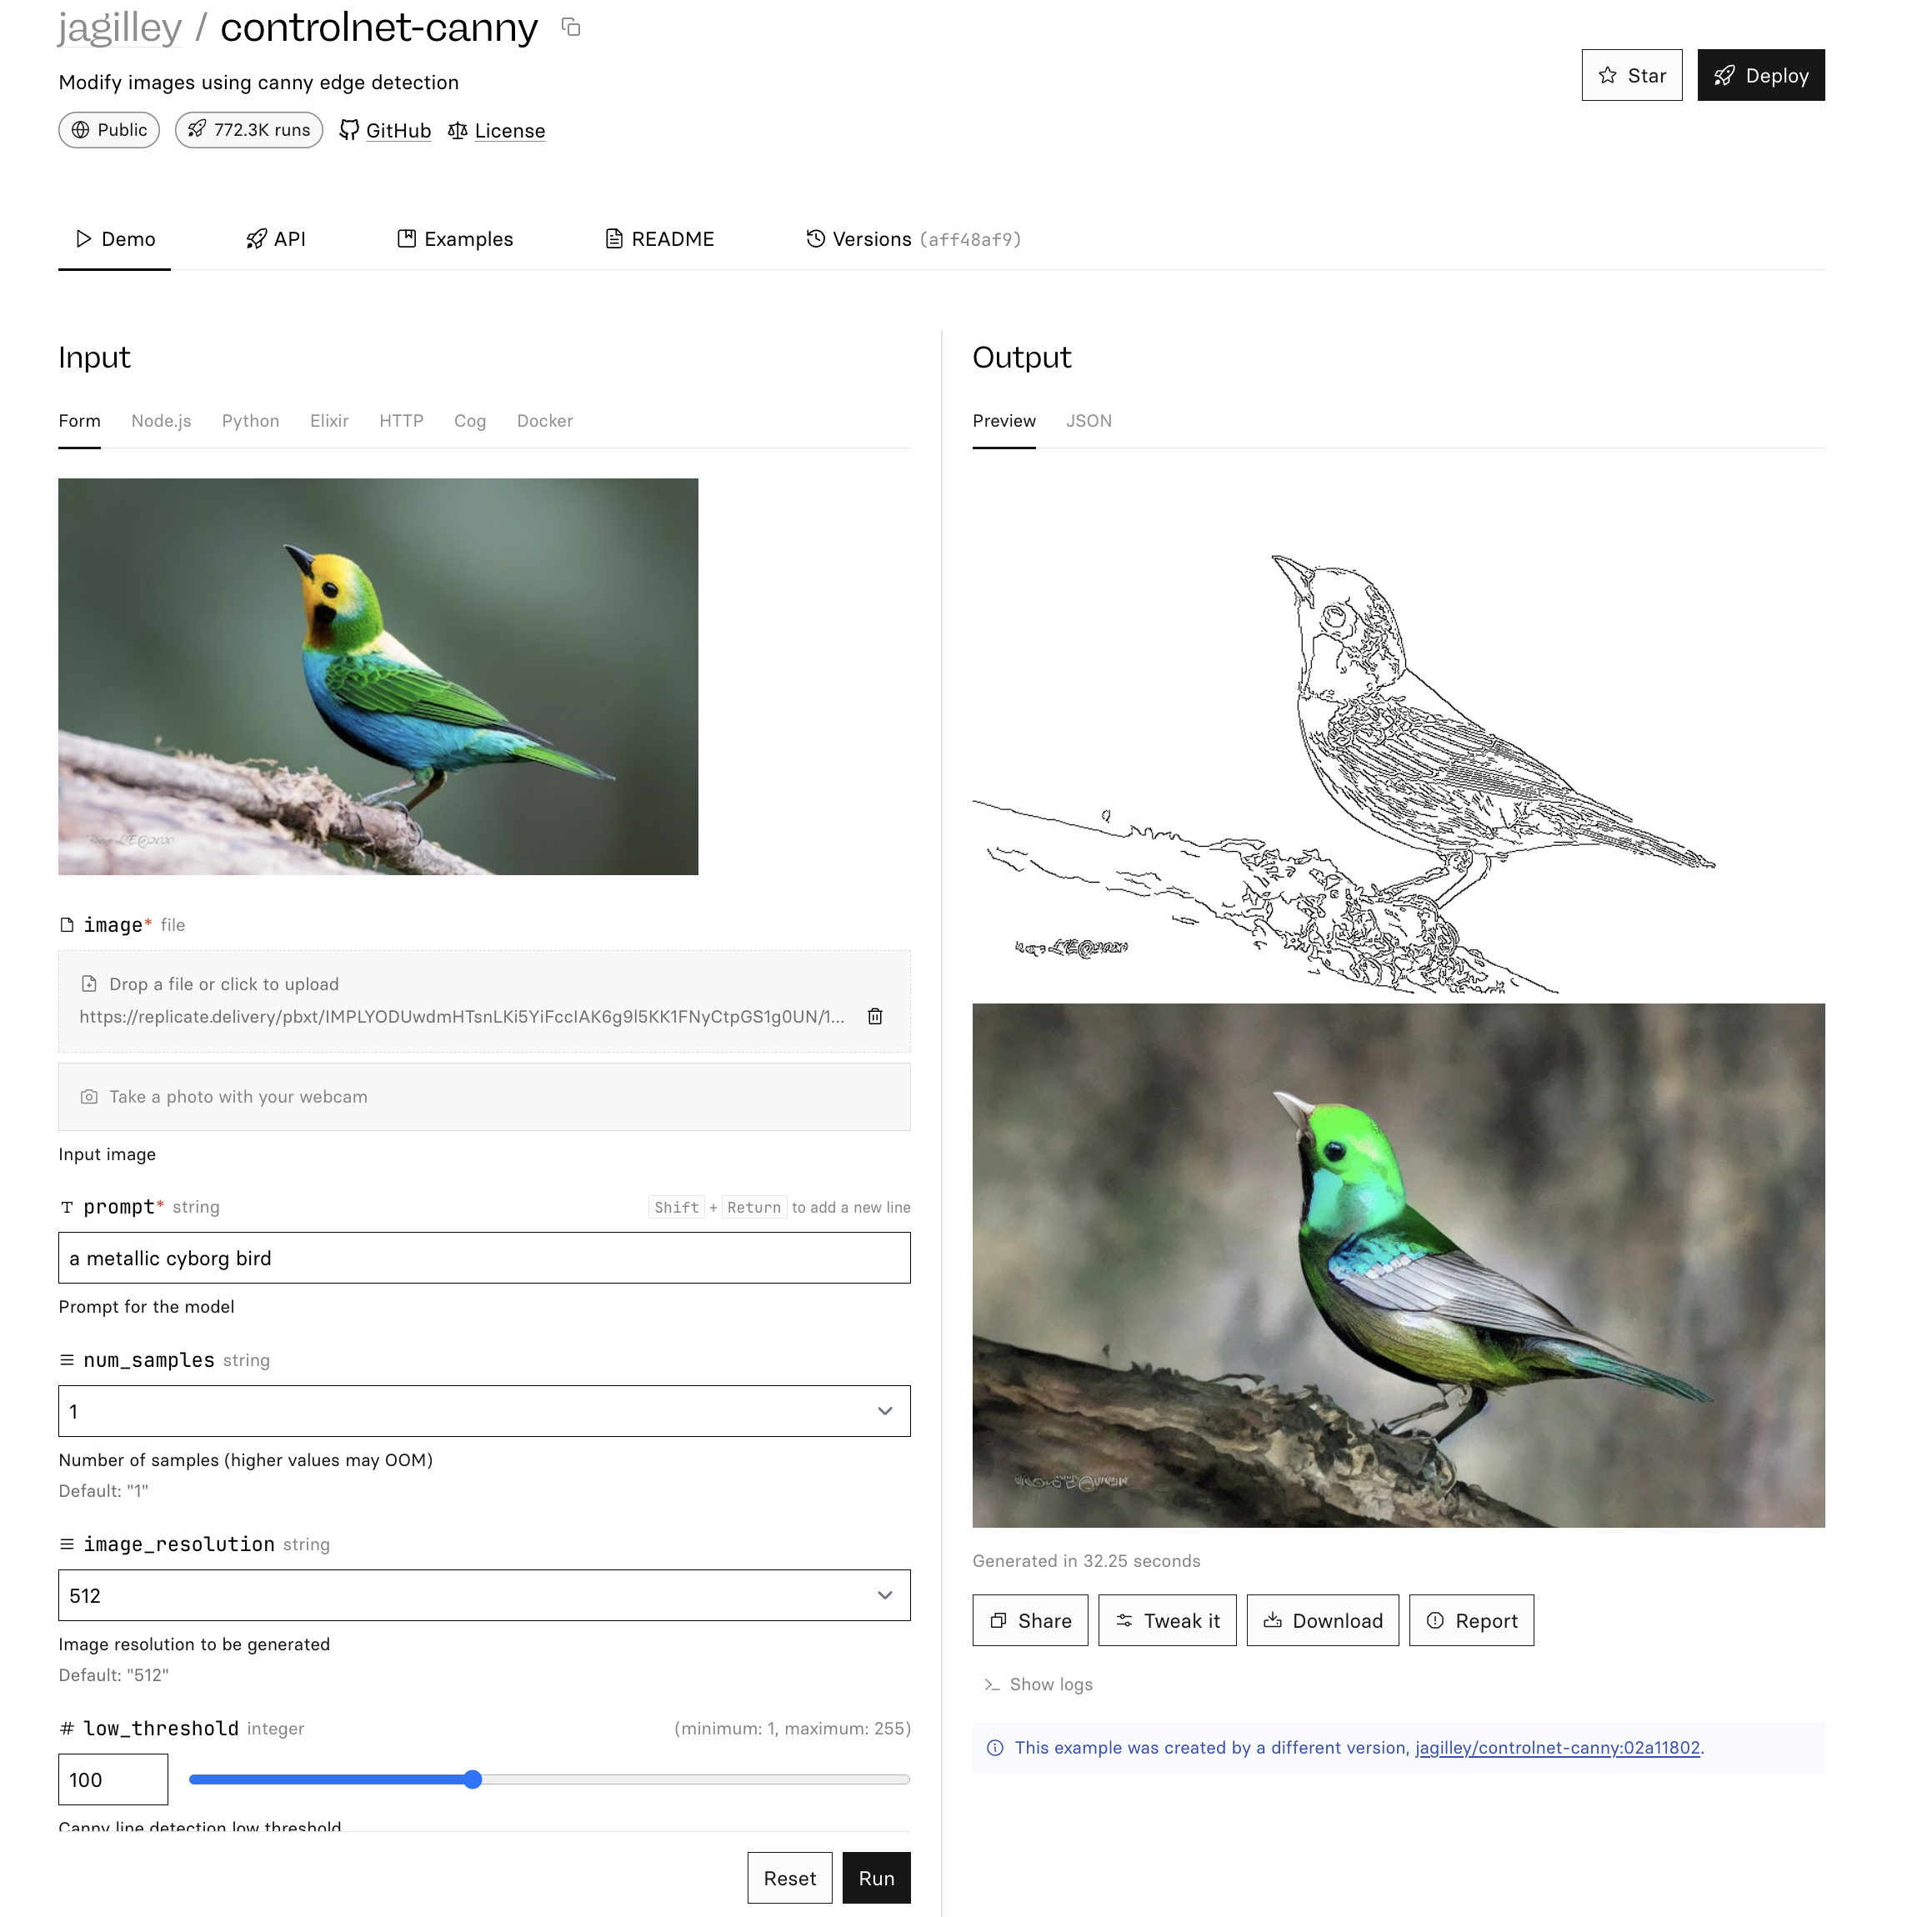
ControlNet is a method for conforming your image generations to a particular structure. It's easiest explained by an example.
Let's say you wanted to create an image of a particular pose—a photo like the man below, but we want a boy doing it.
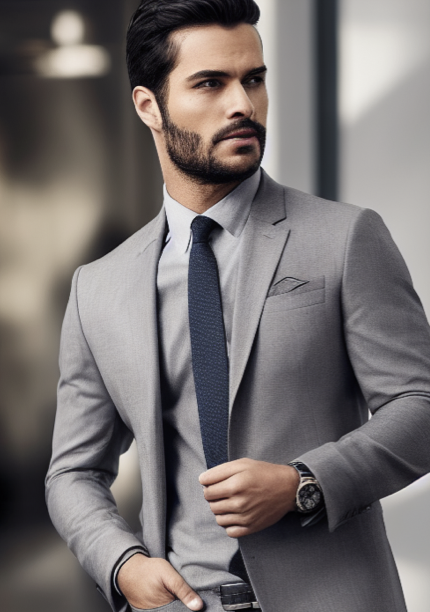
This is a really hard problem with default stable diffusion. We could try a prompt that describes our desired pose in detail, like this:
a photo of a boy wearing a blue jacket looking to his right with his left arm slightly above his right
But this probably isn't going to work. Our outputs aren't going to conform to all these instructions, and even if we got lucky and they did, we won't be able to consistently generate this pose. (why? -- my guess is because the decoder can only conform to so much? or maybe this is possible, it's just a pain?)
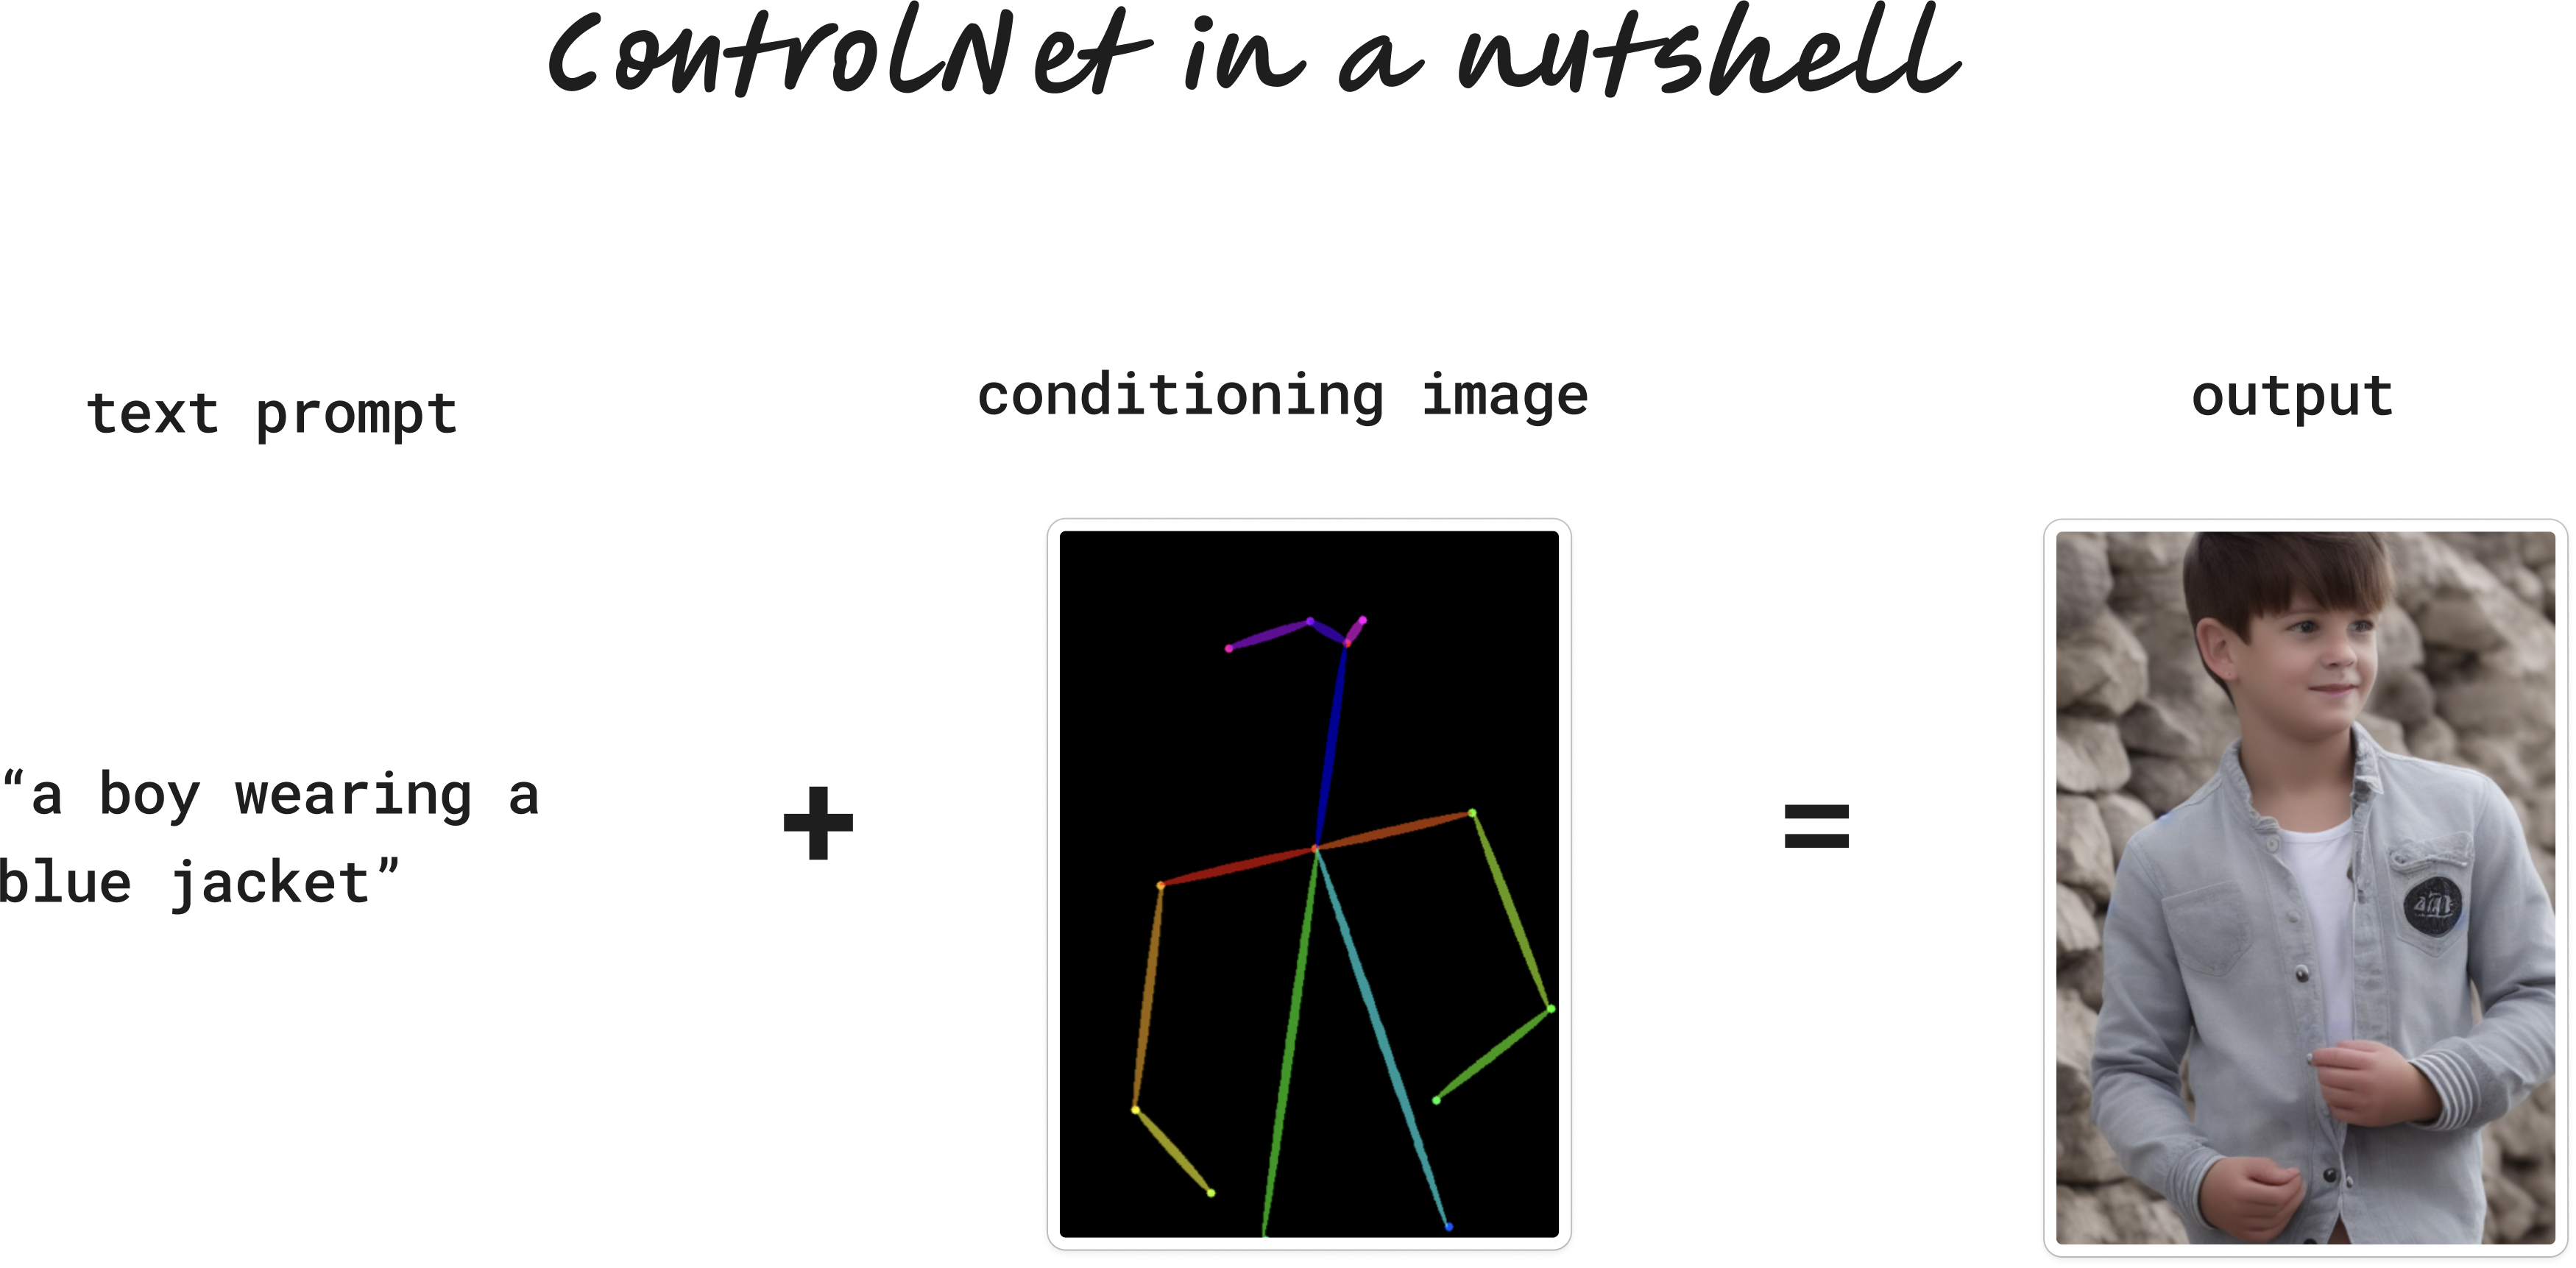
Enter ControlNet. ControlNet models accept two inputs:
A text prompt: a boy wearing a blue jacket
And a conditioning image. There are lots of types, but for now let's use a stick figure (often called human pose):
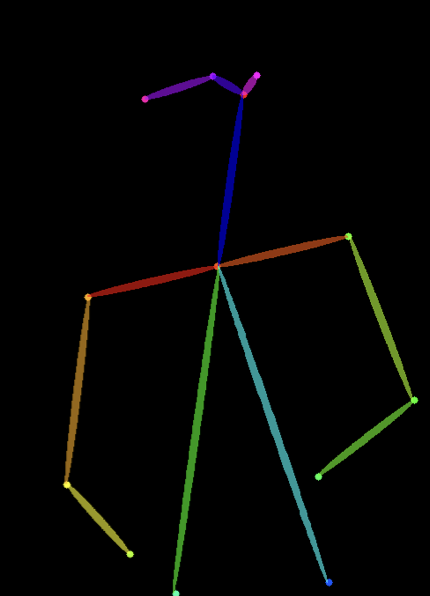
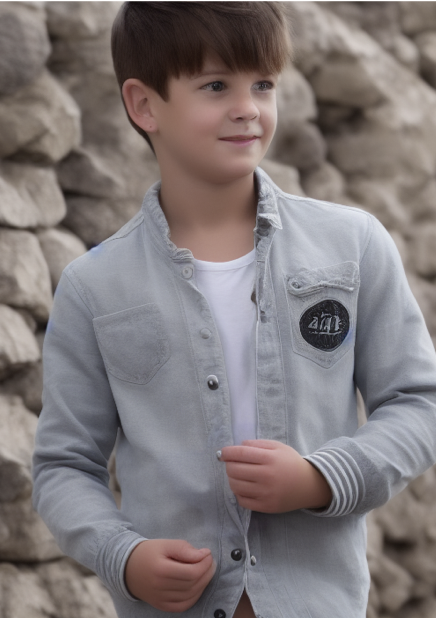
The model then uses our pose to conform/shape/control our image into our desired structure:
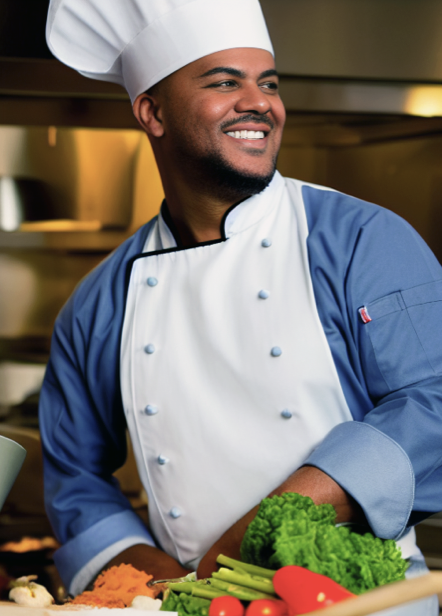
Let's try changing our prompt, but keep the pose input the same:
"chef in kitchen"
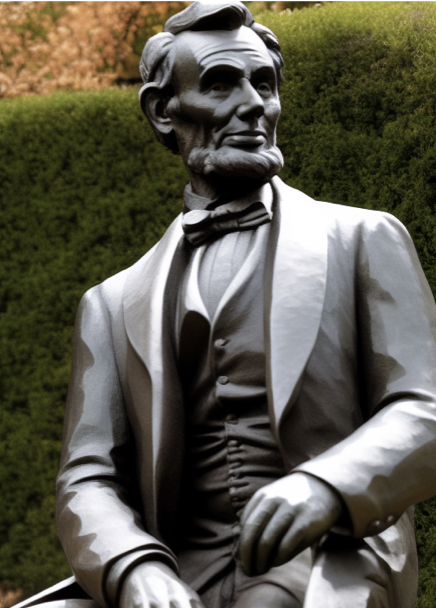
"Lincoln statue"
Source: ControlNet paper
And voila! We can create all kinds of images that are guided by the stick figure pose.
That's the essence of ControlNet. We always provide two inputs: a text prompt (just like normal Stable Diffusion) and a conditioning image. The output is guided by our conditioning image.
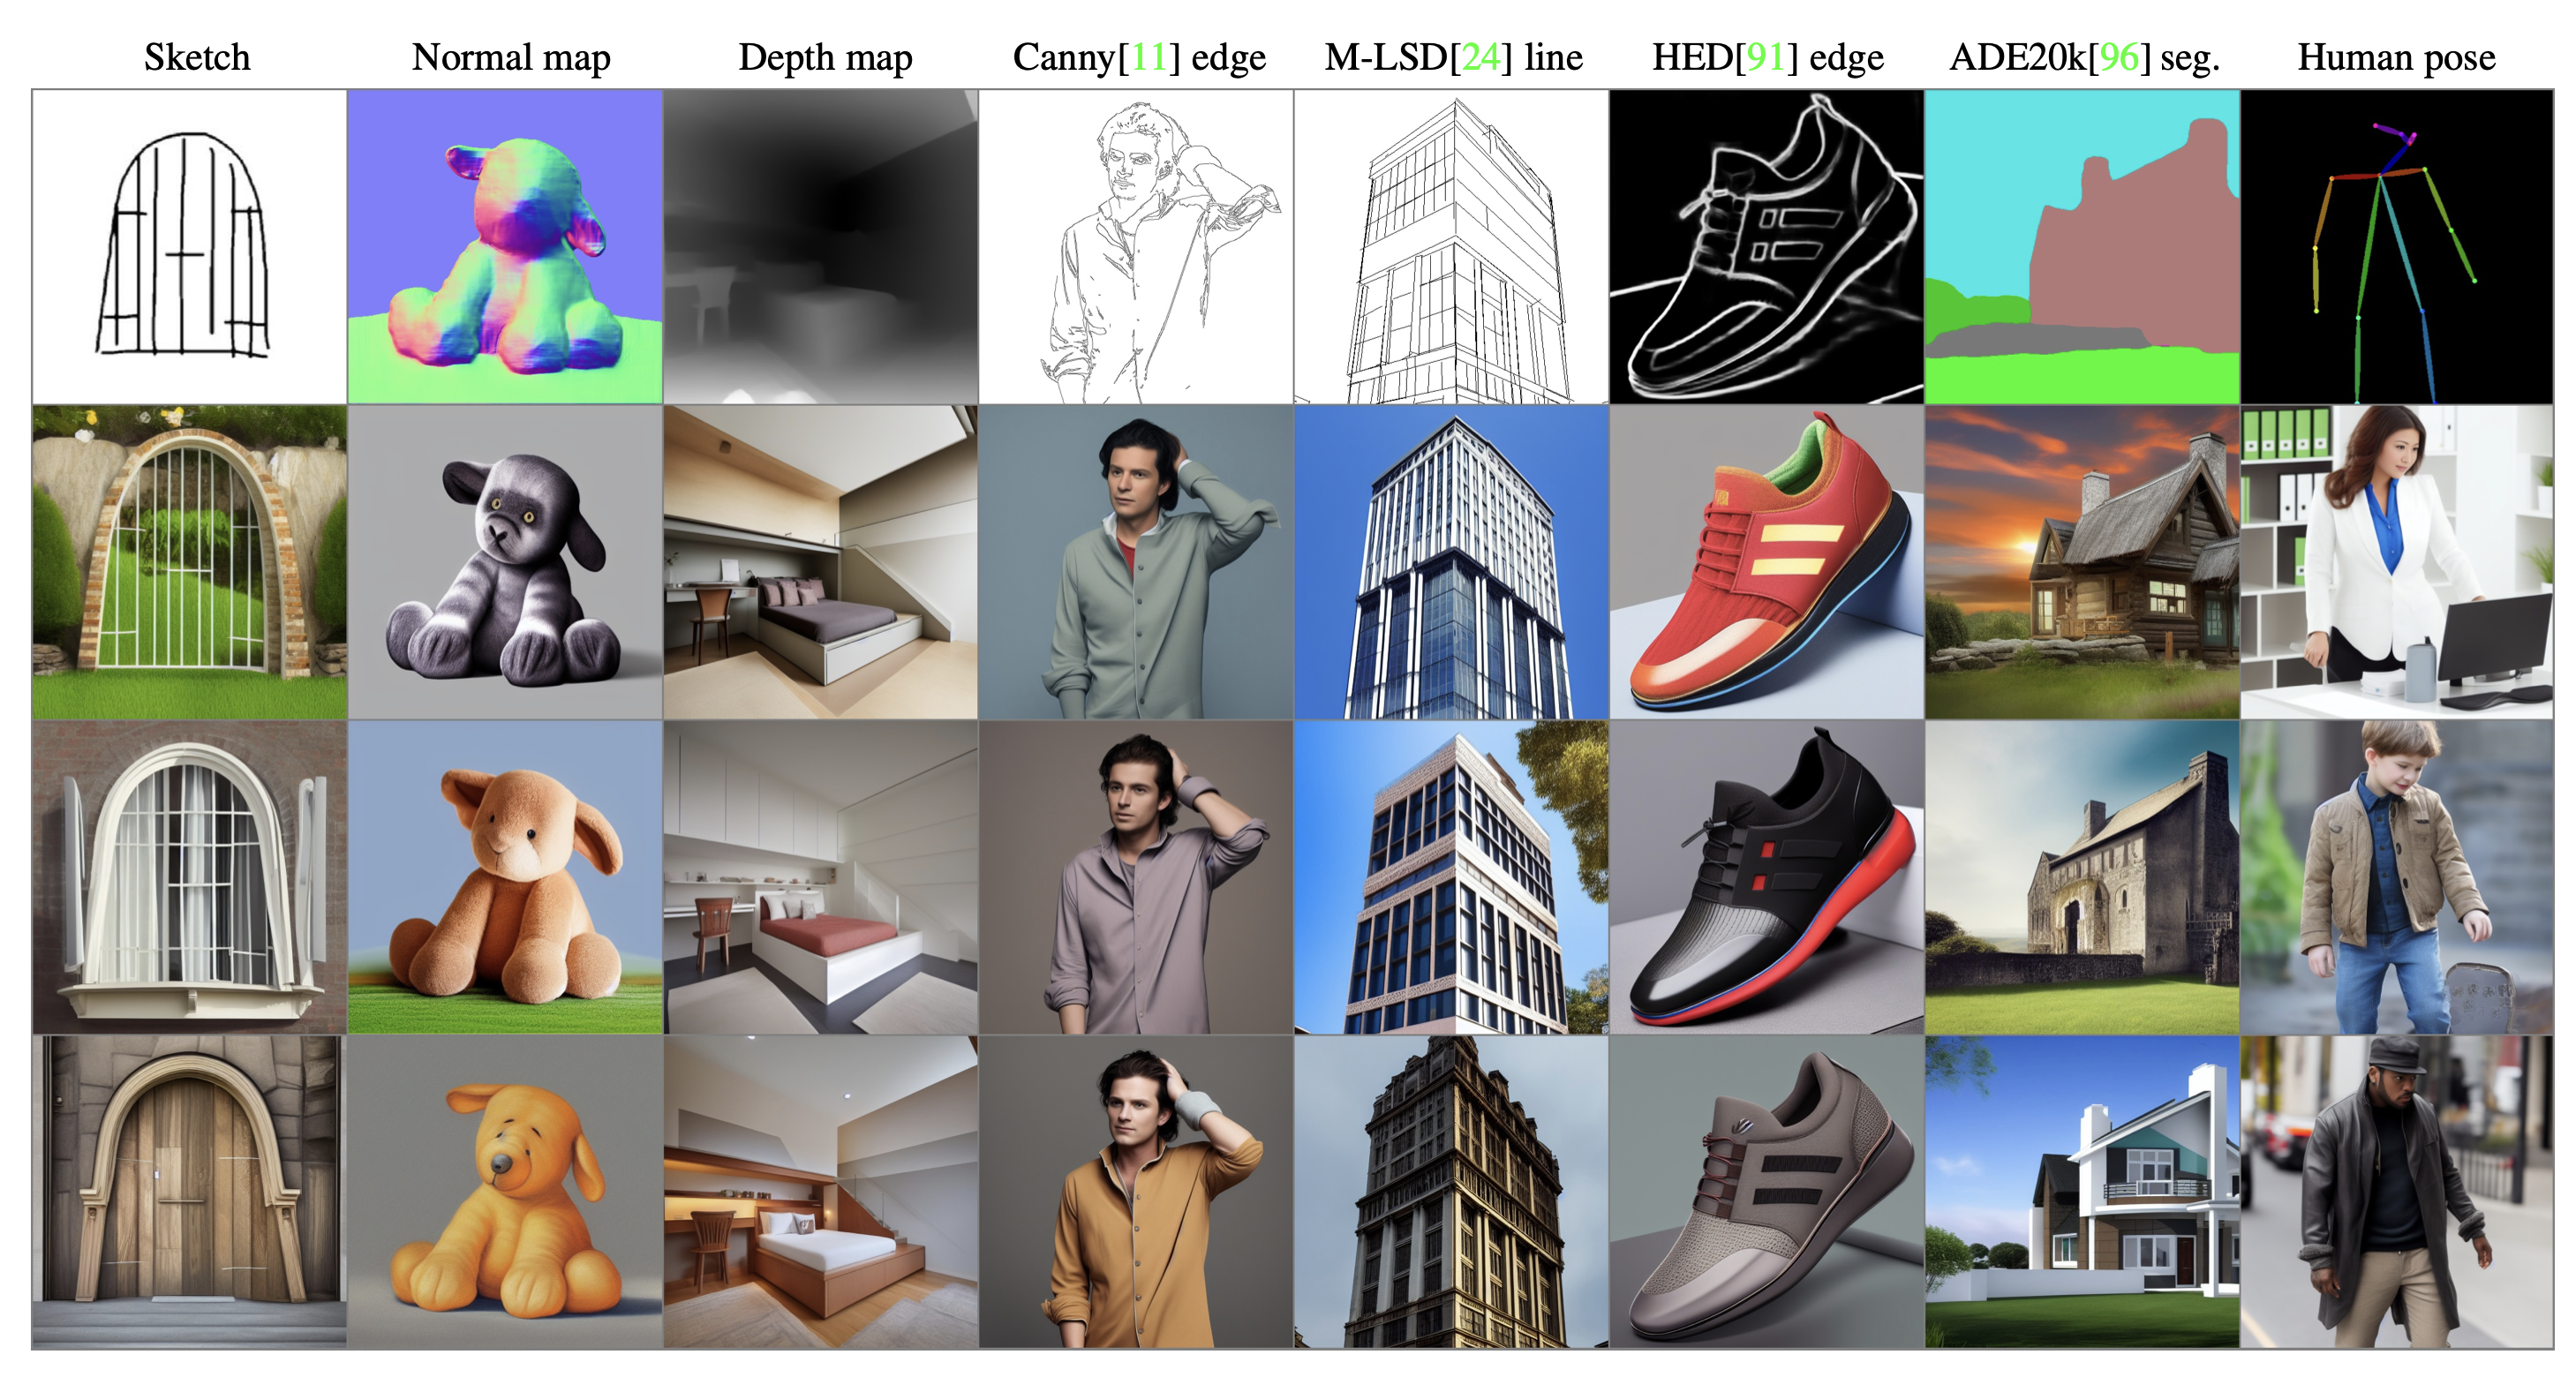
Importantly, the conditioning image isn't restricted to stick figure poses. We can provide all kinds of custom compositions for the ControlNet model to follow, like edges, depths, scribbles, segmentation and many other structures. More on that later.
How does ControlNet work?
ControlNet was created by Stanford researchers and announced in the paper Adding Conditional Control to Text-to-Image Diffusion Models.
It's trained on top of stable diffusion, so the flexibility and aesthetic of stable diffusion is still there.
I don't want to go too in depth, but training ControlNet involves using conditioning images to teach the model how to generate images according to specific conditions. These conditioning images act like guidelines or templates. For example, if the model is to learn how to generate images of cats, it might be trained with a variety of images showing cats in different poses or environments. Alongside these images, text prompts are used to describe the scene or the object. This combination of visual and textual input helps the model understand not just what to draw (from the text) but also how to draw it (from the conditioning images).
To learn more, check out the paper. Or do what I did, and upload the paper to ChatGPT and ask it a bunch of questions.
Types of conditioning images
There are many types of conditioning_image's we can use in ControlNet. We're not restricted to our human pose. We can guide our images using edge detectors, depth maps, segmentation, sketchs, and more.
The best way to see how each of these work is by example.
Let's run a selection of conditioners on the following two images with completely new prompts.
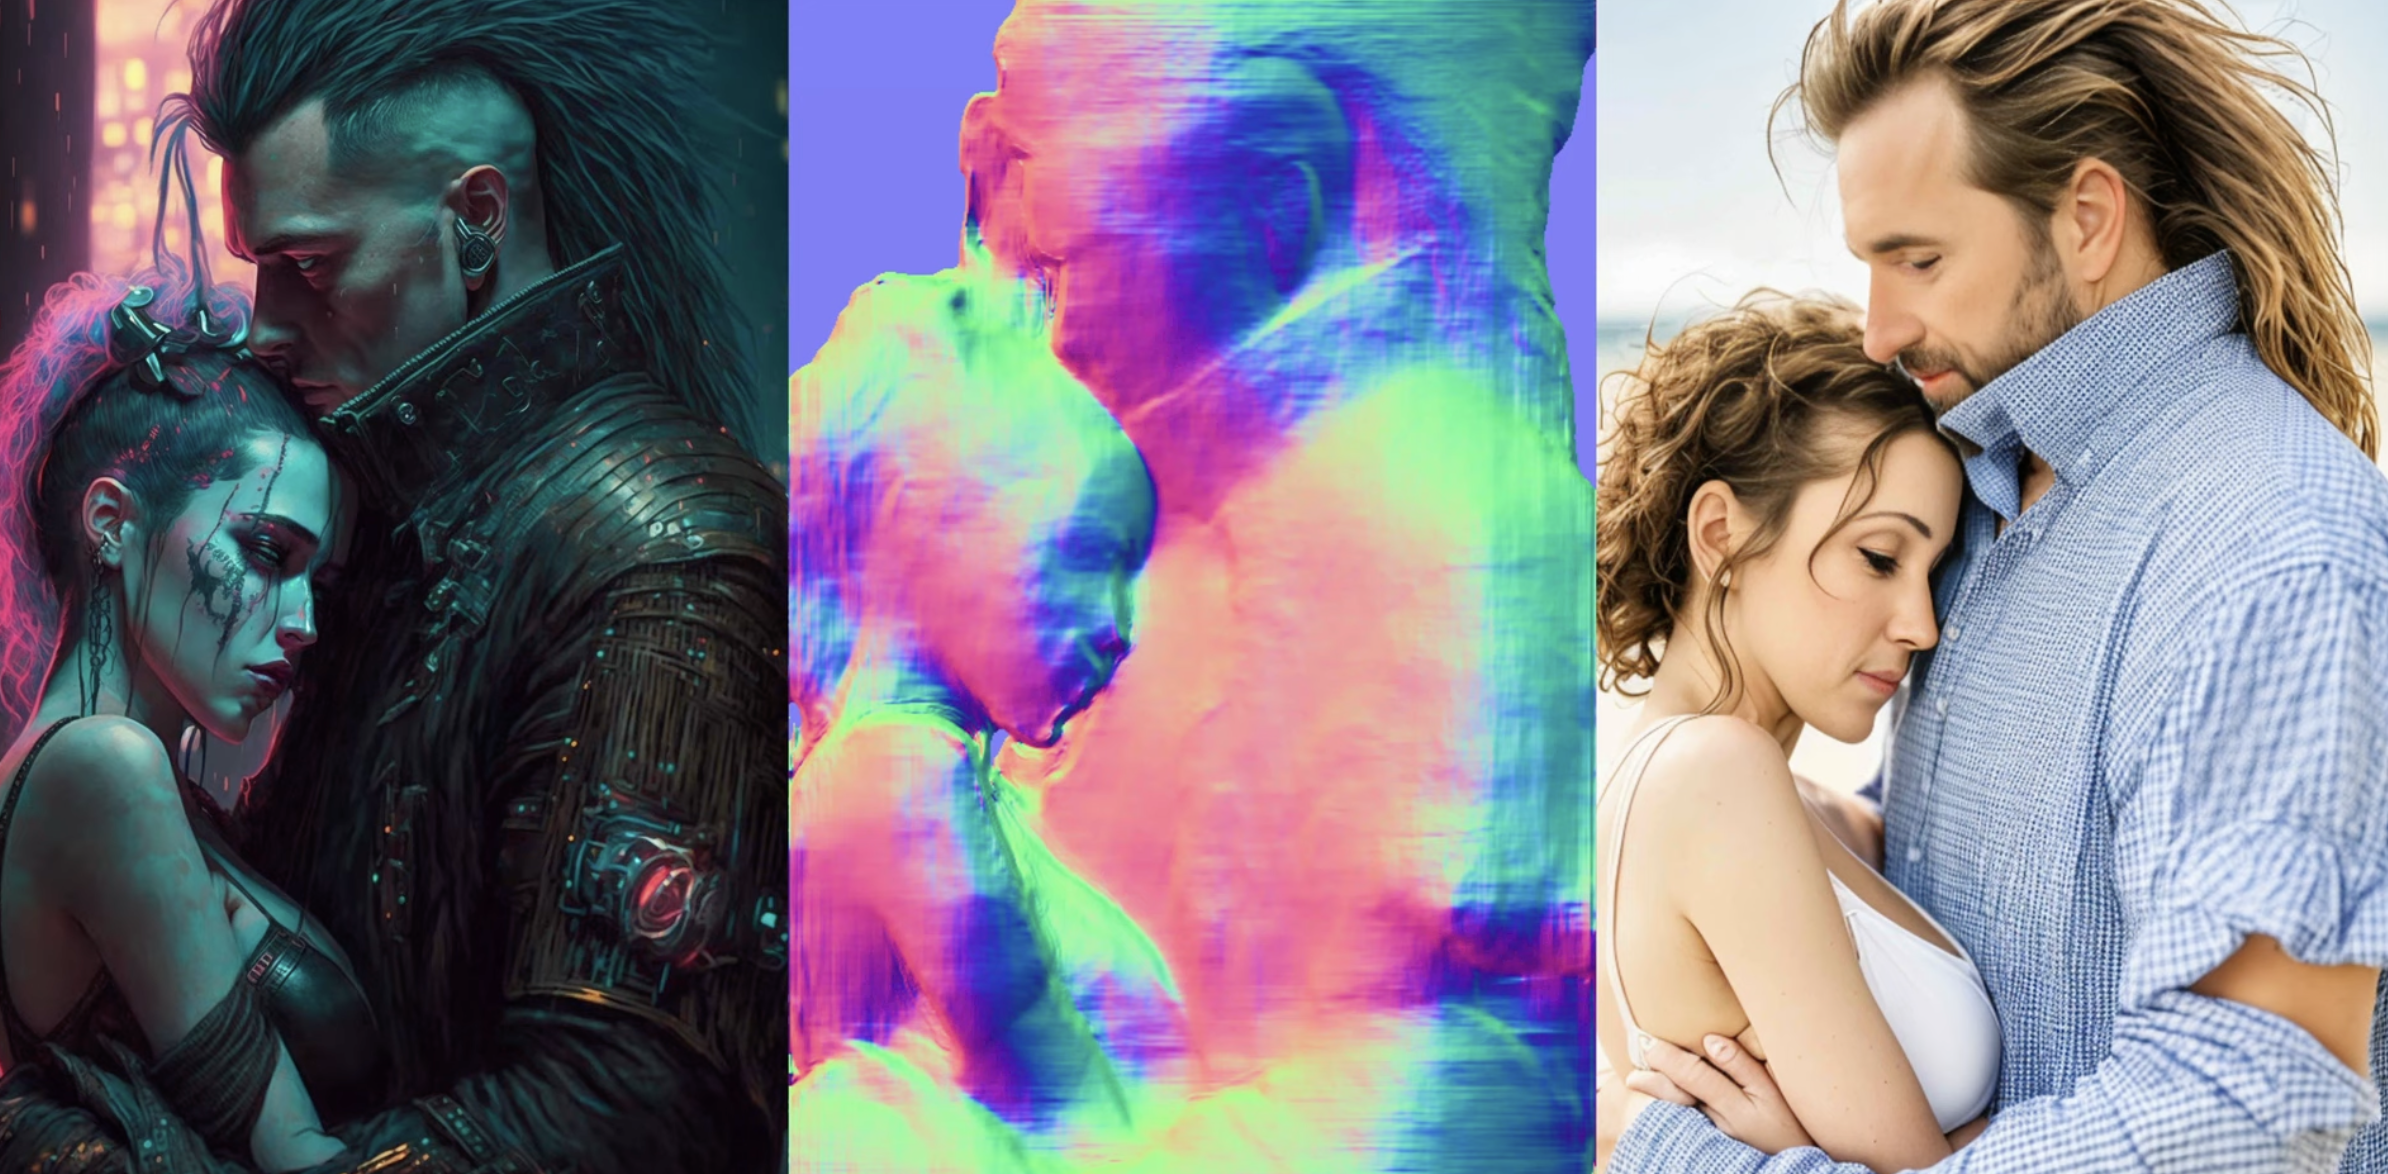
Cyberpunk Couple New prompt:
couple embracing, summer clothes,
color photo, 50mm prime, canon, studio
portrait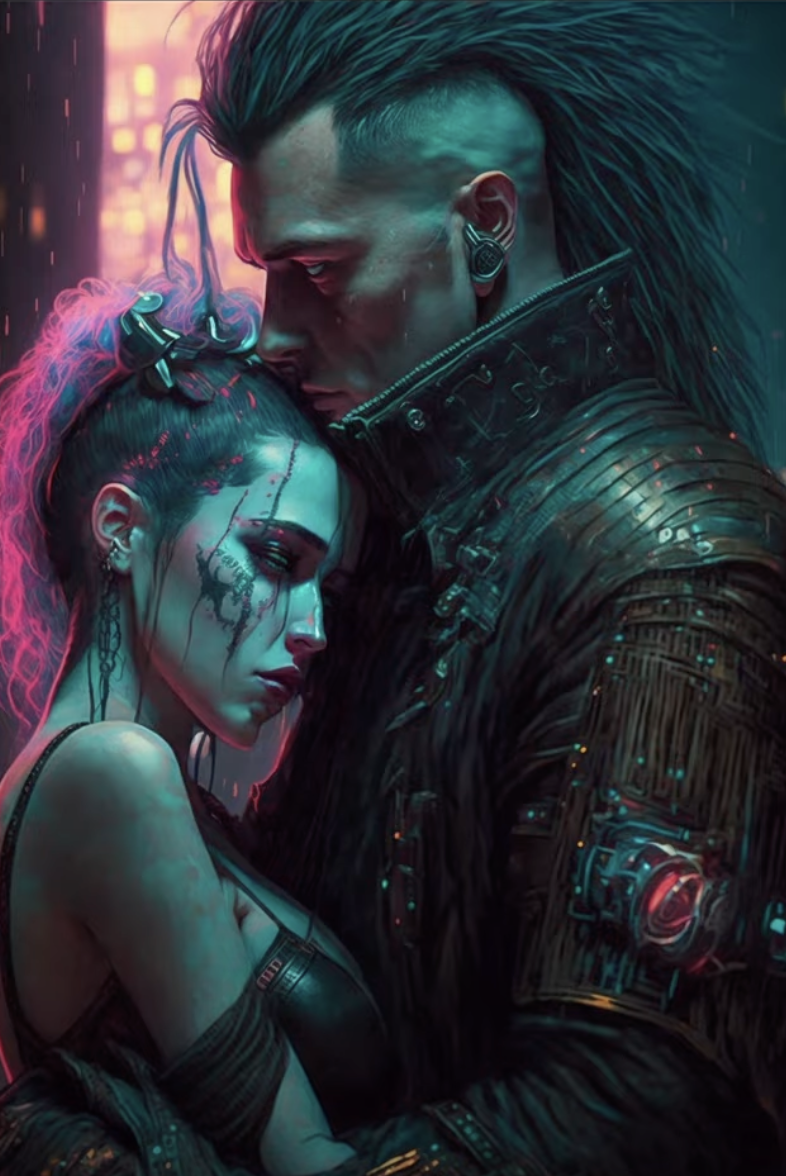
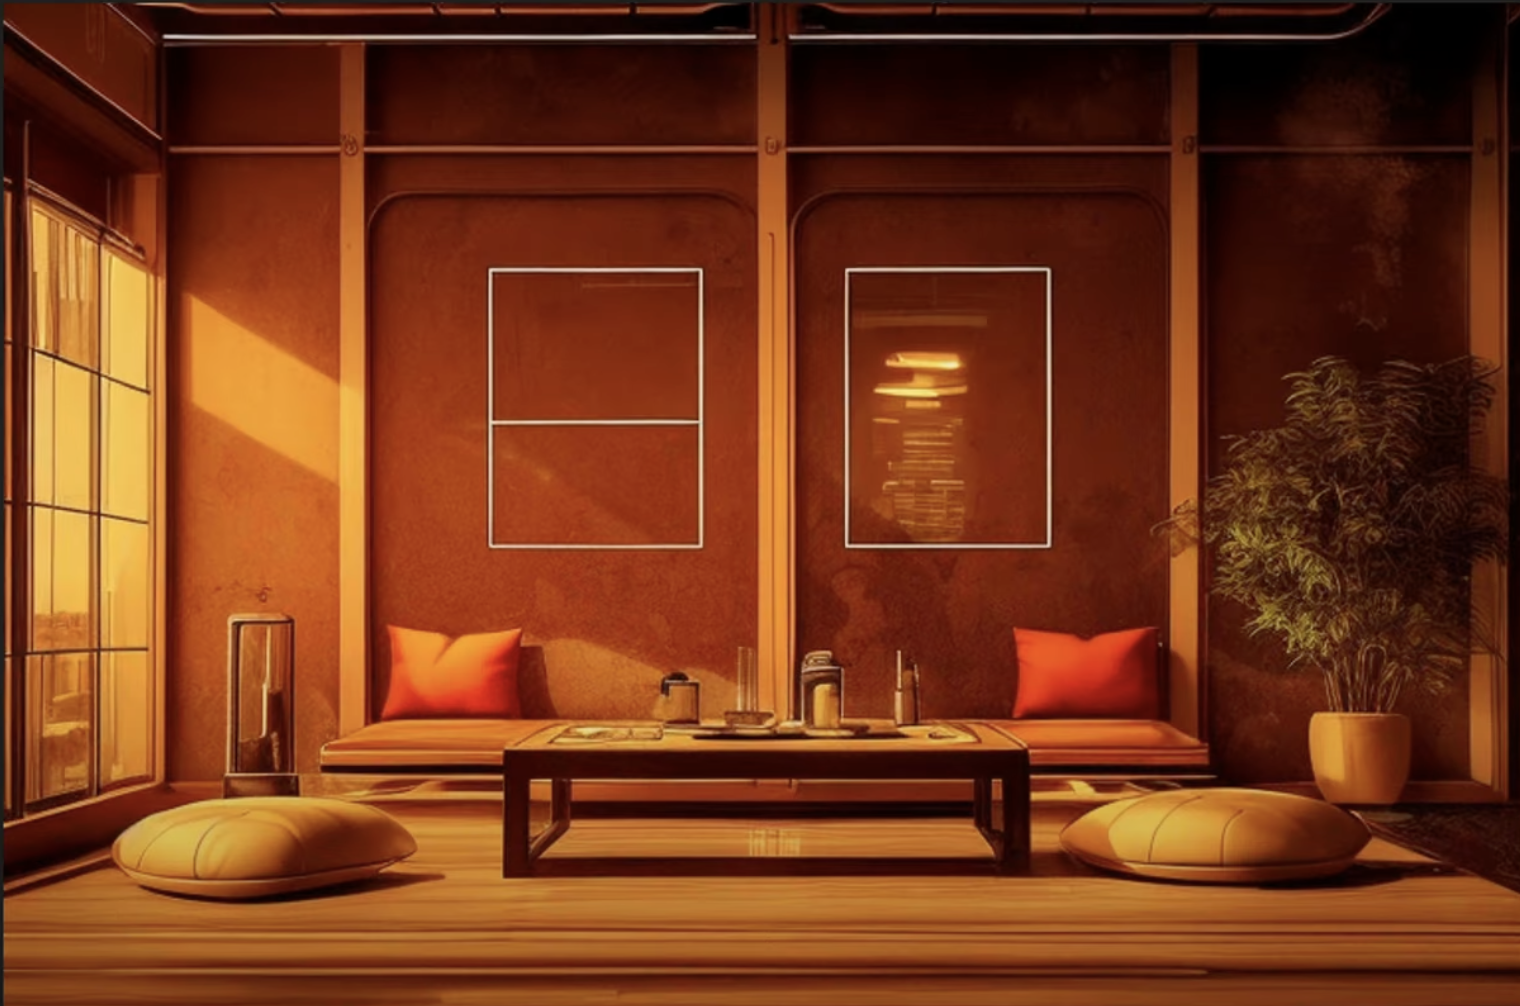
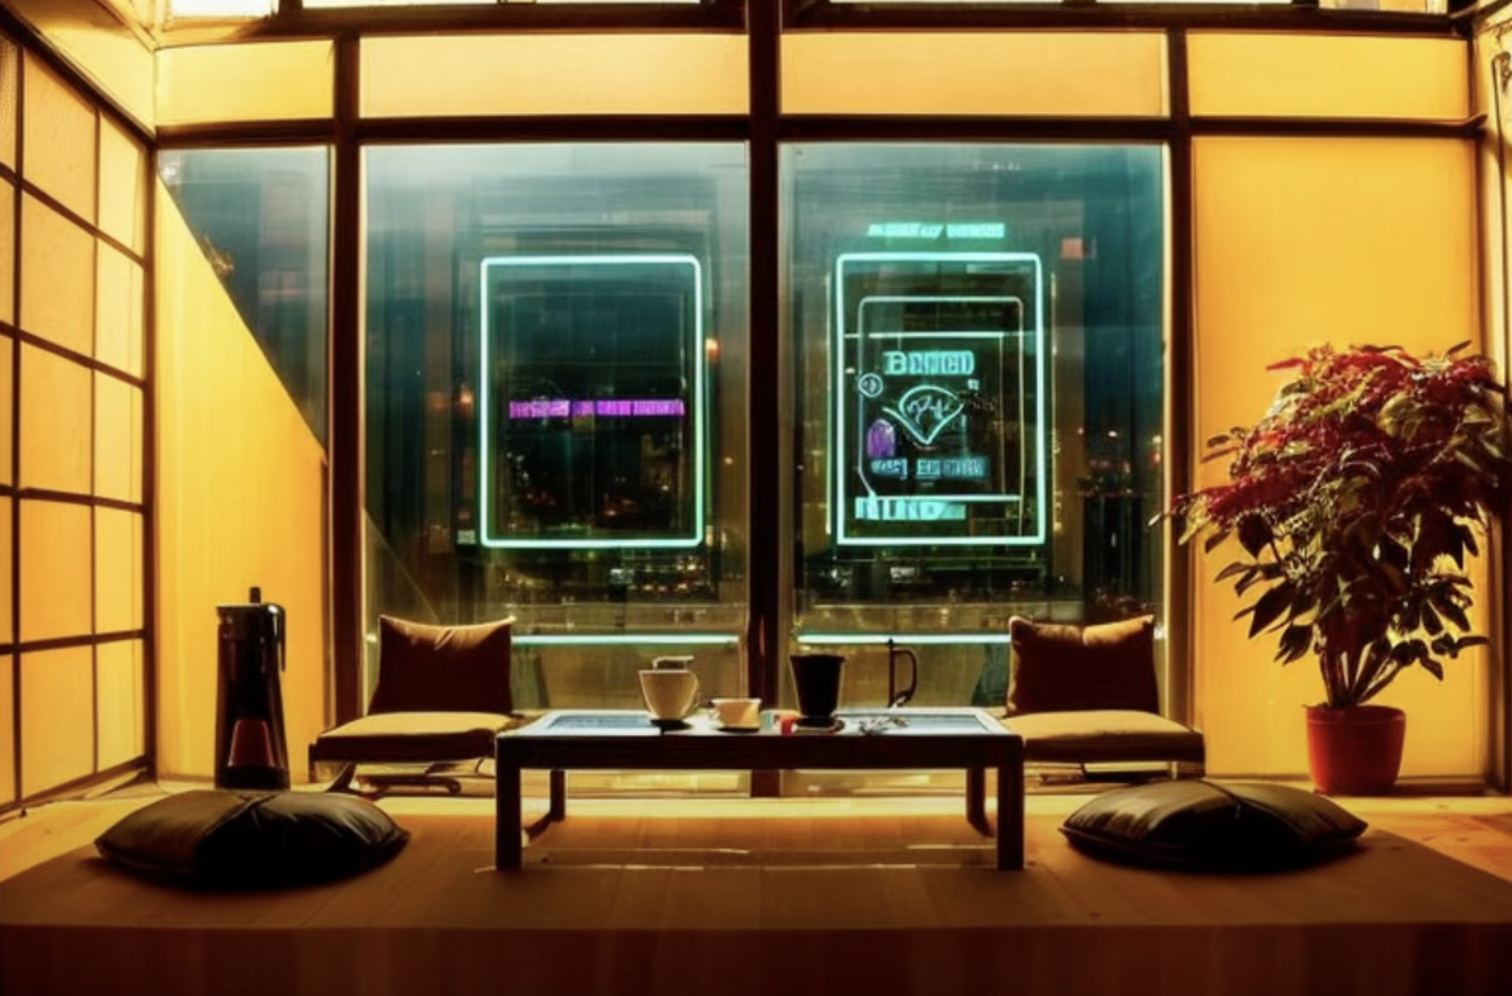
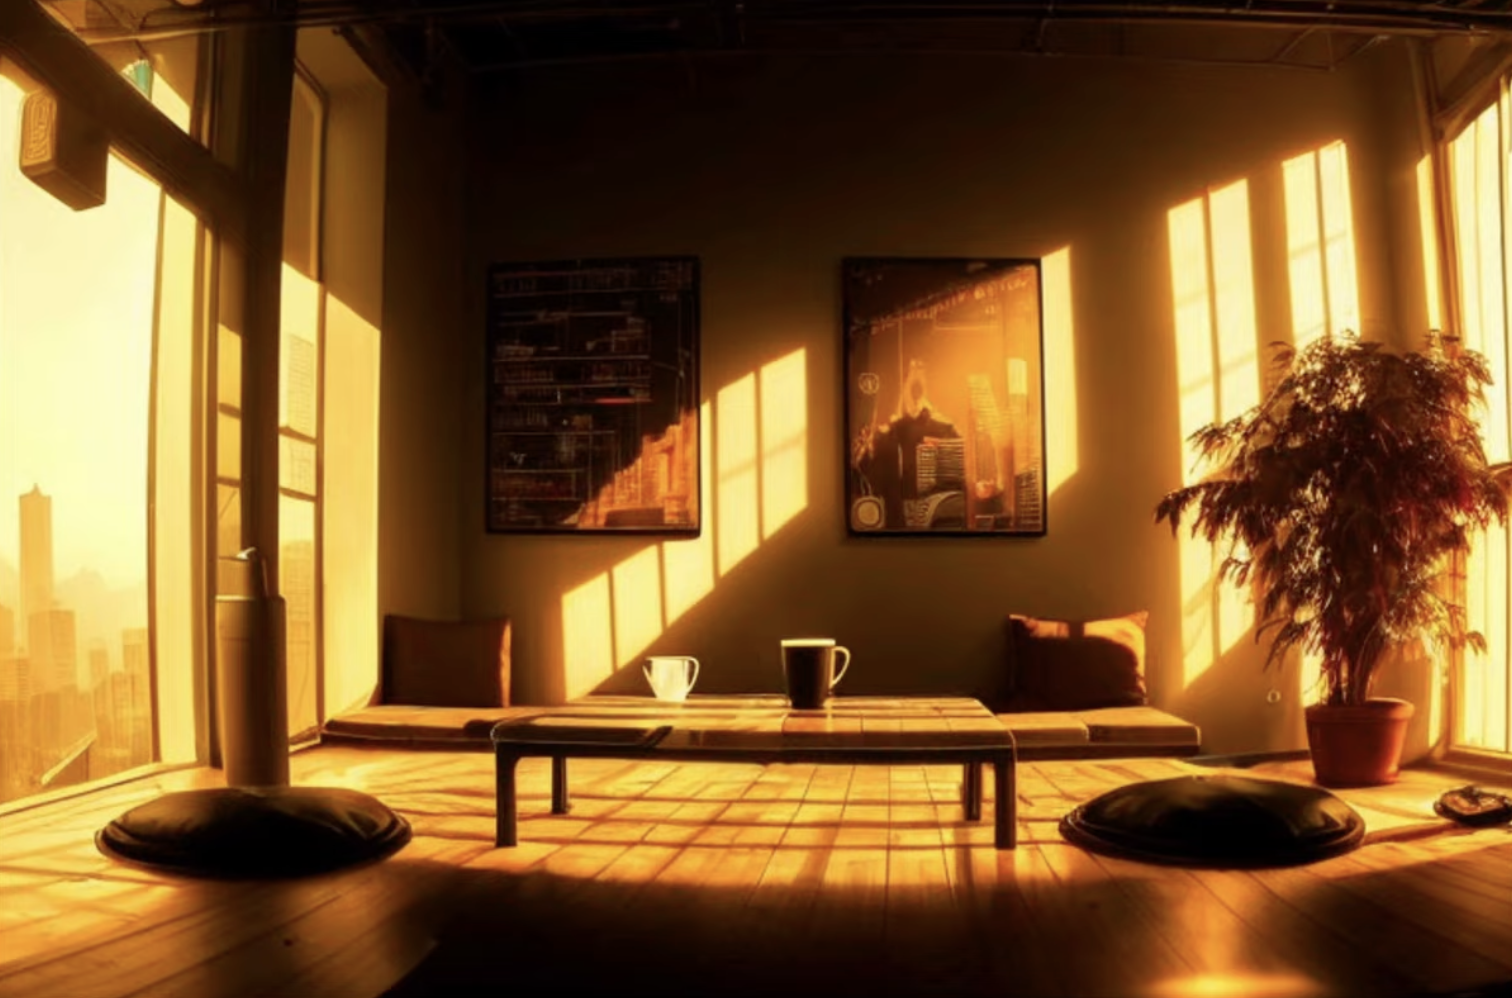
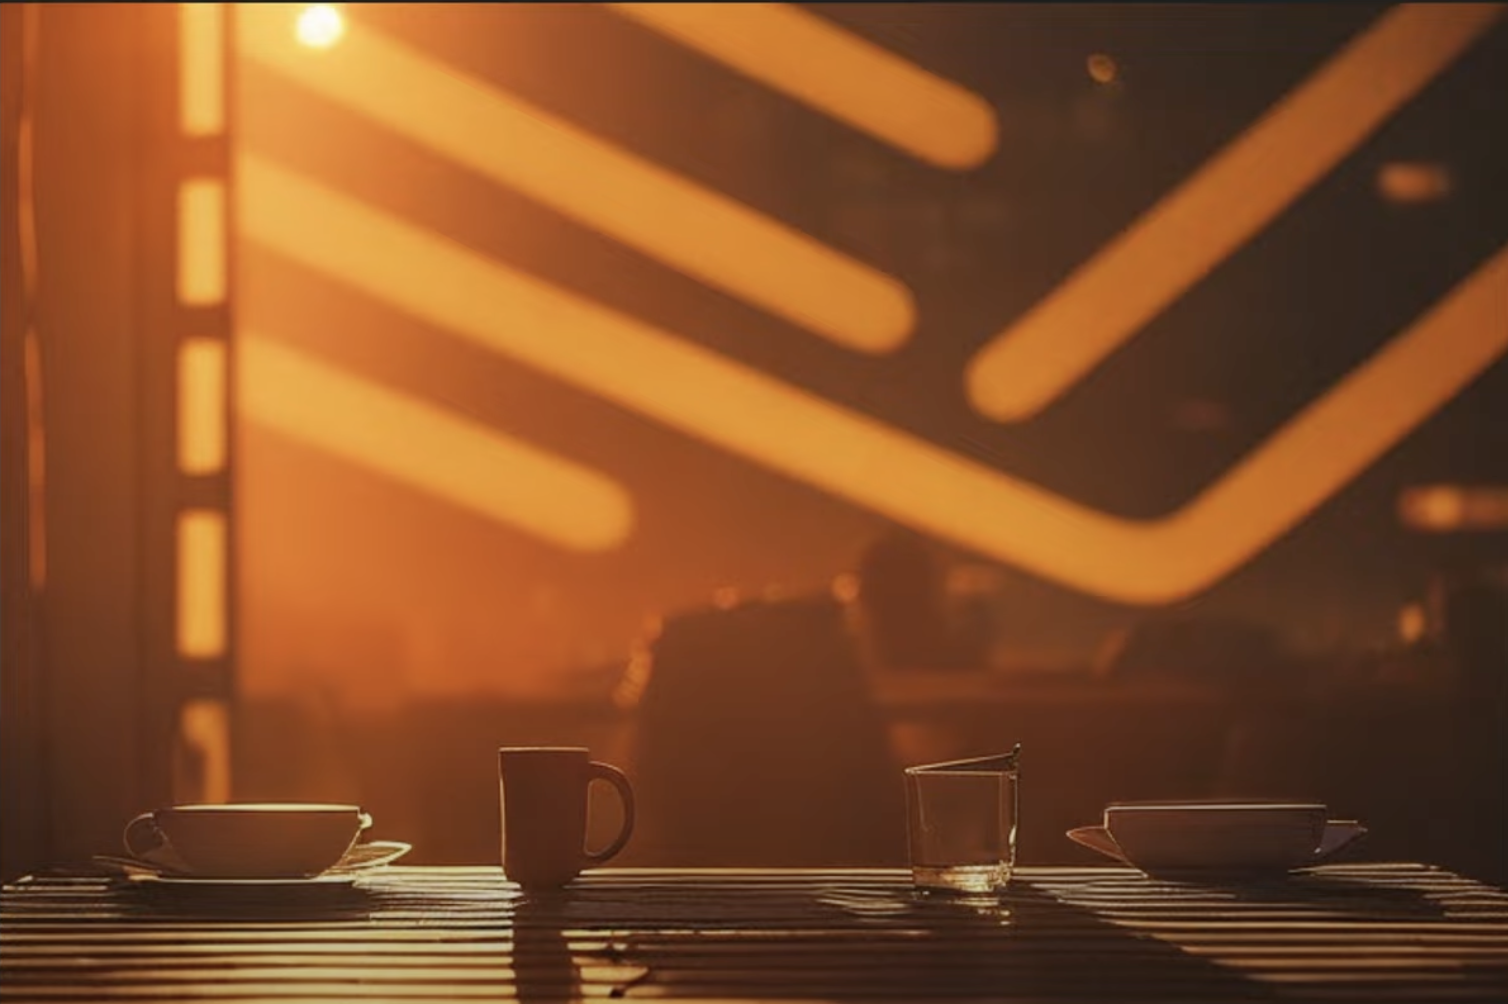
Tea Room New prompt:
a photo of a beautiful cyberpunk
cafe, dawn light, warm tones,
morning scene, windows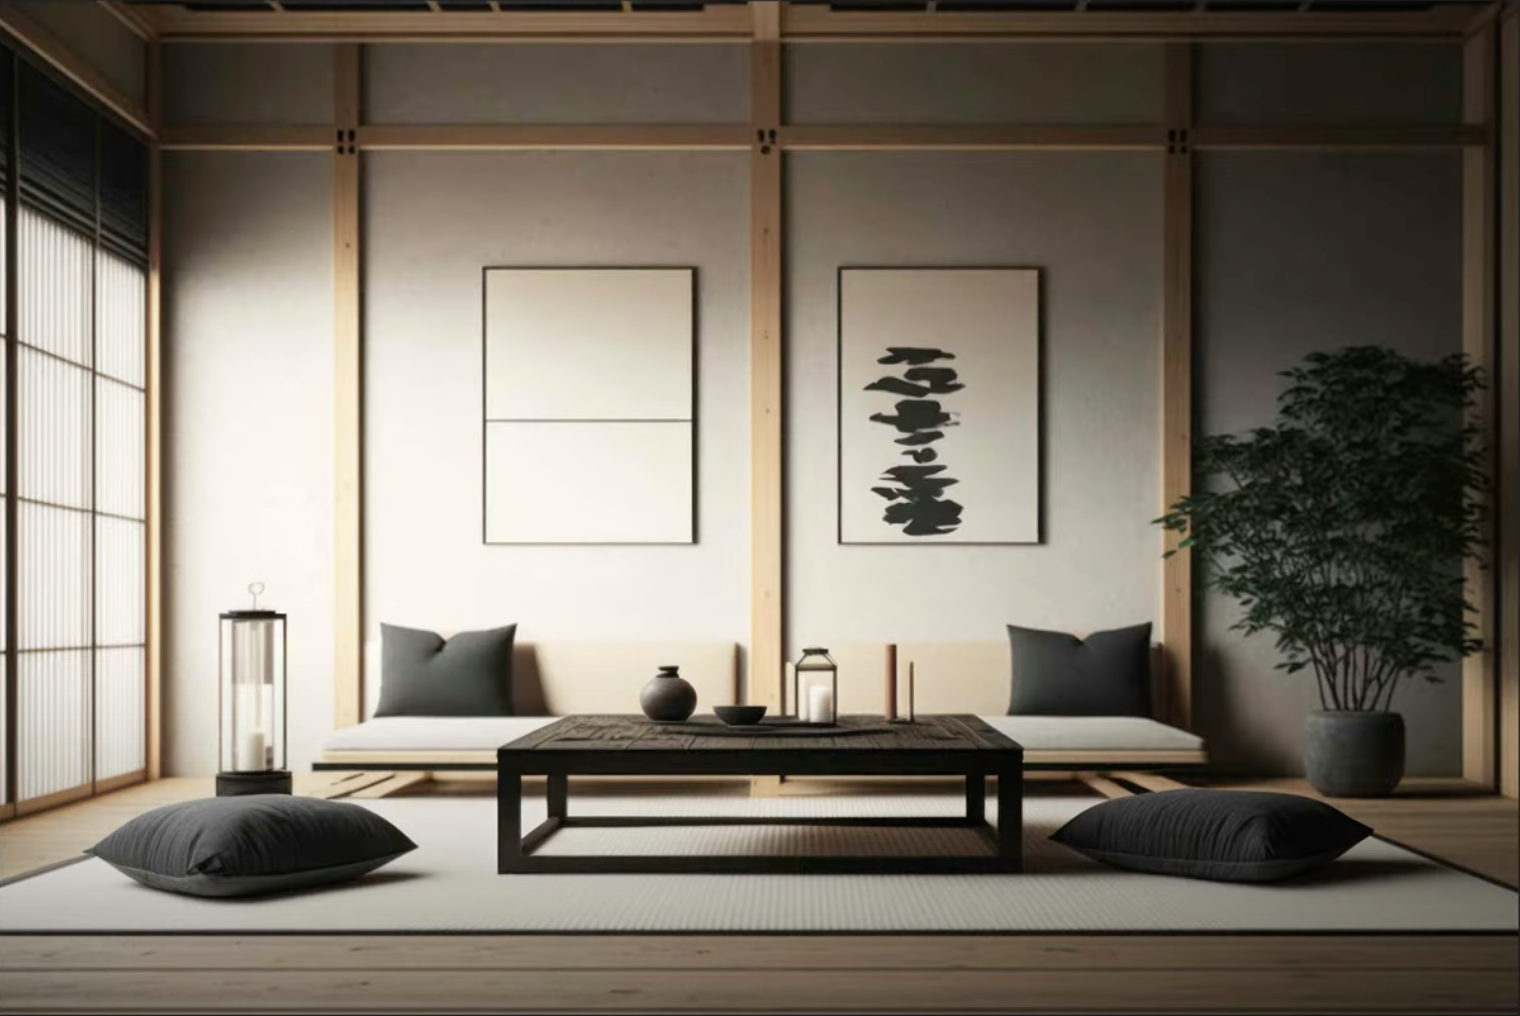
Let's see what happens when we apply different ControlNets on these two images. In other words, let's go through this process for each type of conditioner:
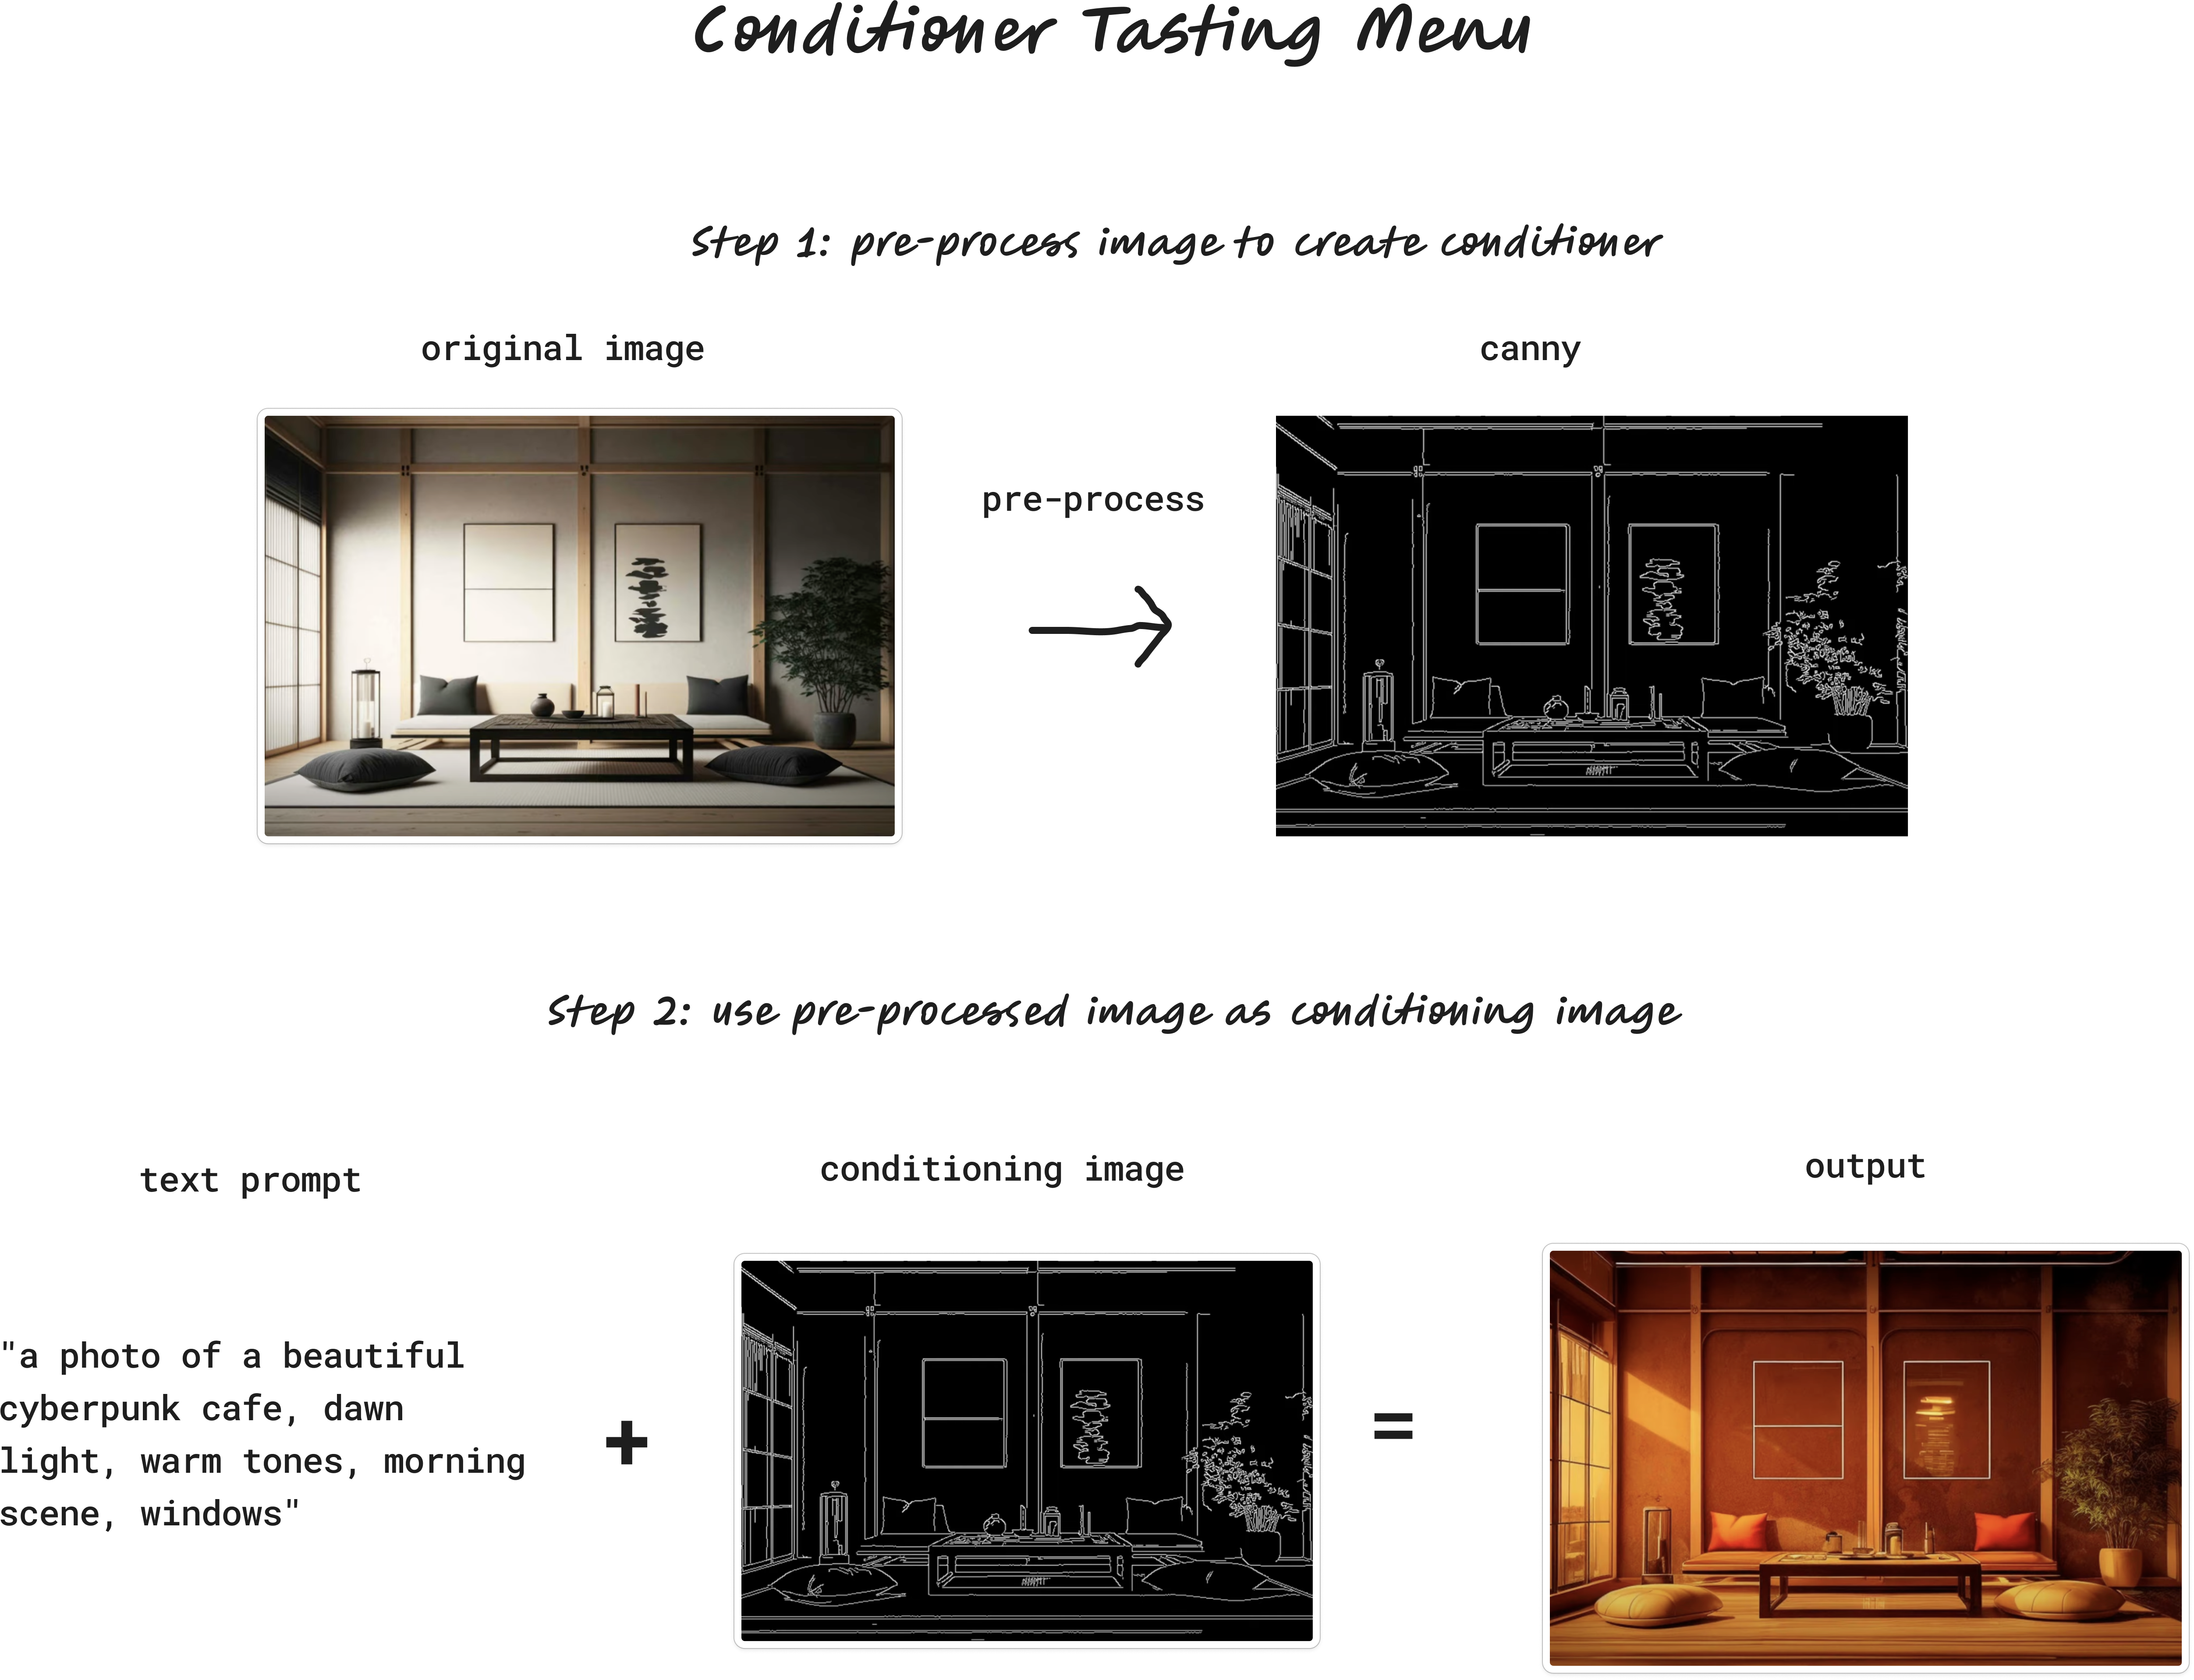
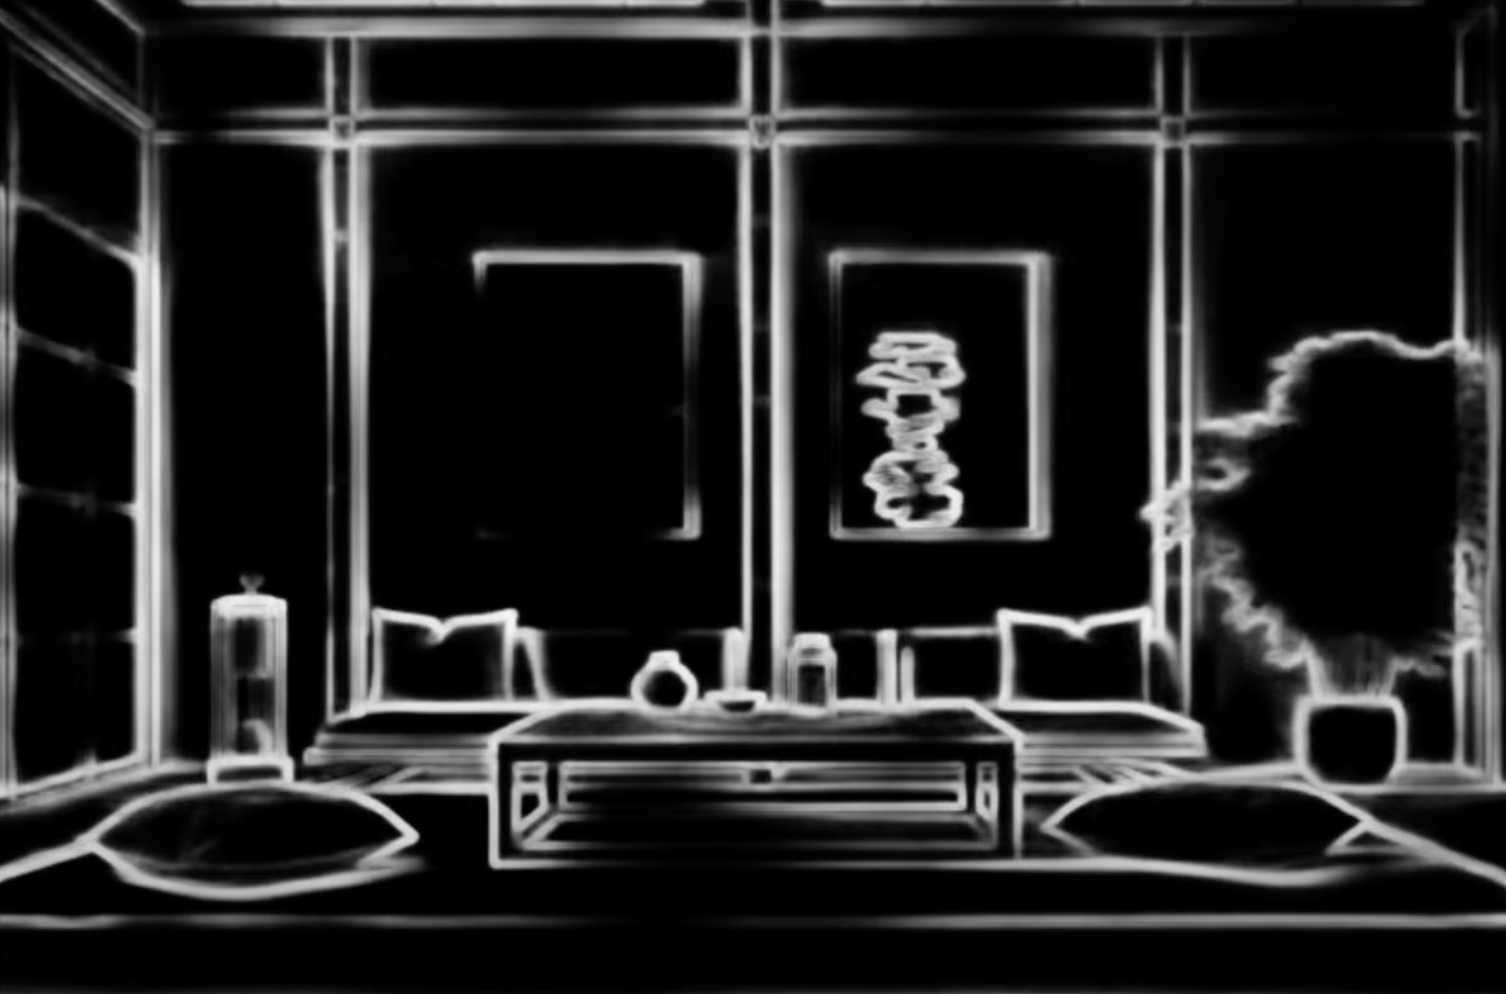
Canny — Edge detection
Canny is a widely used edge detector.
Here's our tea room after going through the Canny pre-processor:
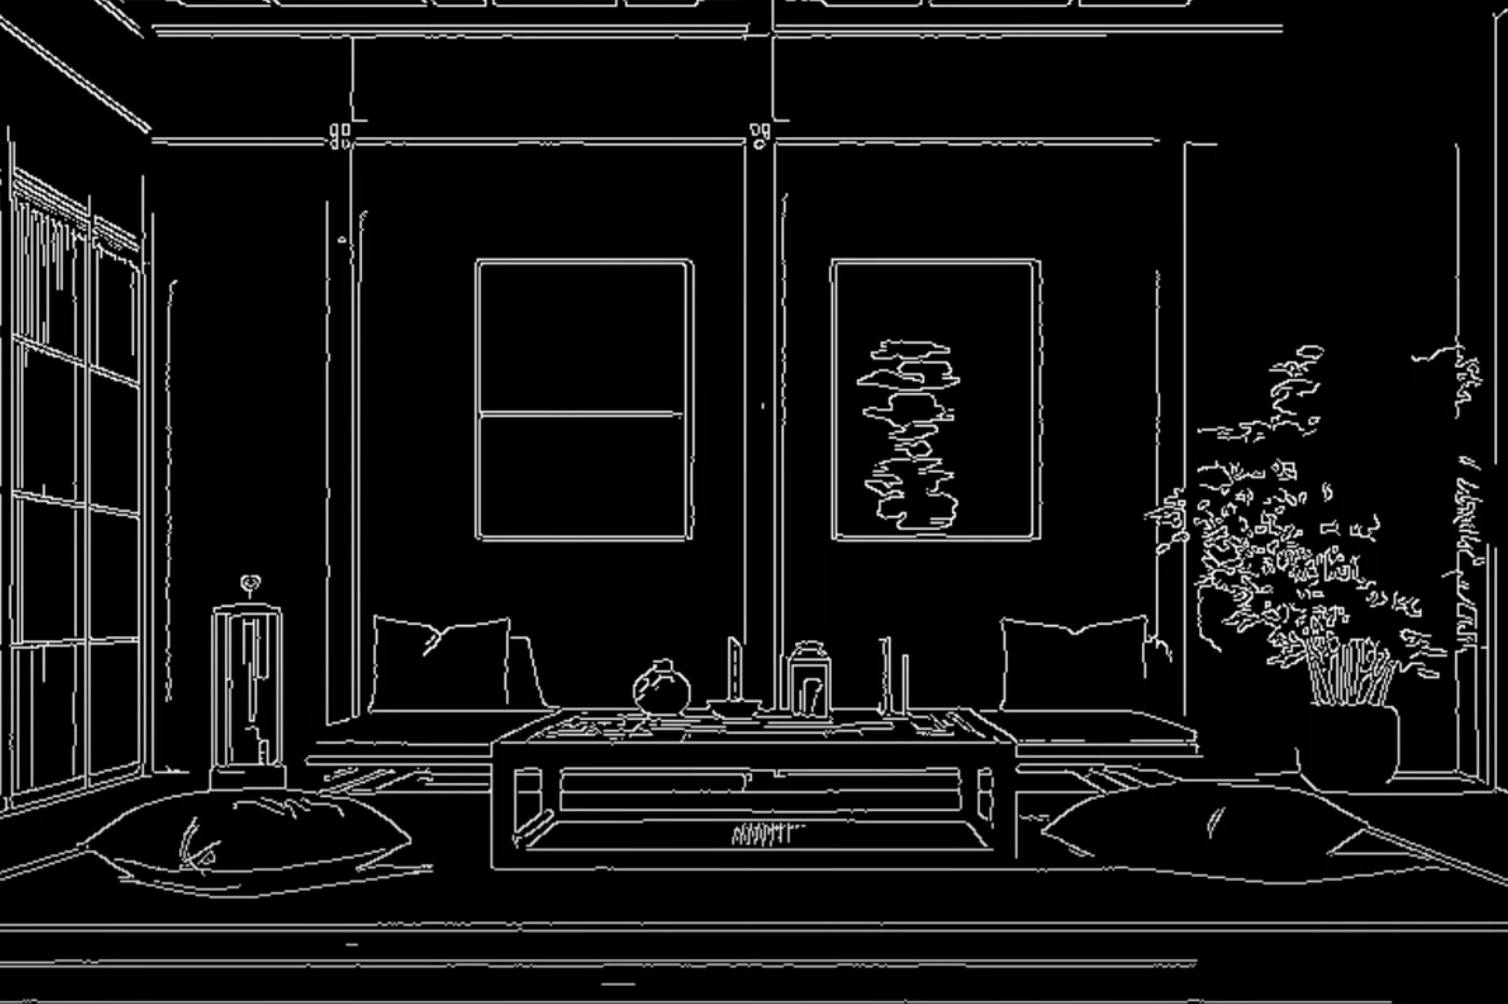
Remember our prompt from earlier?
"a photo of a beautiful cyberpunk
cafe, dawn light, warm tones,
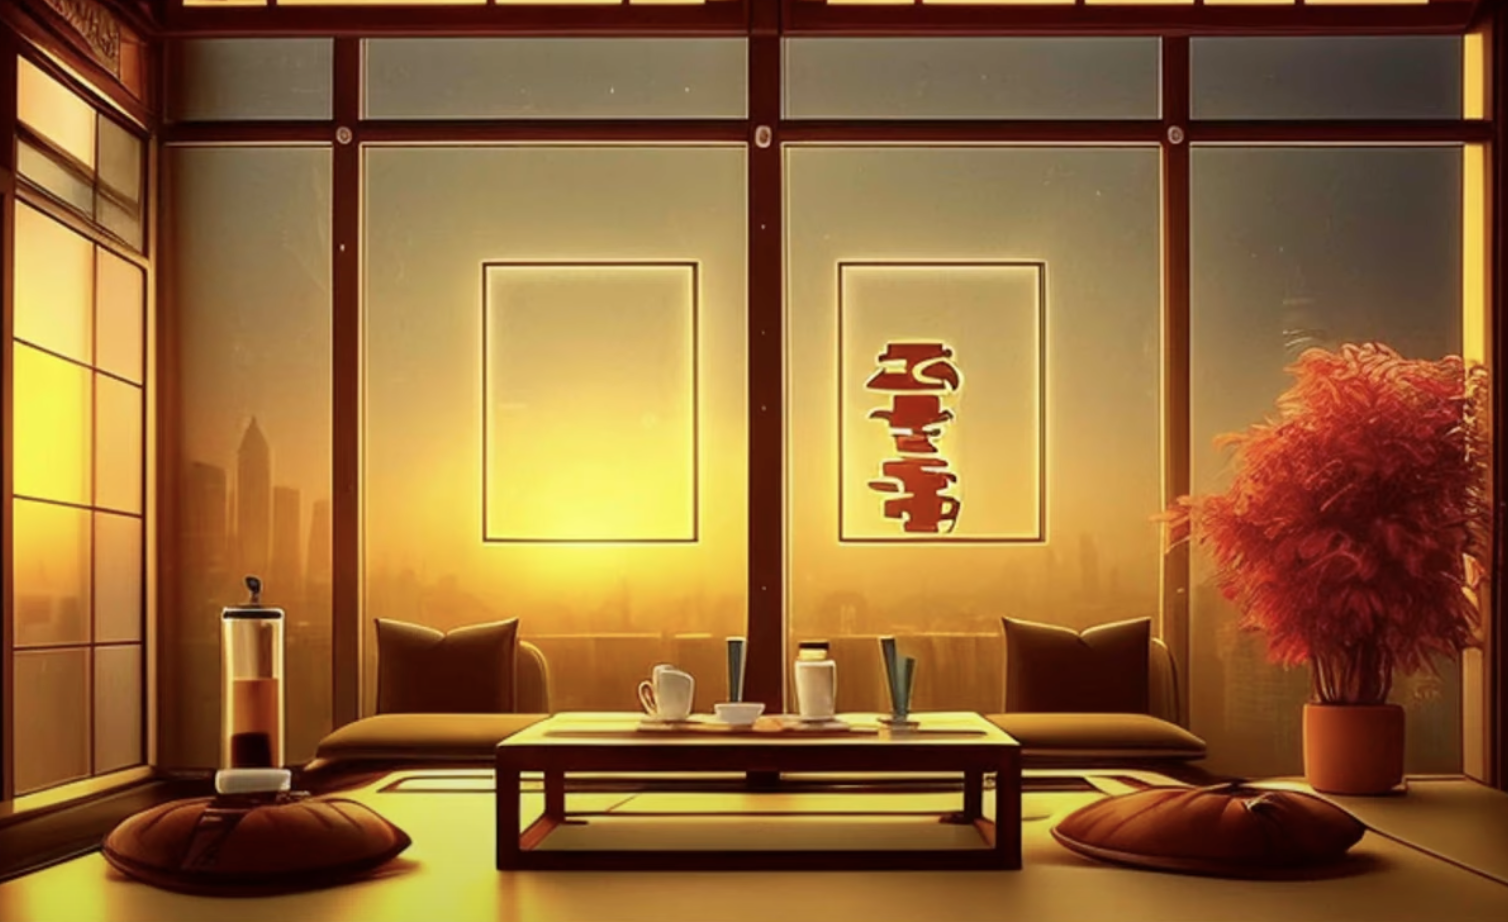
morning scene, windows"Now, when we generate an image with our new prompt, ControlNet will generate an image based on this prompt, but guided by the Canny edge detection: Result
Here's that same process applied to our image of the couple, with our new prompt:
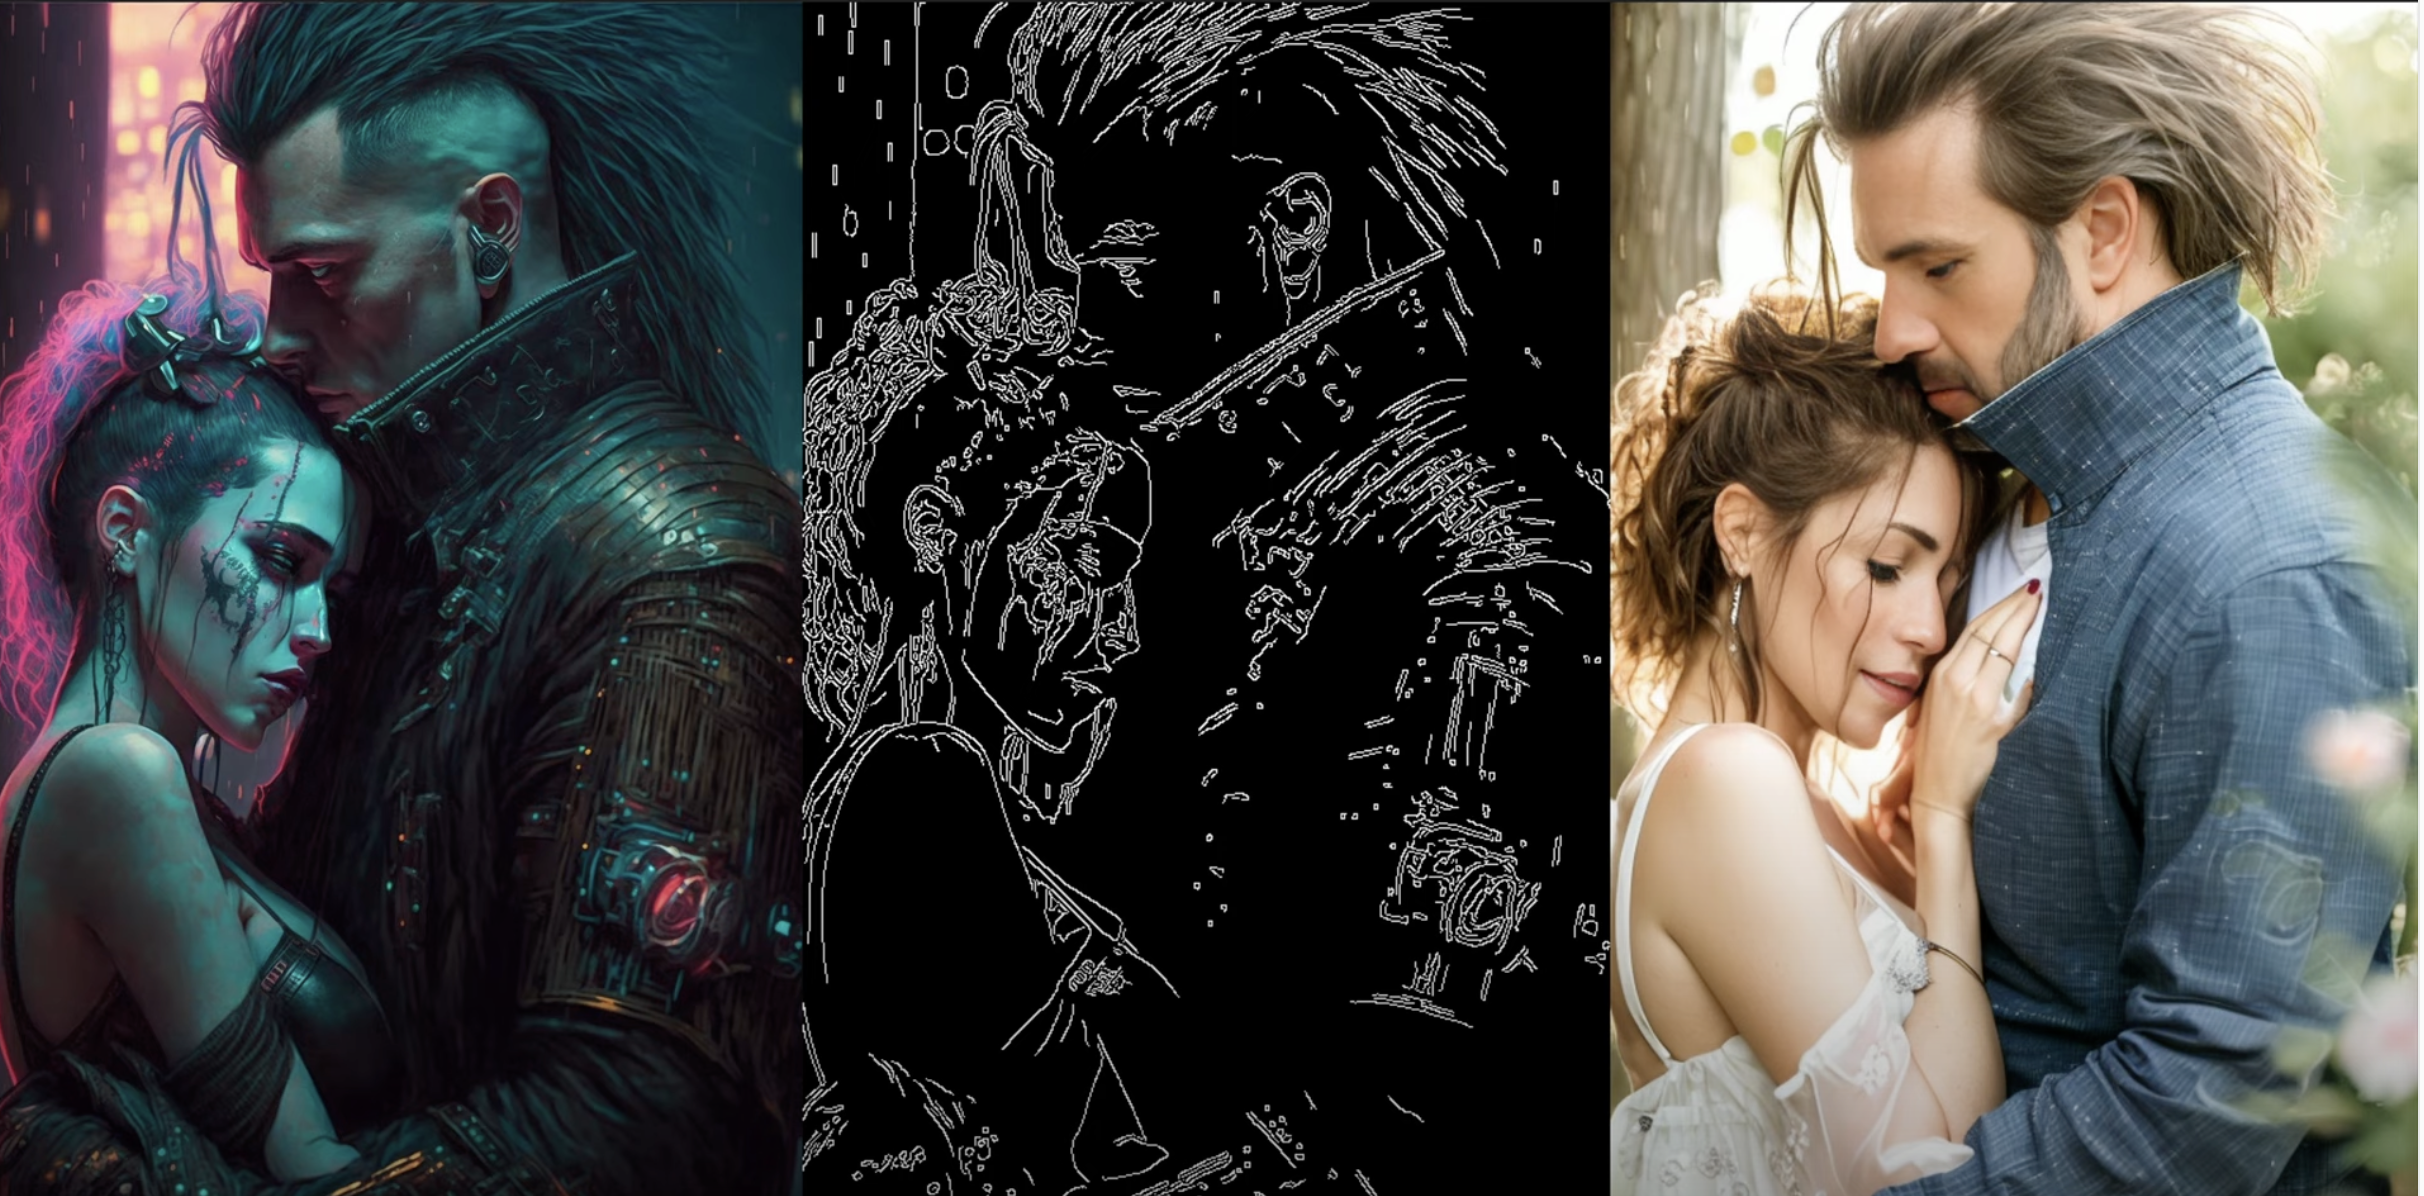
HED — Fuzzy edge detection
HED is another kind of edge detector. Here's our pre-processed output:
And here's our output:
The effect of HED is a bit more clear on our cyberpunk couple:
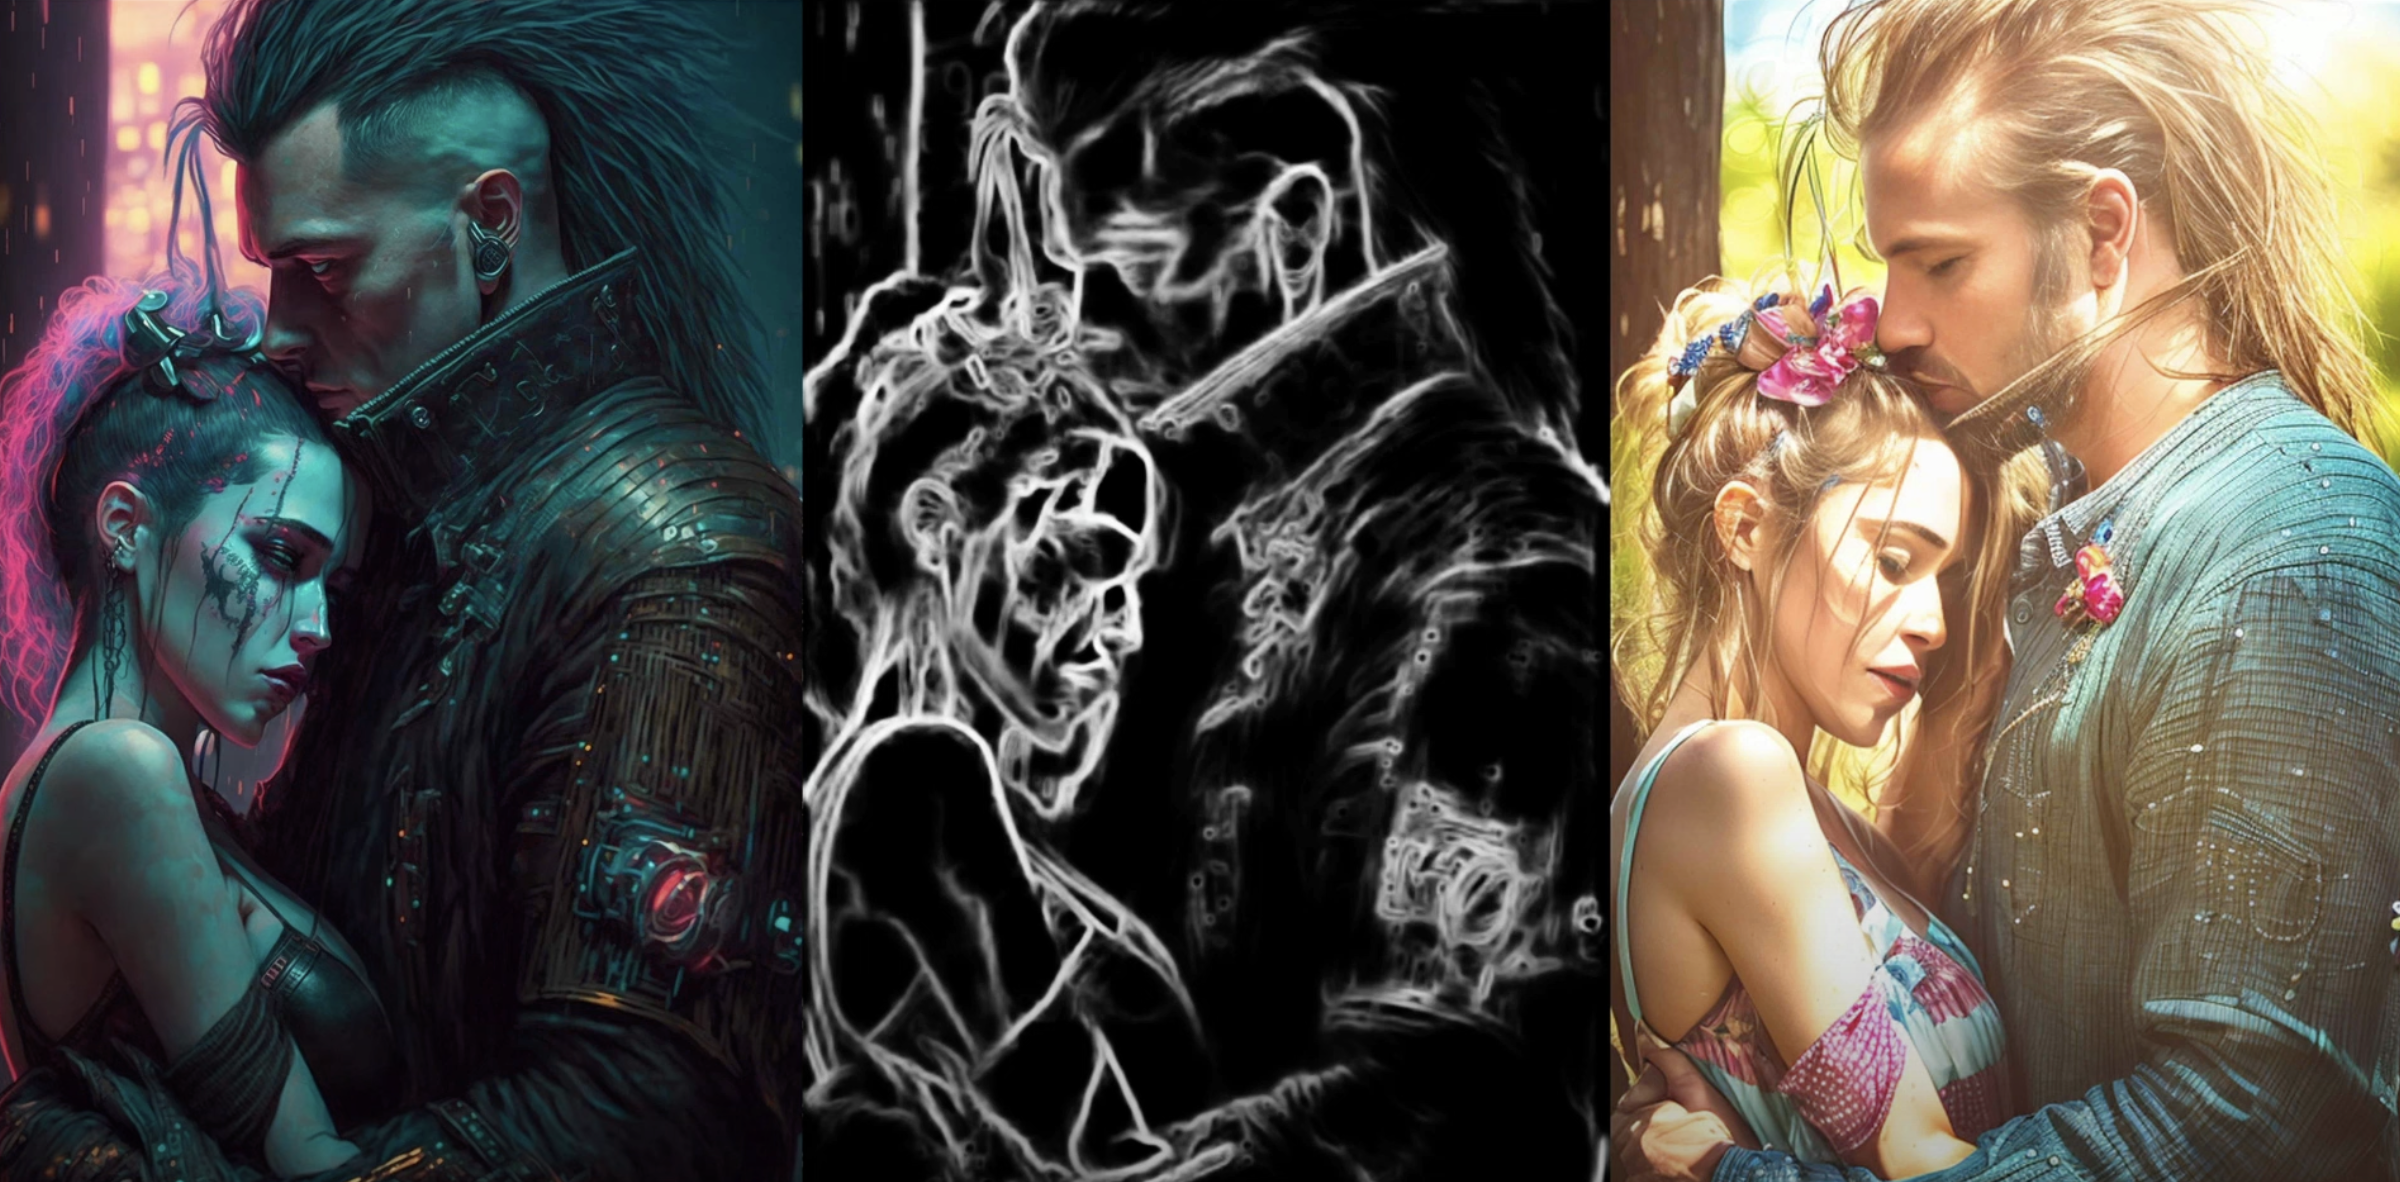
Note that many details that were lost in the Canny version are present in HED detection, like her hand placement, the angle of the overhead light, and her headpiece. Note also where HED struggles—his collar becomes a streak of hair, and her makeup becomes a shadow. HED works really well for painting and art.
M-LSD — Straight line detection
M-LSD is another kind of edge detection that only works on straight lines. Here's M-LSD on our tea room:
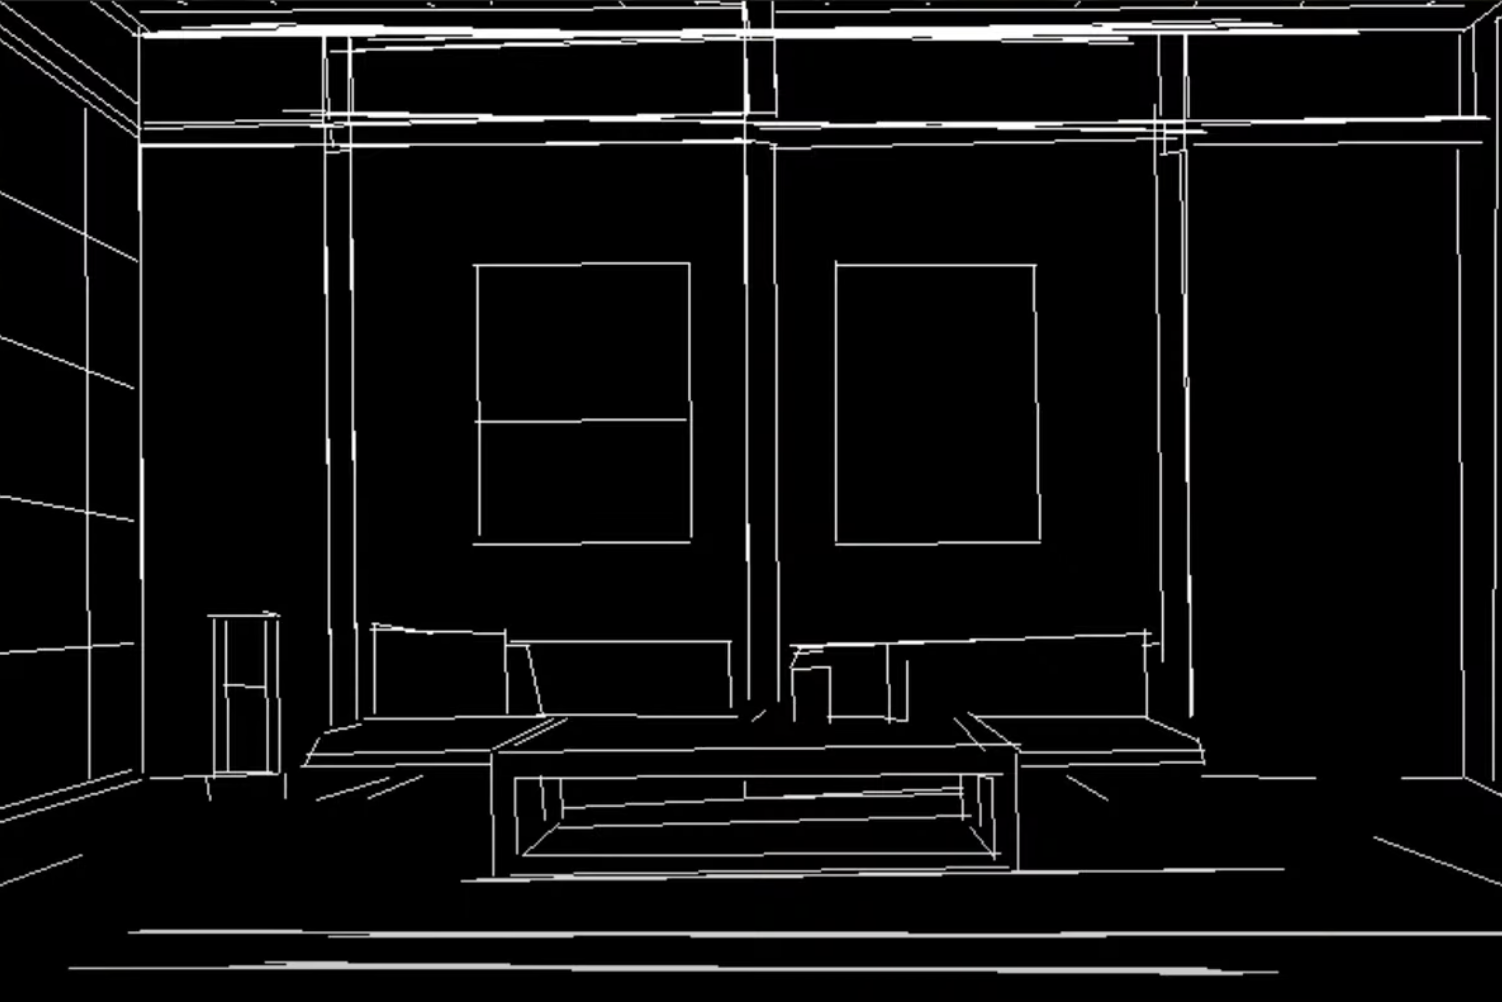

And on our cyberpunk couple:
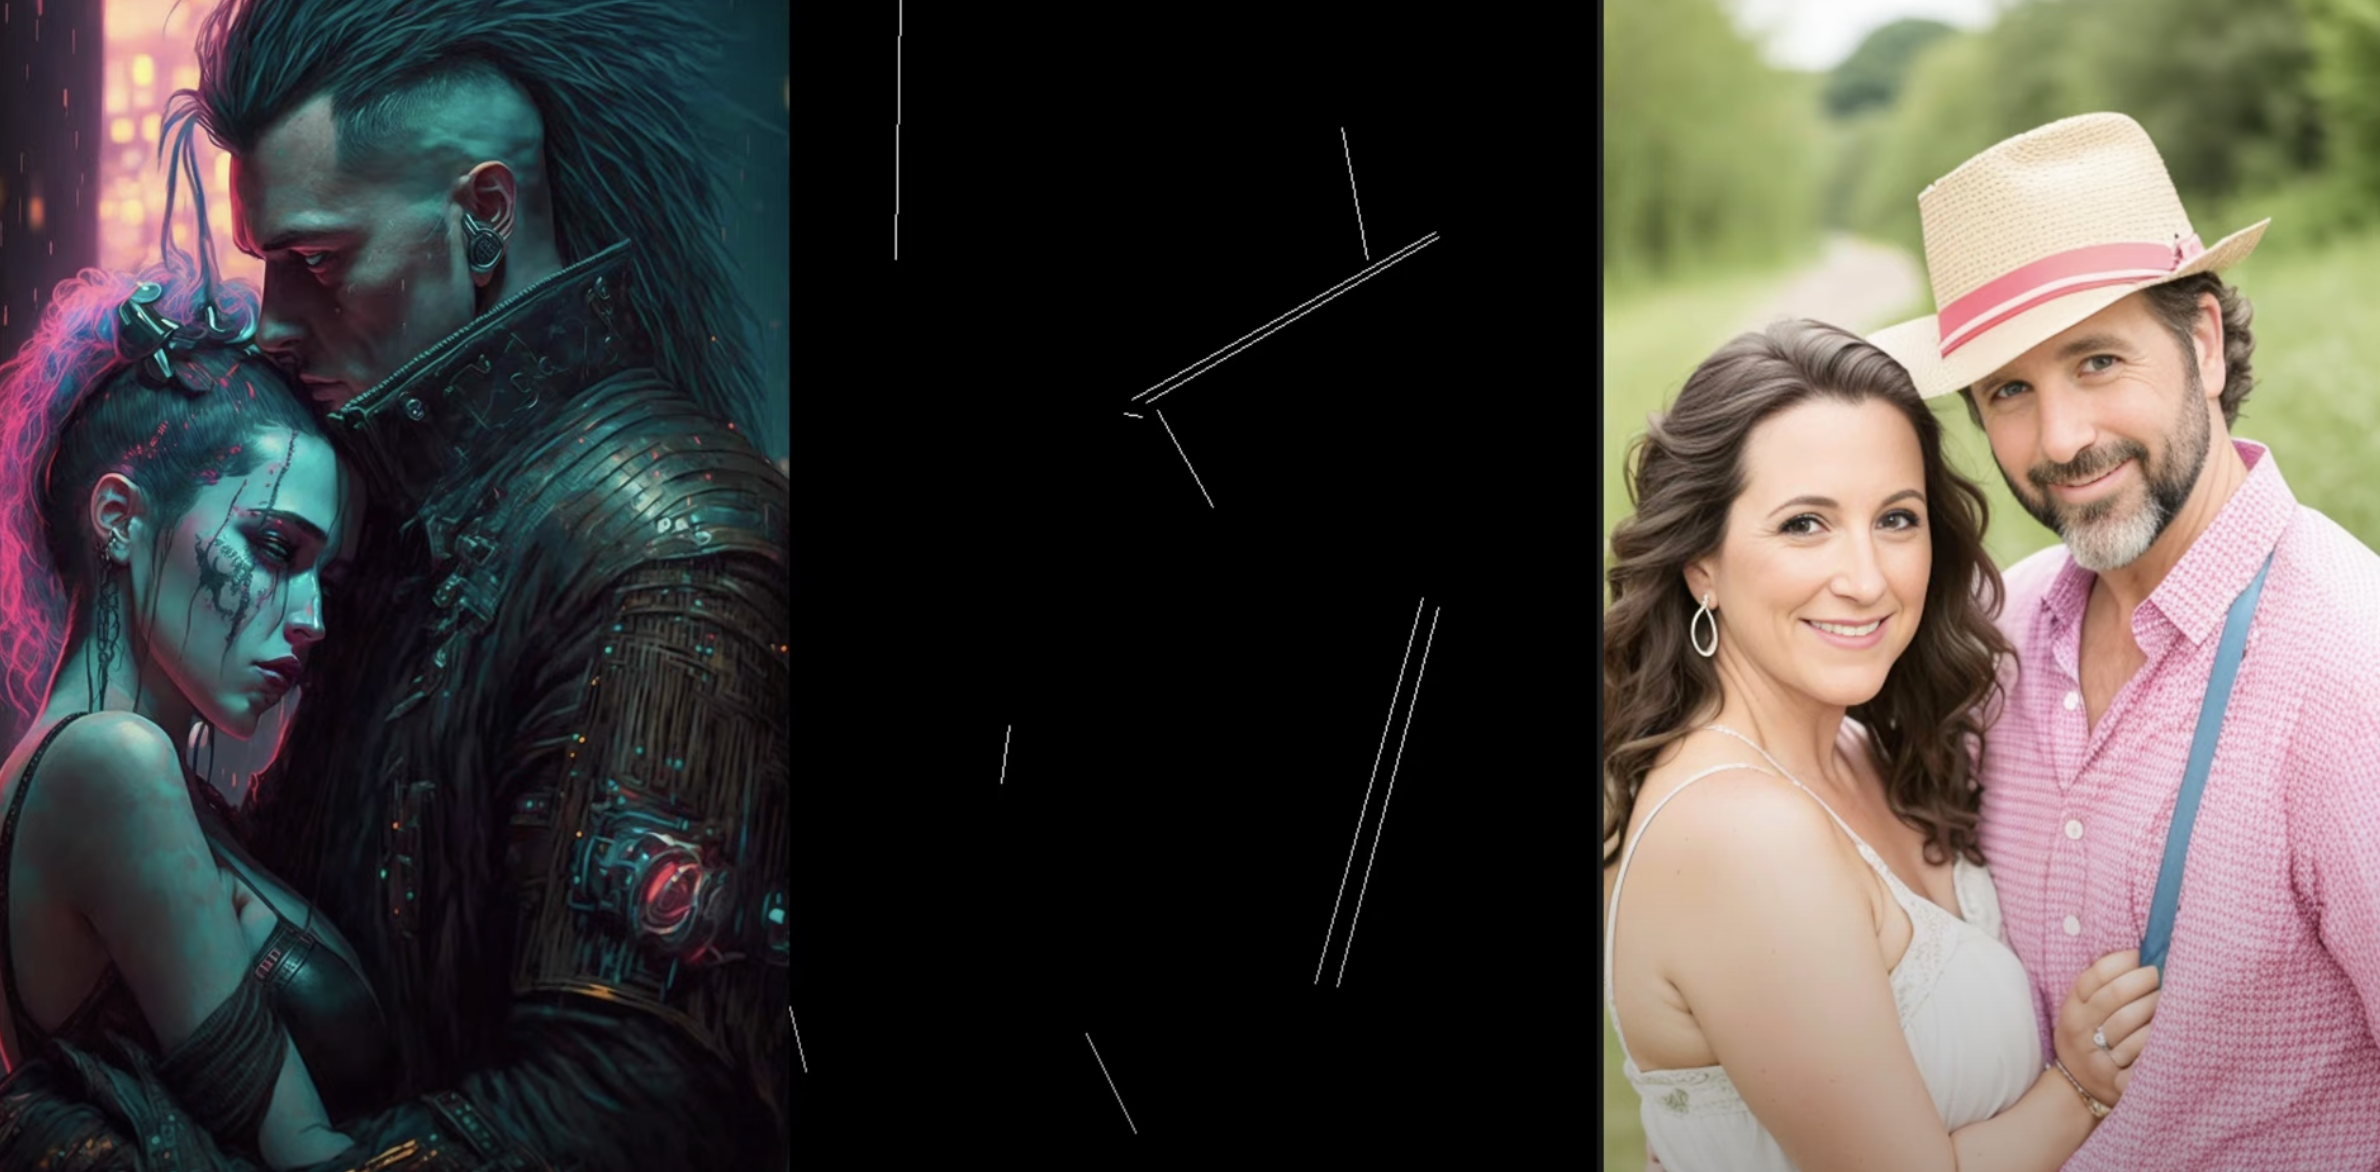
As you can tell, M-LSD doesn't work well here—there aren't many straight lines in the original.
Depth Map
A depth map works by simulating the distance of parts of the image from the camera. Here's what it looks like:
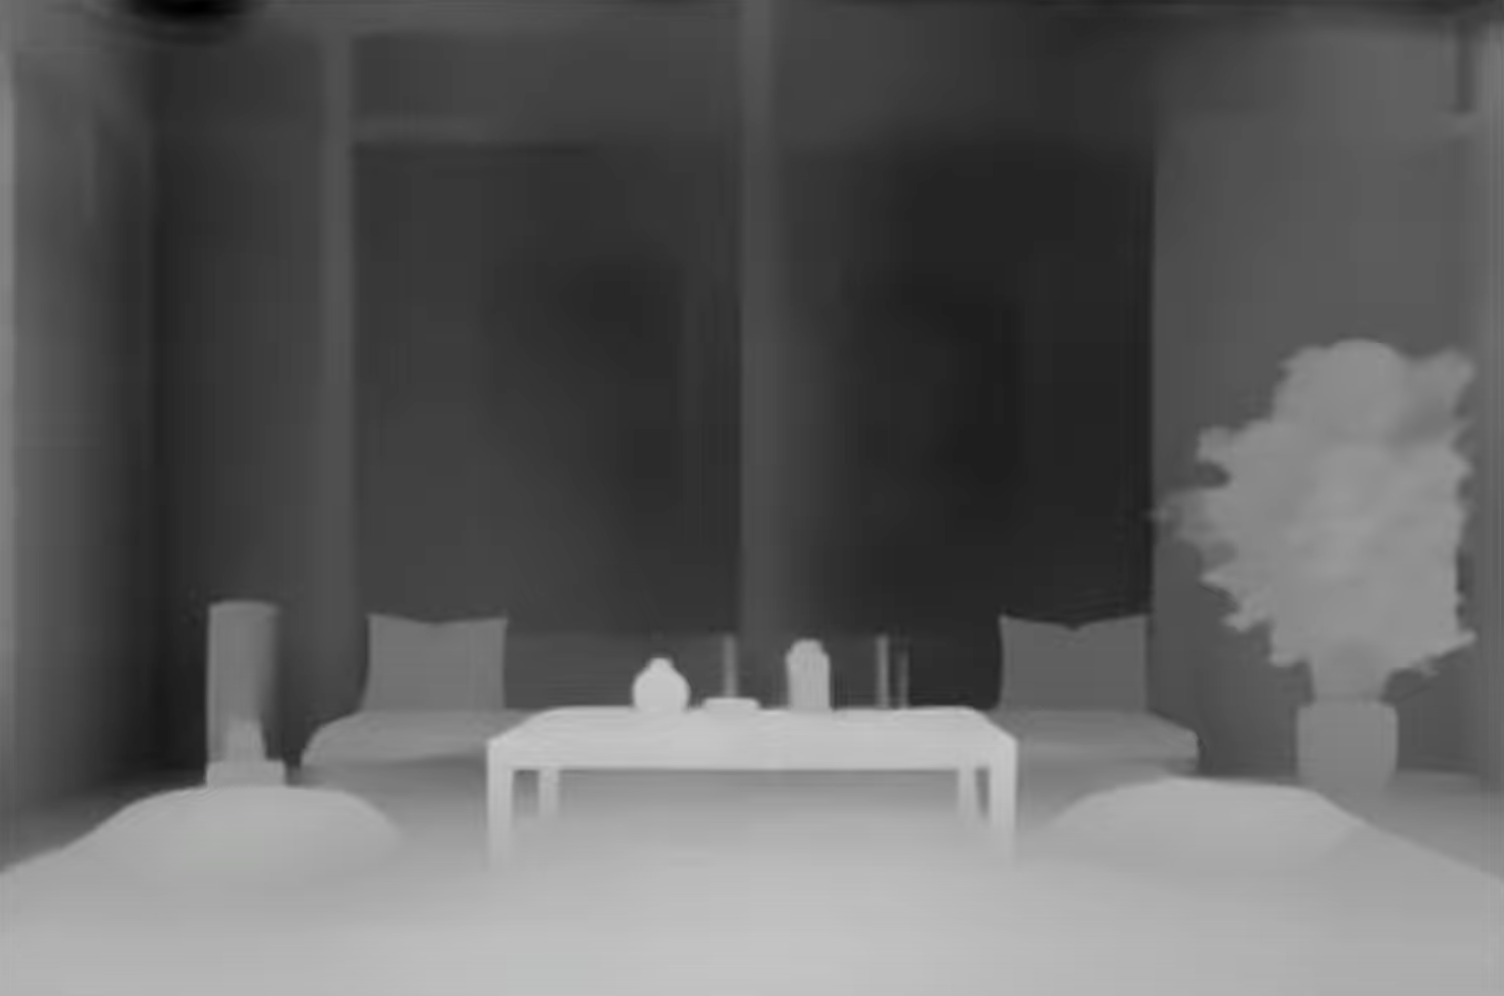
This works really well on our tea room. The frames, plants, tables and pillows are all preserved. Let's try it on our couple:
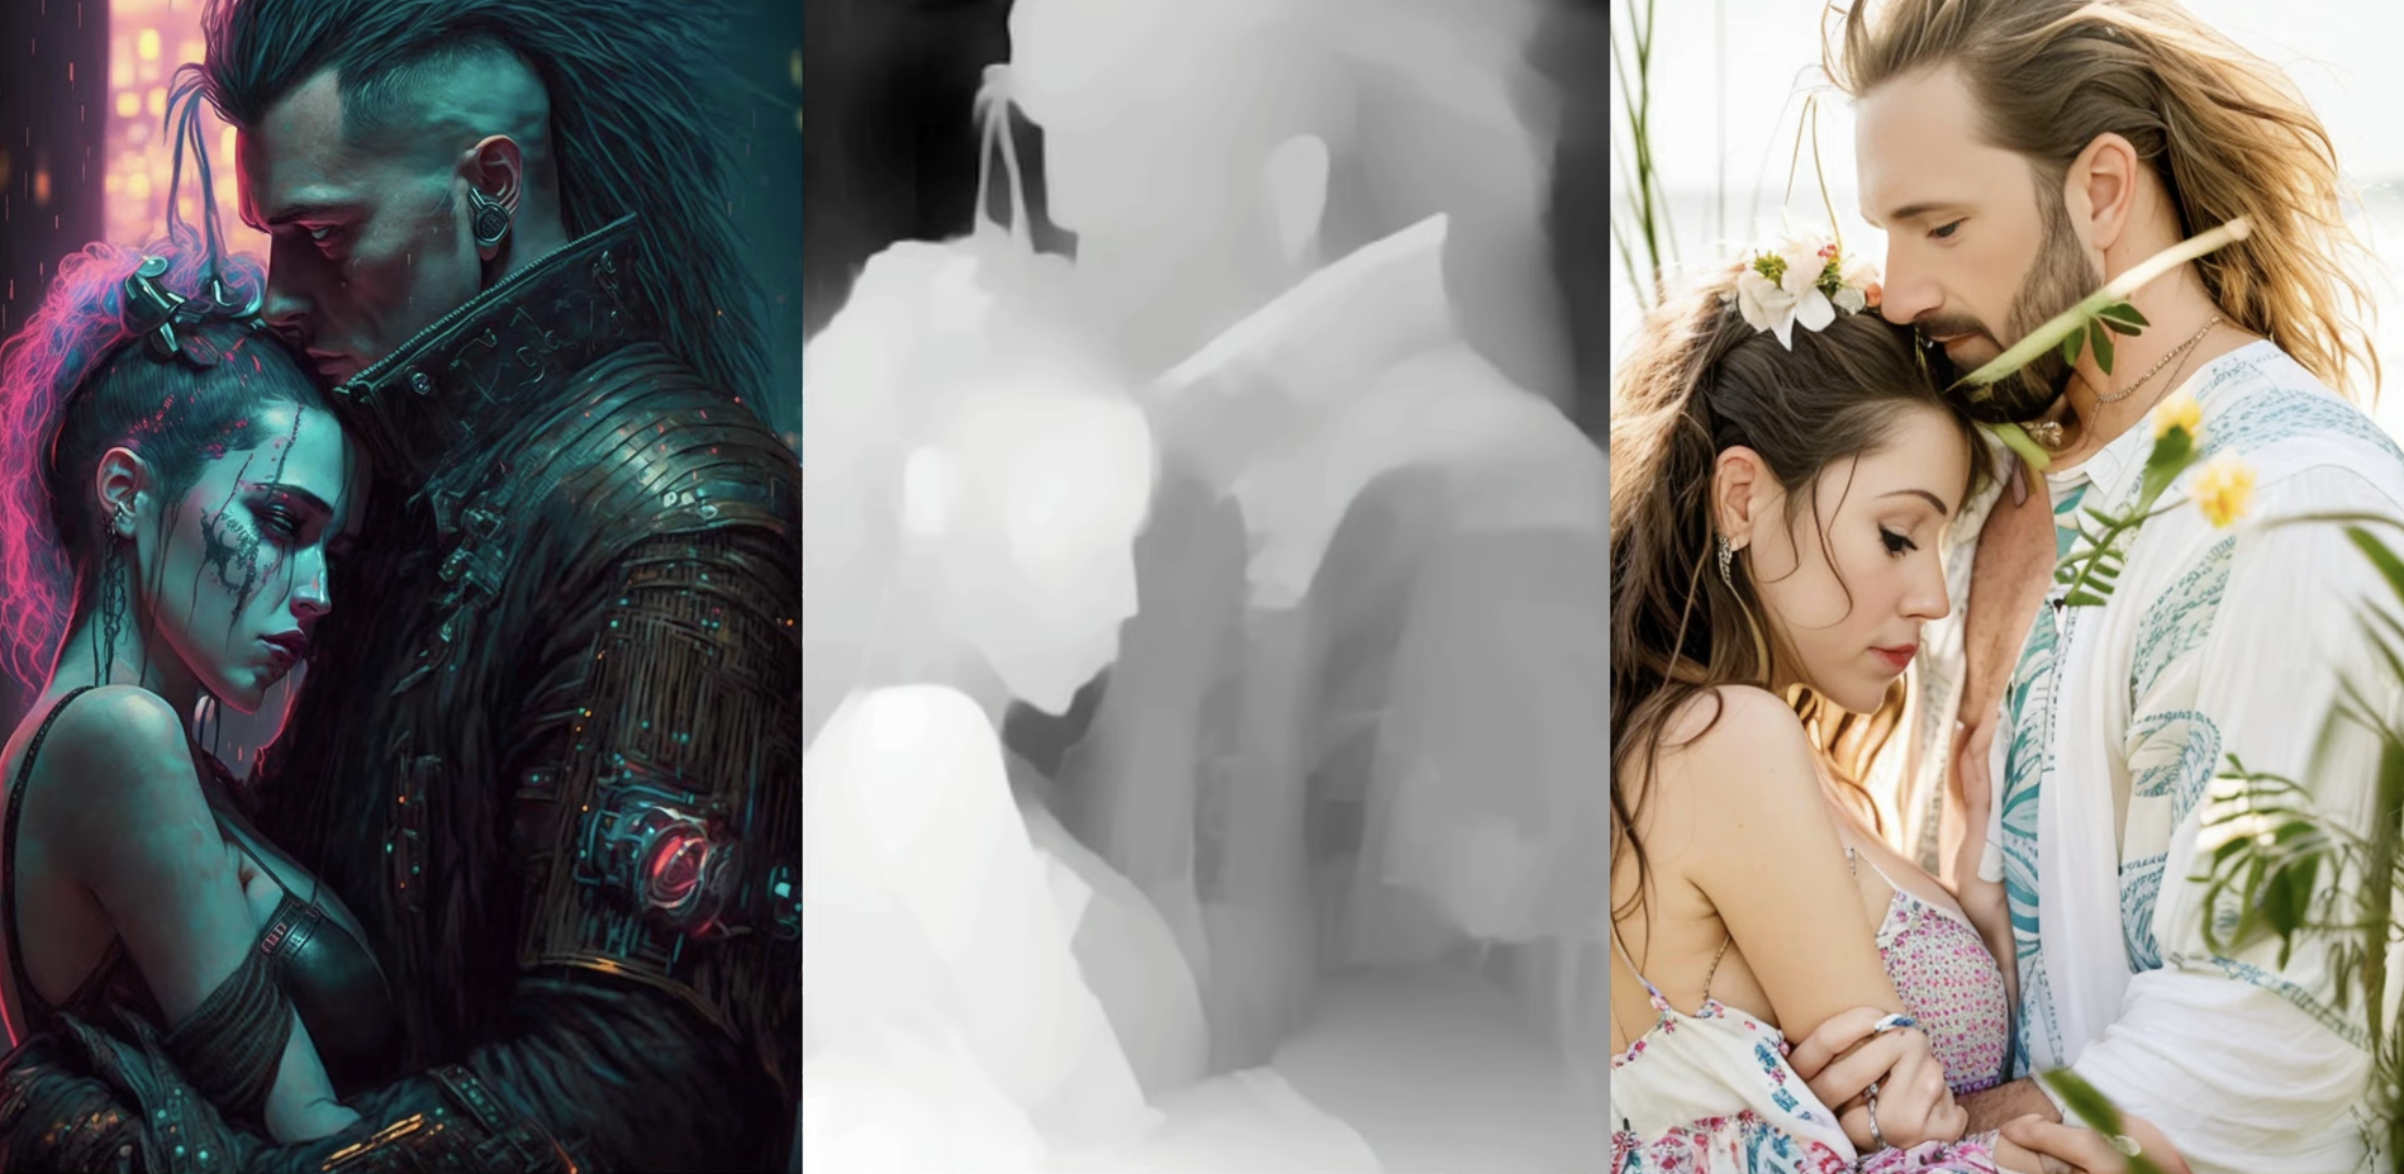
Again, the composition is preserved, but it struggles with the collar and hands.
Open pose (aka Human pose)
This one should be familiar to you! Open pose/human pose turns images of people into stick figures. Let's try it on our couple:
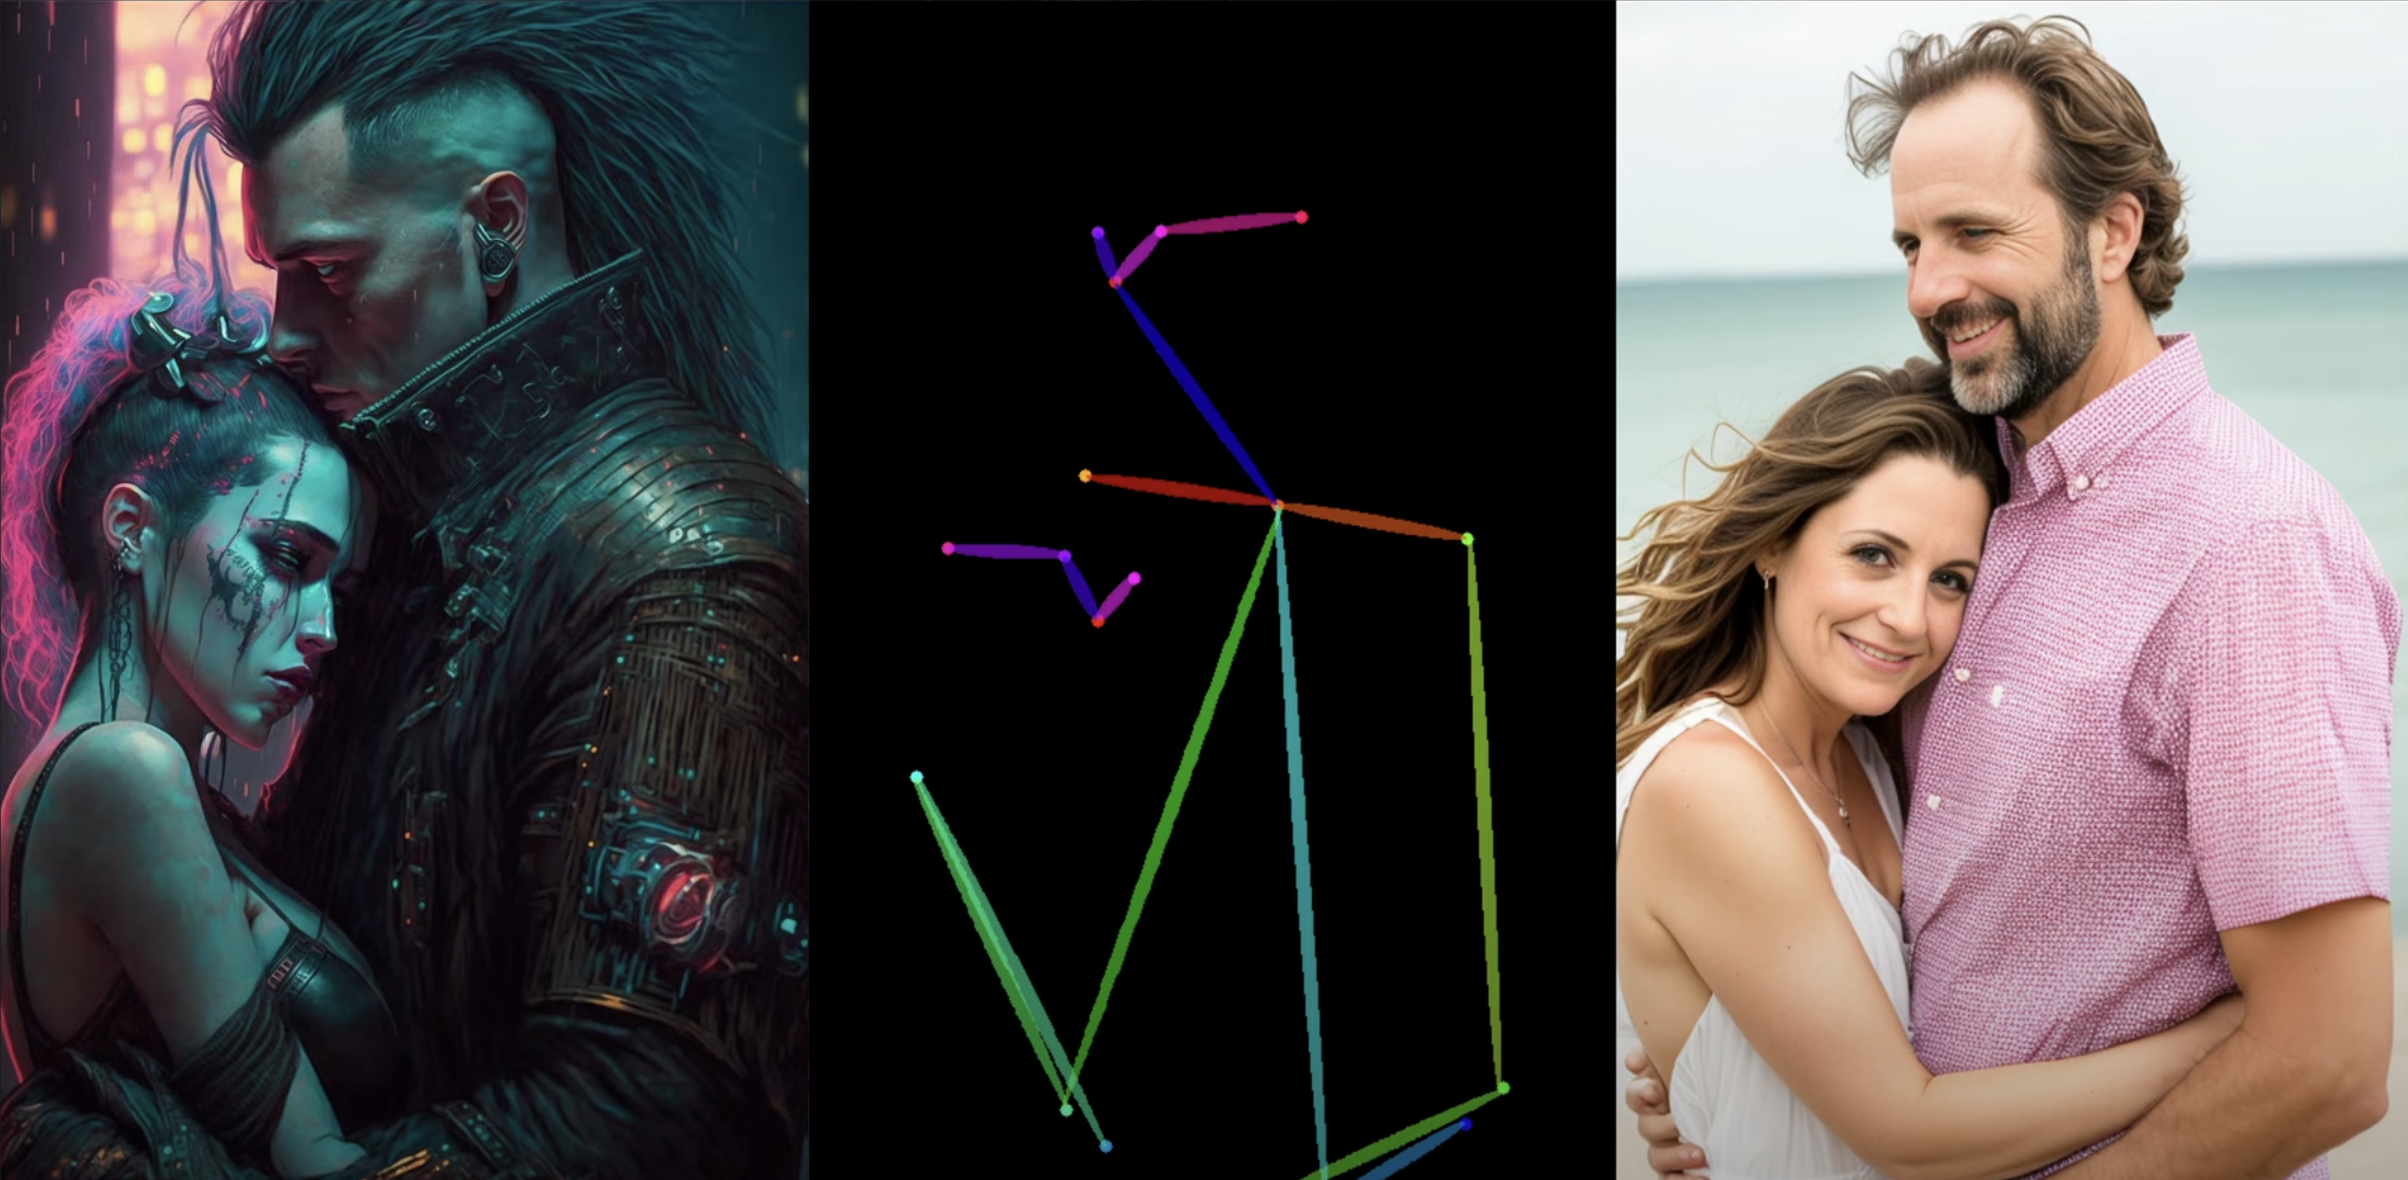
The colored bars are representations of the body parts of our characters. You can see that the poses are preserved, but the detail and style is lost.
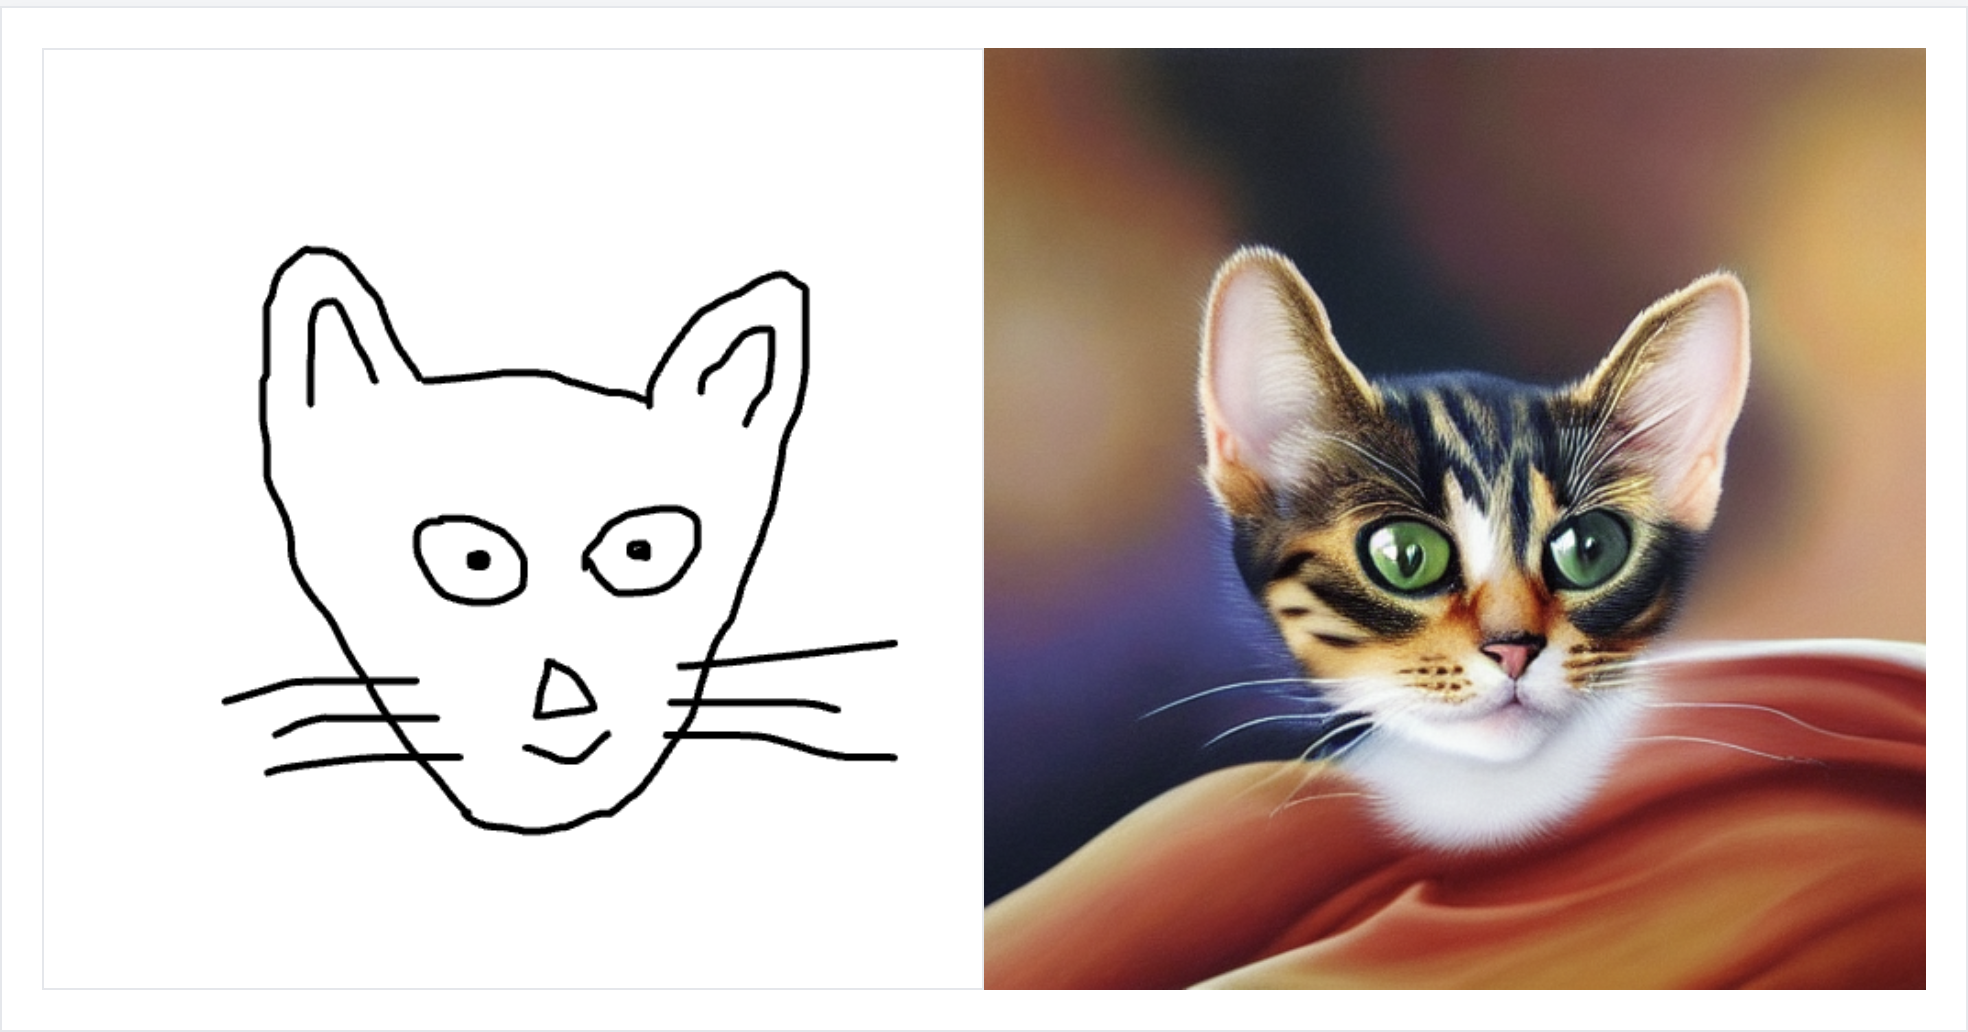
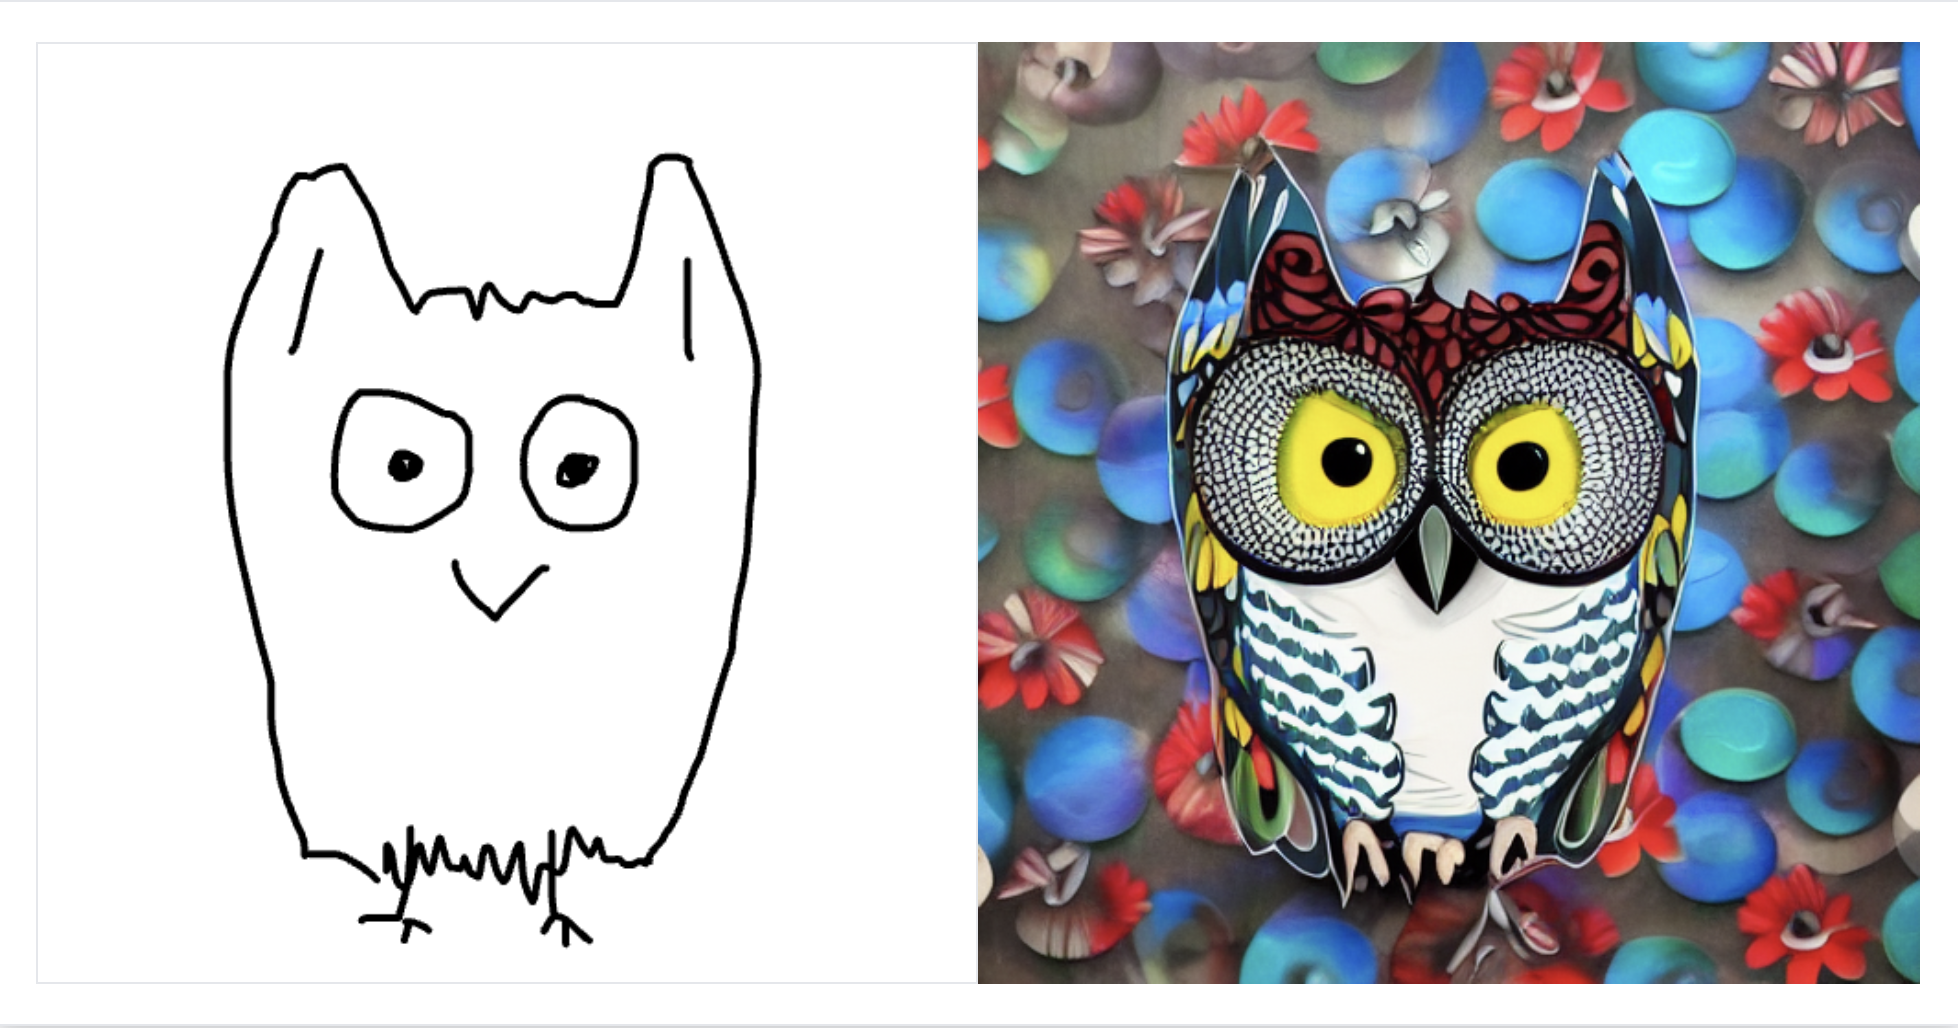
Scribble
Scribble is behind the very popular "turn a sketch into a drawing" apps. I'm going to use a different example for scribble, because it works best with a doodle input conditioner. For example, here's a doodle of a cat alongside my text prompt, "an oil painting of a cat":
Here's the same with an owl:
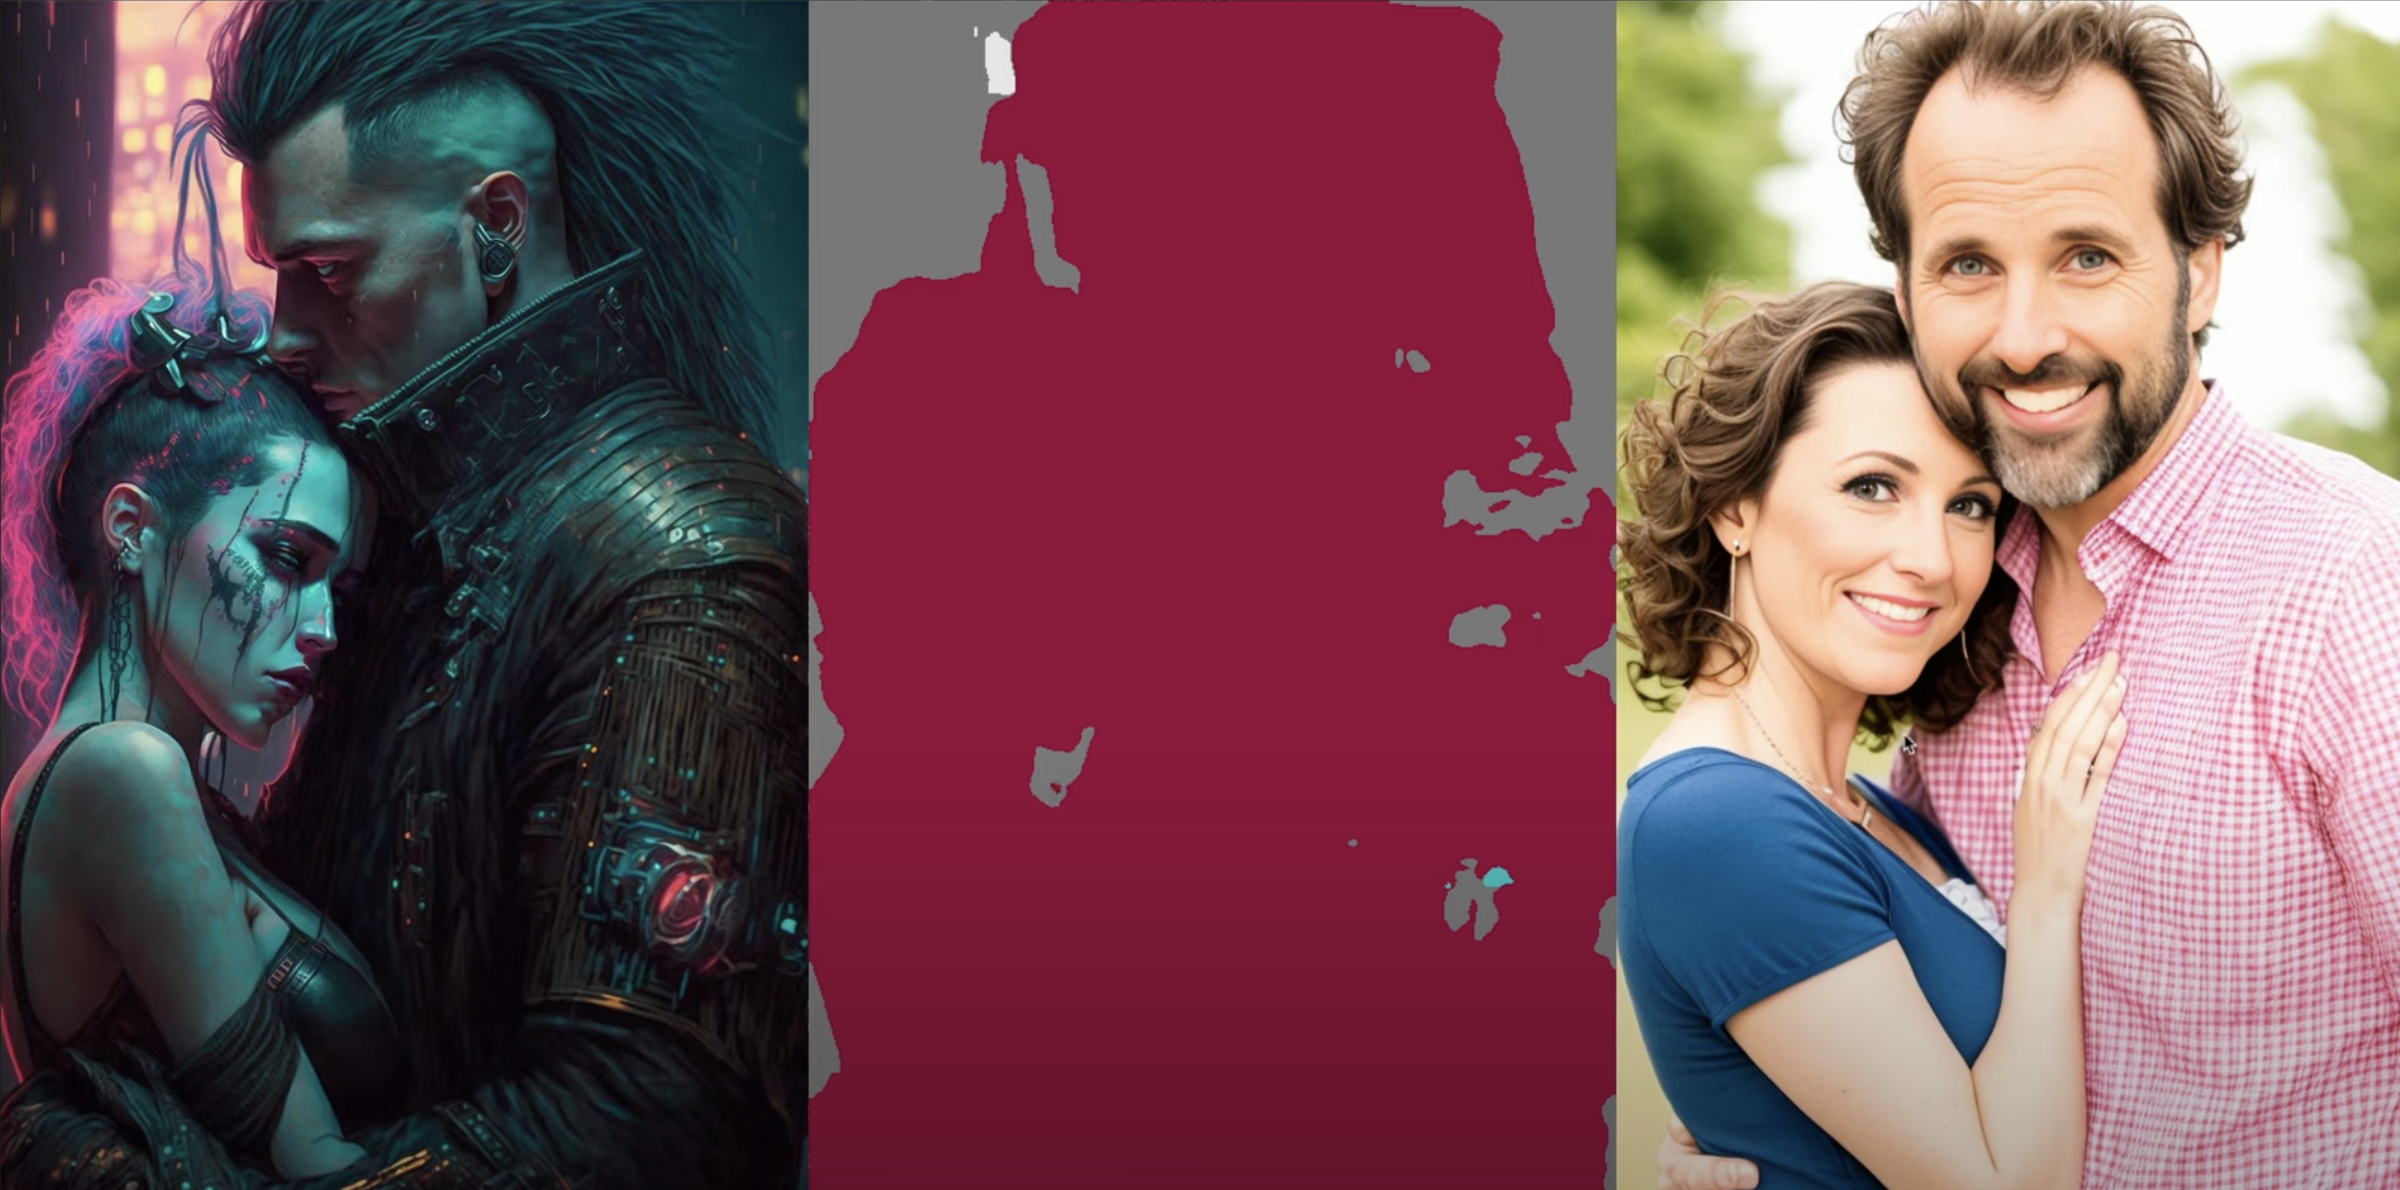
Segmentation
Segmentation breaks our image down into different segments.

We've maintained the plants, the frames, and the table, but the output is quite different. There's a bit of a fish eye effect, and we've lost the pillars in the cafe. Here's segmentation on our couple.
Normal map
A normal map detects the texture of an image.
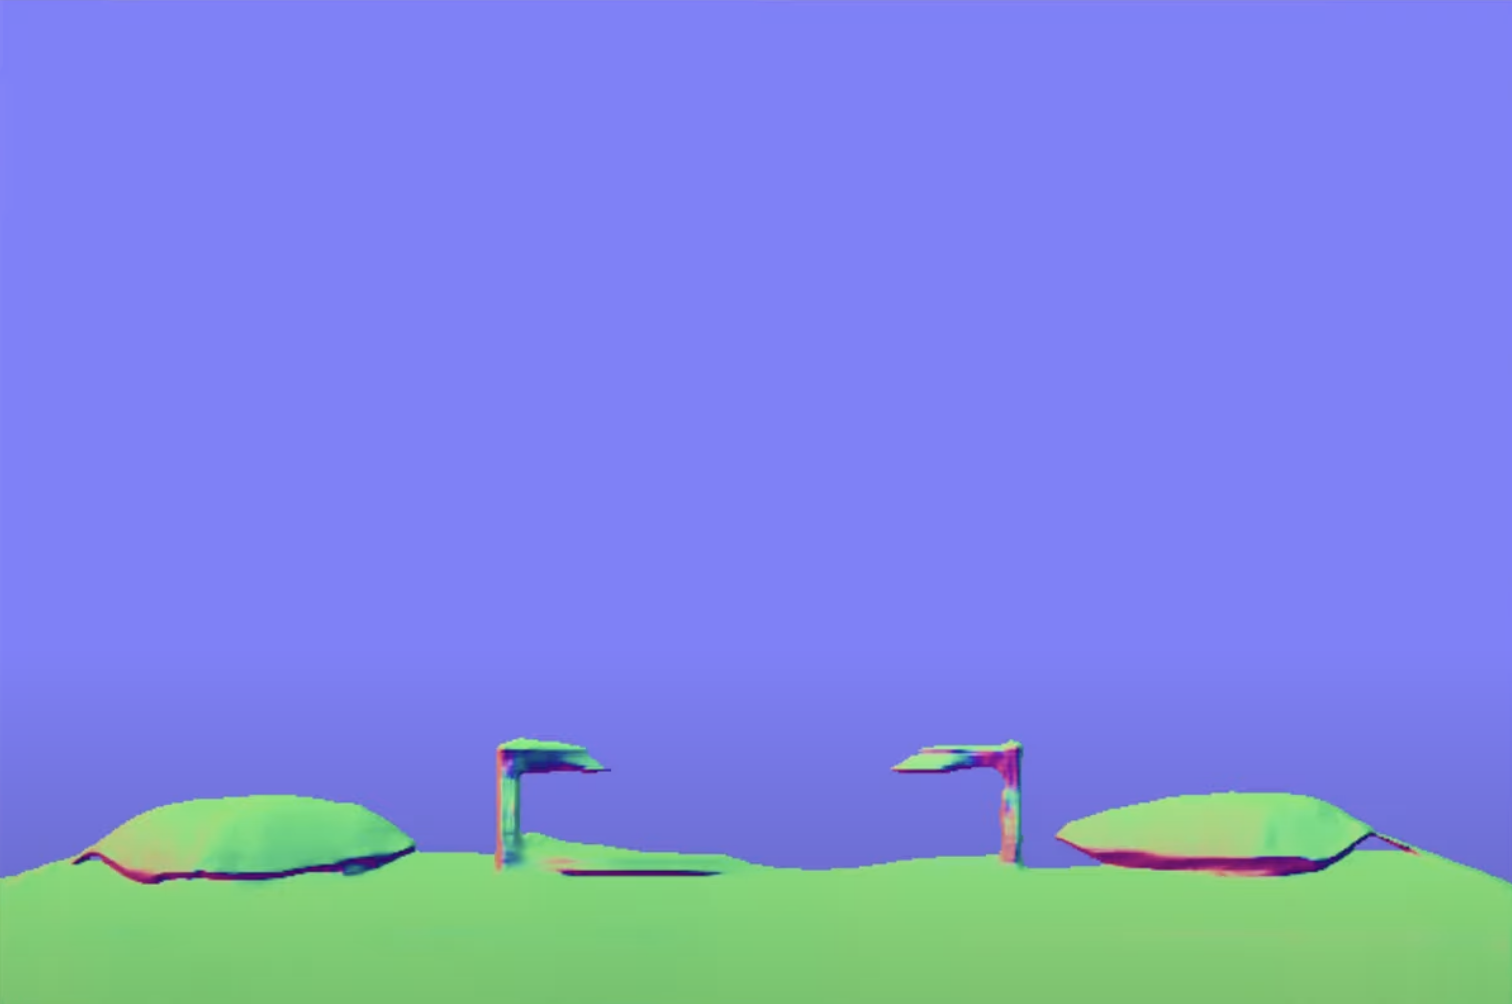
This is a nice output, but it doesn't preserve our original input at all. A normal map works much better on our couple:
How to use ControlNet
Using ControlNet is easy with Replicate 😎. We have a collection of ControlNet models here.
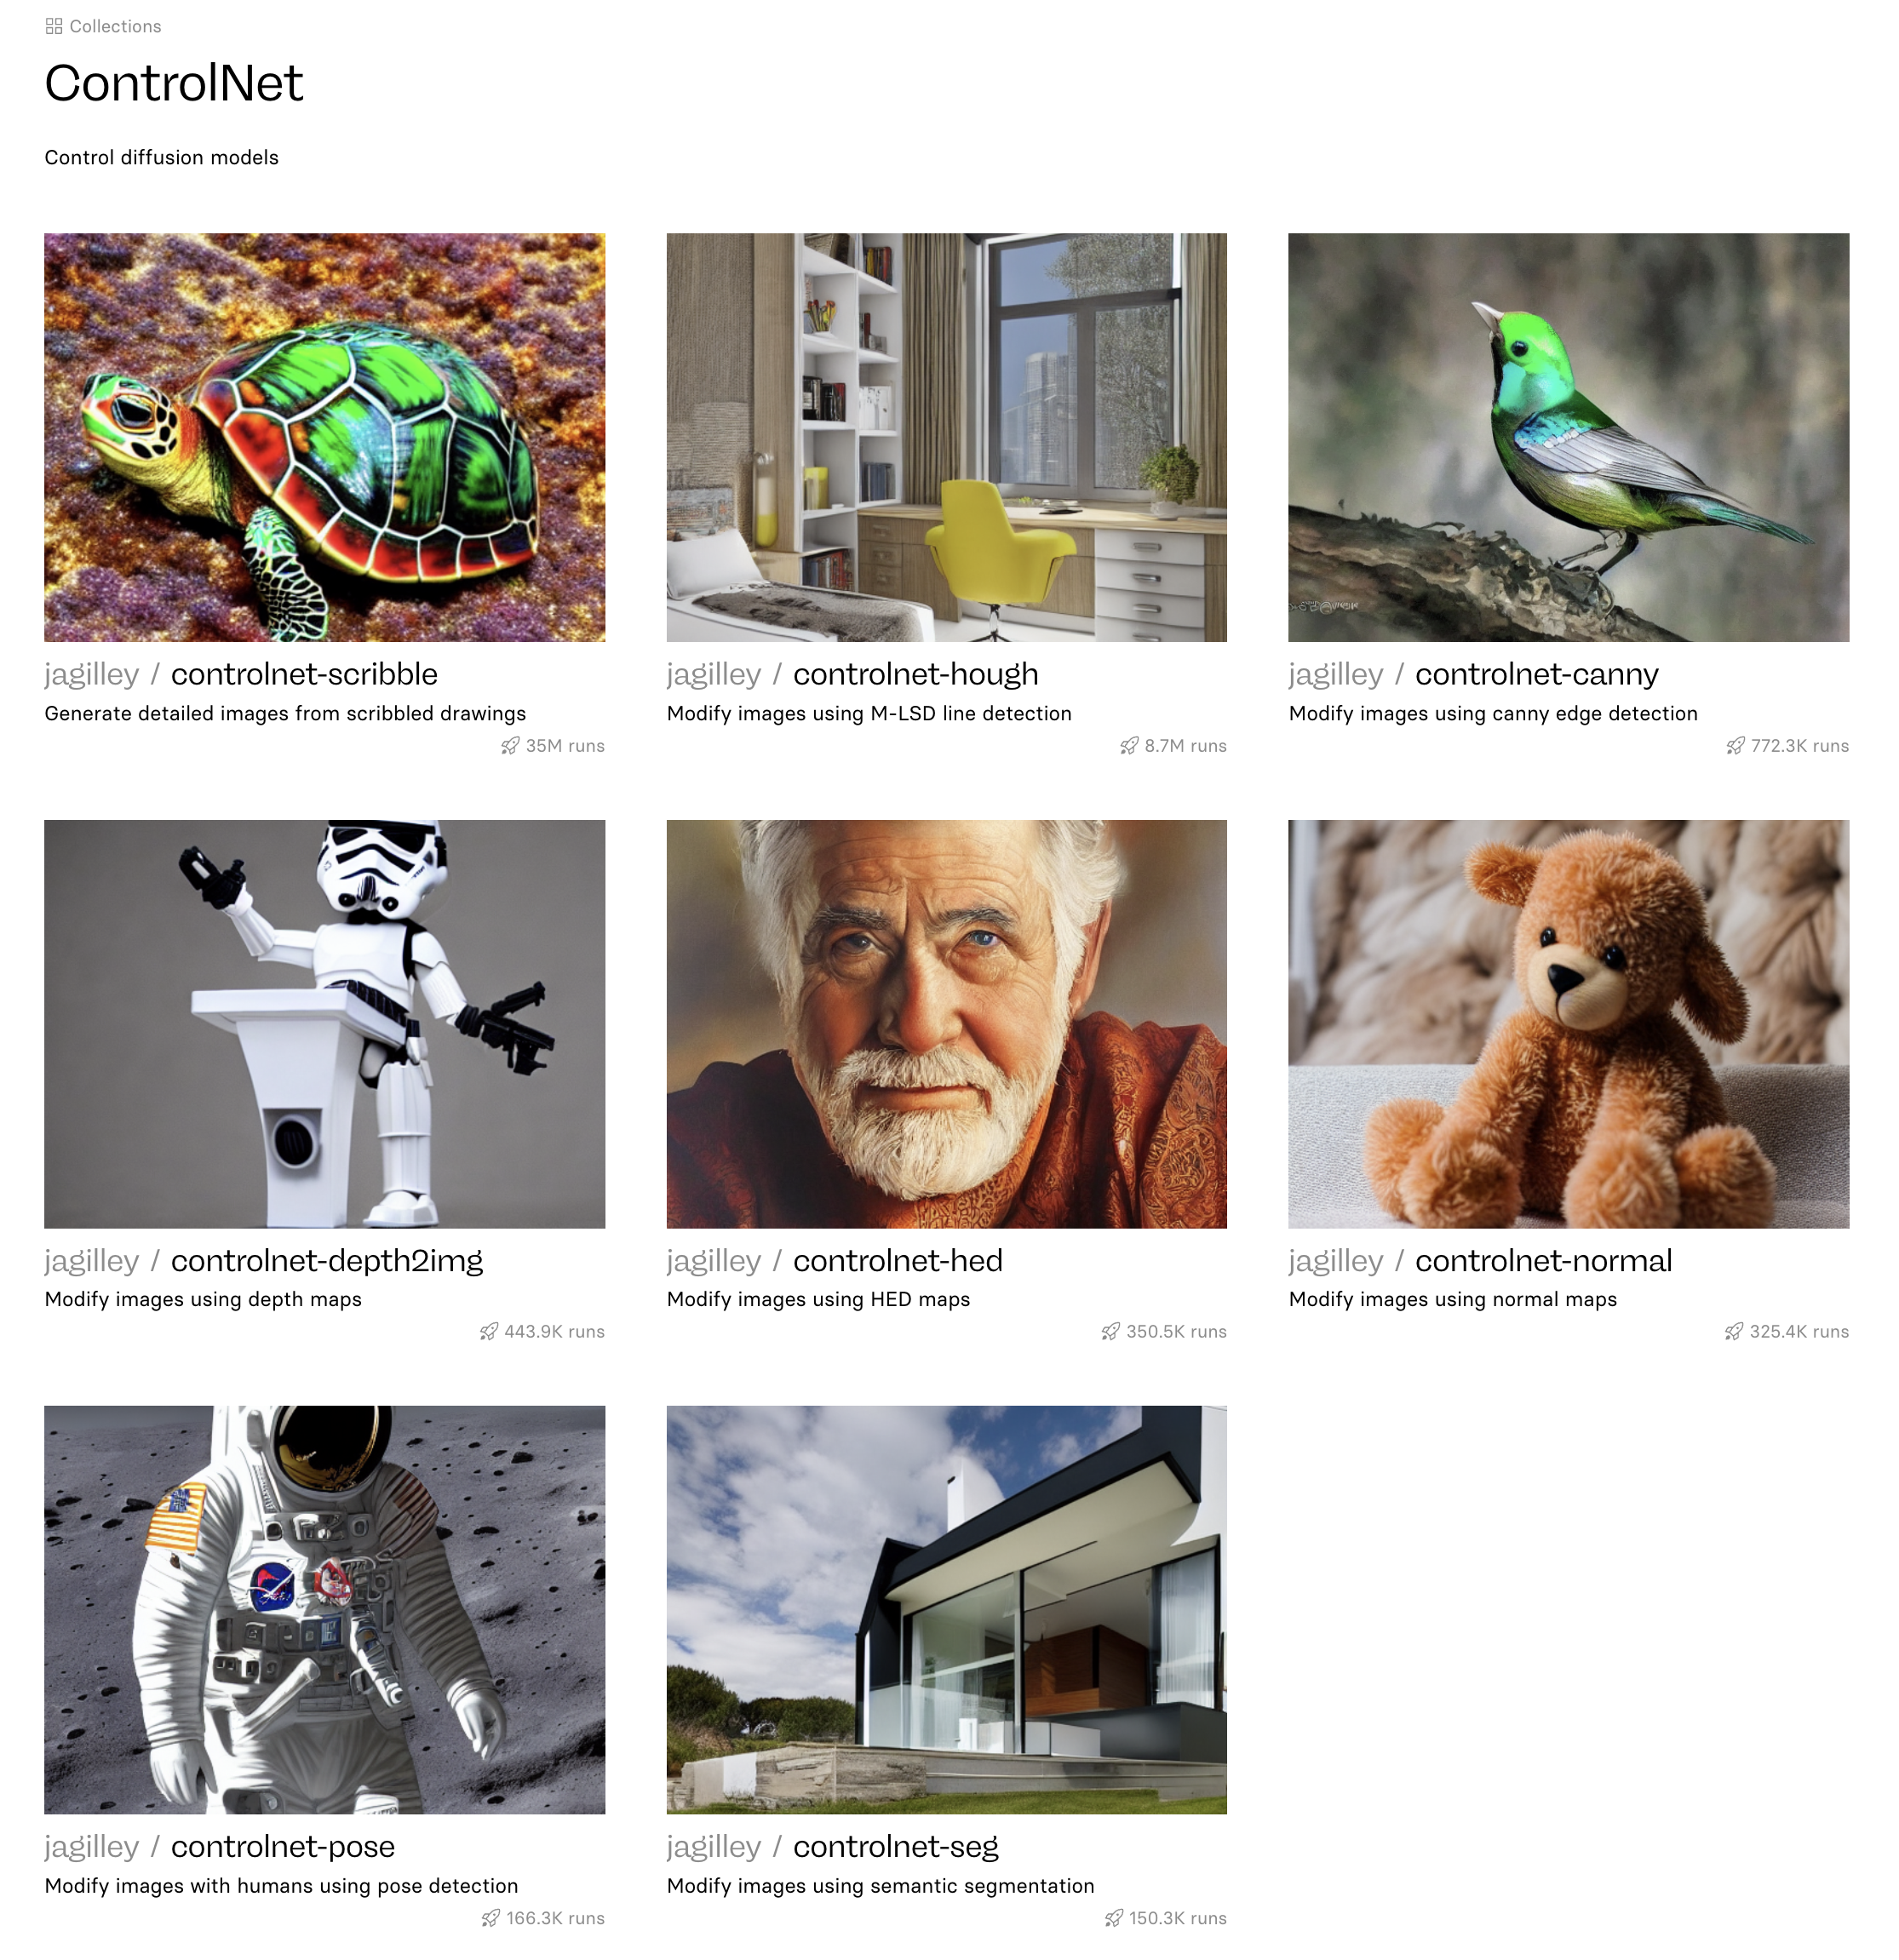
You can get started by choosing a ControlNet model and playing around with it in our GUI. If you're a developer and want to integrate ControlNet into your app, click the API tab and you'll be able to copy and paste the API request into your codebase. Happy hacking!